Transport Fever 3 Cheats and Trainers: Legit Money Strategies
No working cheat code exists in Transport Fever 3 — but loans, purple subsidy contracts, cargo specialisations and line settings all pay. Twelve legitimate steps.
FAQ
Does Transport Fever 3 have cheat codes?
Are Transport Fever 3 trainers and save editors safe to use?
How do I make money quickly in Transport Fever 3?
Do subsidies actually pay in Transport Fever 3?
How many wagons should a train have in Transport Fever 3?
Why does a profitable-looking line keep losing money?
Does map size affect your costs in Transport Fever 3?
There is no cheat code — there are economy levers
Transport Fever 3 ships no cheat console, no money code and no built-in “unlock everything” switch. The row of purple icons at the top of the screen is not a cheat either: those are subsidy contracts the game offers your company, and the video behind this guide shows one paying nine million to move workers to a farm and another doubling a line’s income. Everything else that moves the balance sheet — loans, station upkeep, cargo specialisations, departure rules — is ordinary simulation, and that is exactly why it is worth learning.
Cheaper than a cheat: loans and subsidies
The two fastest legitimate money taps in Transport Fever 3 are both on screen from day one. Loans exist because the official advice is blunt that the first months are expensive: infrastructure is paid for immediately while a new line’s revenue only ramps up as the chain beds in. Take the loan with the lowest interest rate that you can service, and check the yearly instalment rather than the headline amount — a cheaper rate on an instalment your cash flow cannot carry is the fastest way back into debt. Subsidies are the other half of the story: they appear as purple icons at the top of the screen and range from level progress to a doubled income for a single line. Worker-transport subsidies are the ones to watch, because moving passengers to a workplace pays far more than the fares suggest.
This page stays inside the simulation. If you are still deciding where to put the first tracks, read the starting position guide and the map sizes guide before you borrow anything, then copy the twelve steps below in the order they appear.
Start cheap: map, loan, stations, terrain
-
Choose a map size and density your company can afford
Map size, town density and industry density are decided before the save exists. Fewer, closer towns keep the first chains short and hold the fixed overhead down; huge, crowded maps also drag performance once the towns grow.
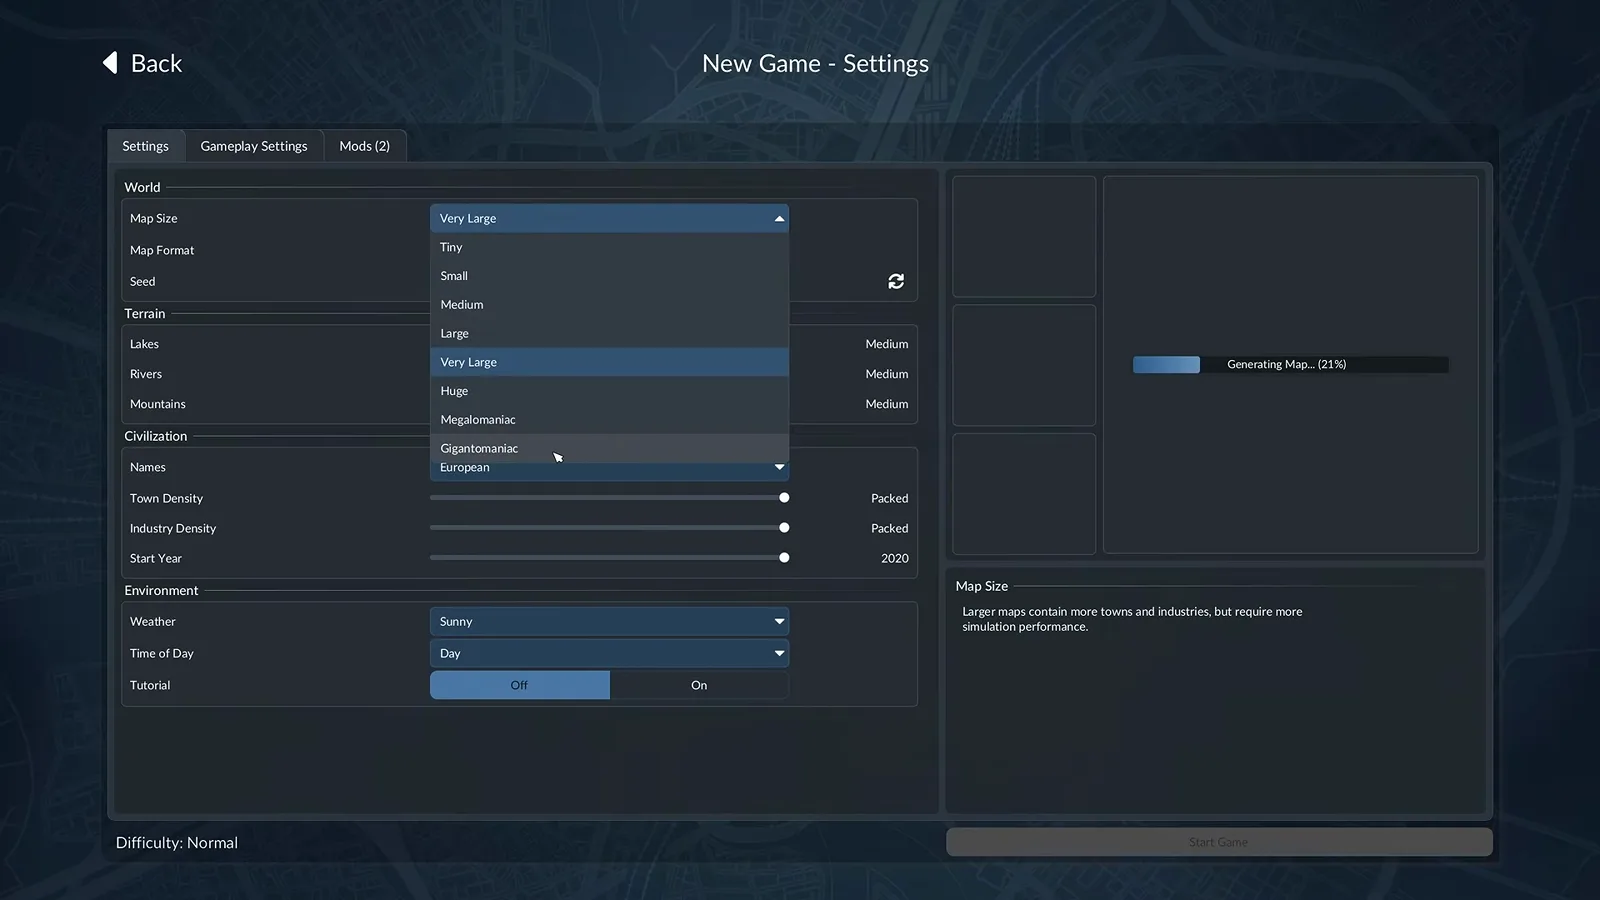
Everything that decides how far apart your first customers are lives on this one screen. Watch this step at 1:15 -
Take the cheapest loan you can actually service
Loans bridge the first months. The offers differ in interest rate and in the yearly instalment, so pick the lowest rate you can still pay every year rather than the biggest number on the card.
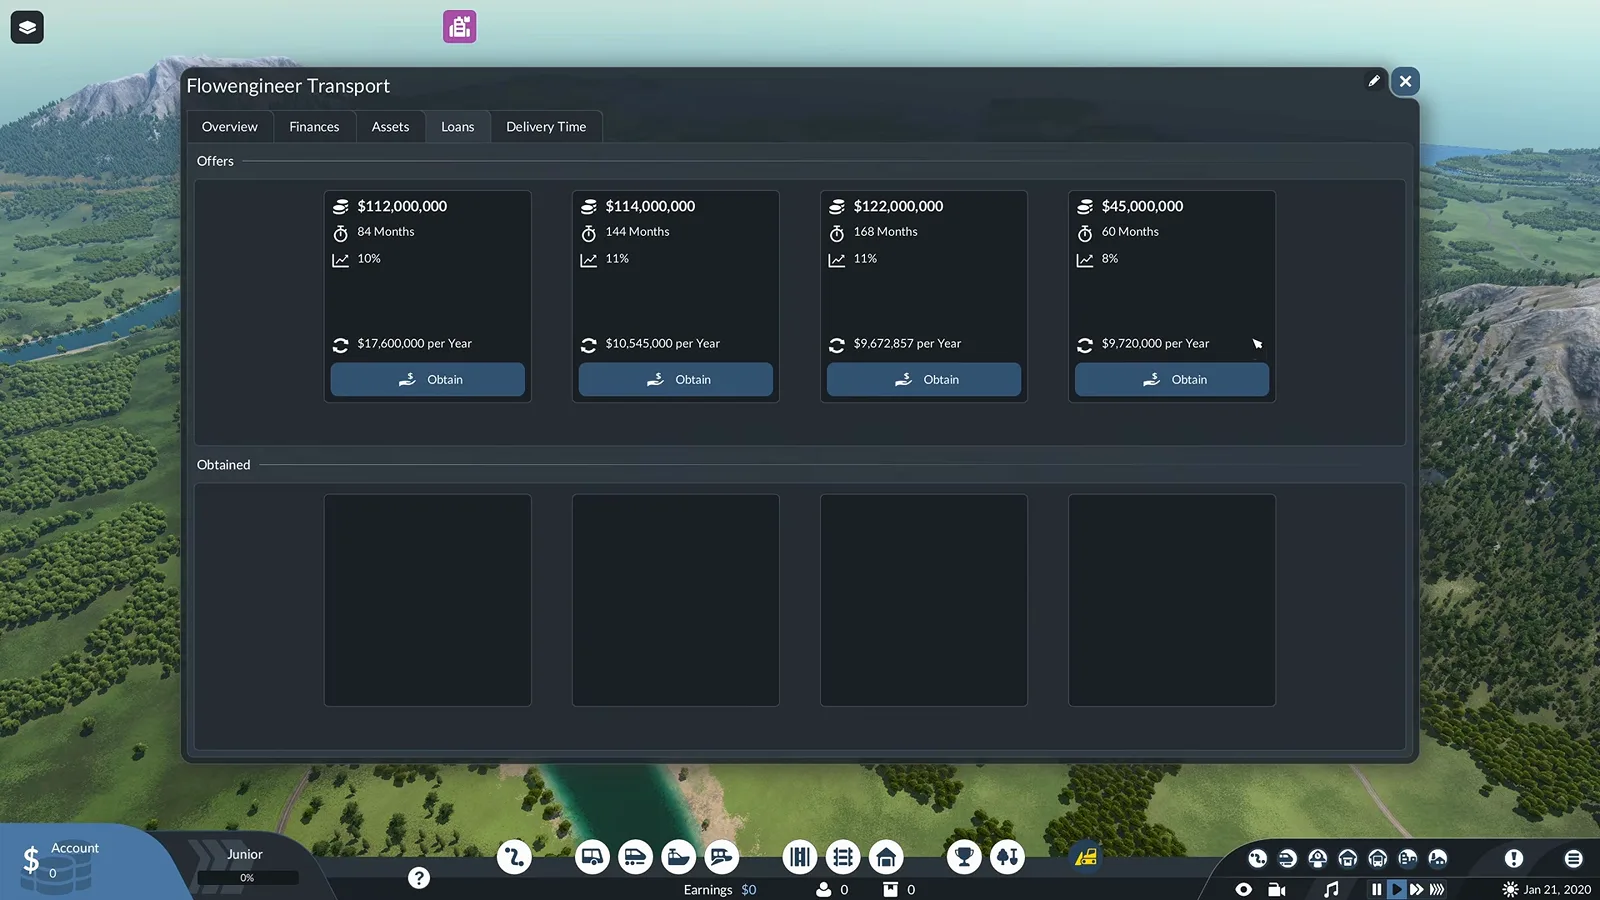
Four offers, four annual instalments — the cheapest rate is not automatically the cheapest loan. Watch this step at 1:40 -
Keep stations at the size the line actually needs
The station tooltip shows the build cost and the monthly upkeep before you place anything. Making a station a little bigger to future-proof it raises the upkeep immediately, while the extra capacity earns nothing until the line is busy.
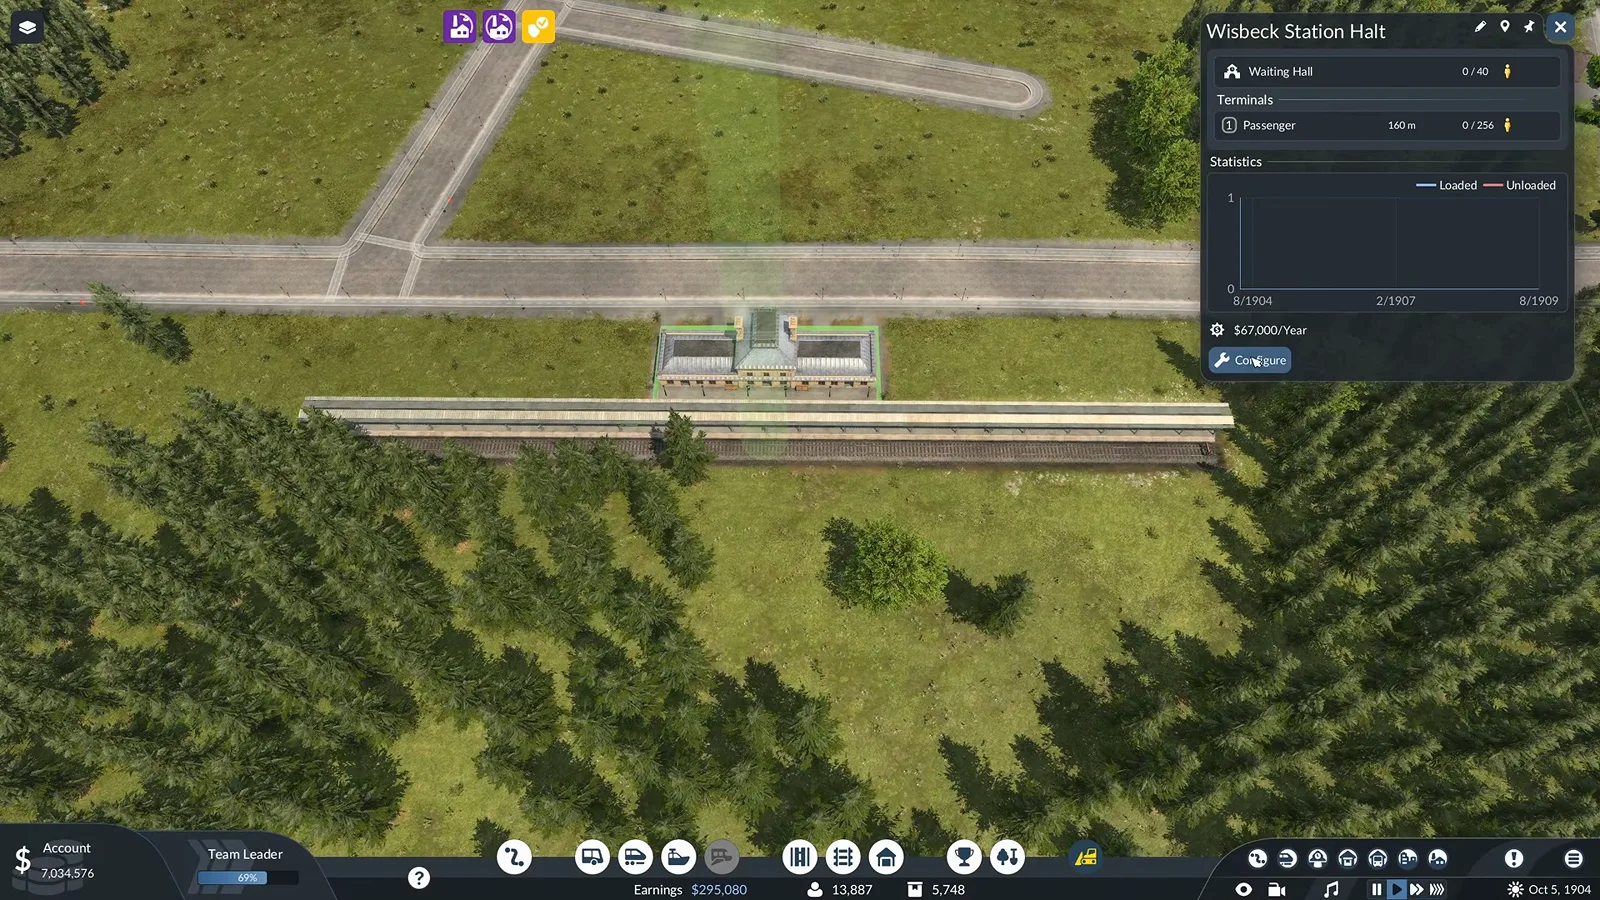
The tooltip already tells you what the station costs every month, not only once. Watch this step at 17:38 -
Follow the terrain instead of cutting through it
In hilly ground, following the contour and letting the line curve is dramatically cheaper than forcing a straight cut or a tunnel. The video compared roughly 150,000 for the contoured route against half a million for the tunnel.
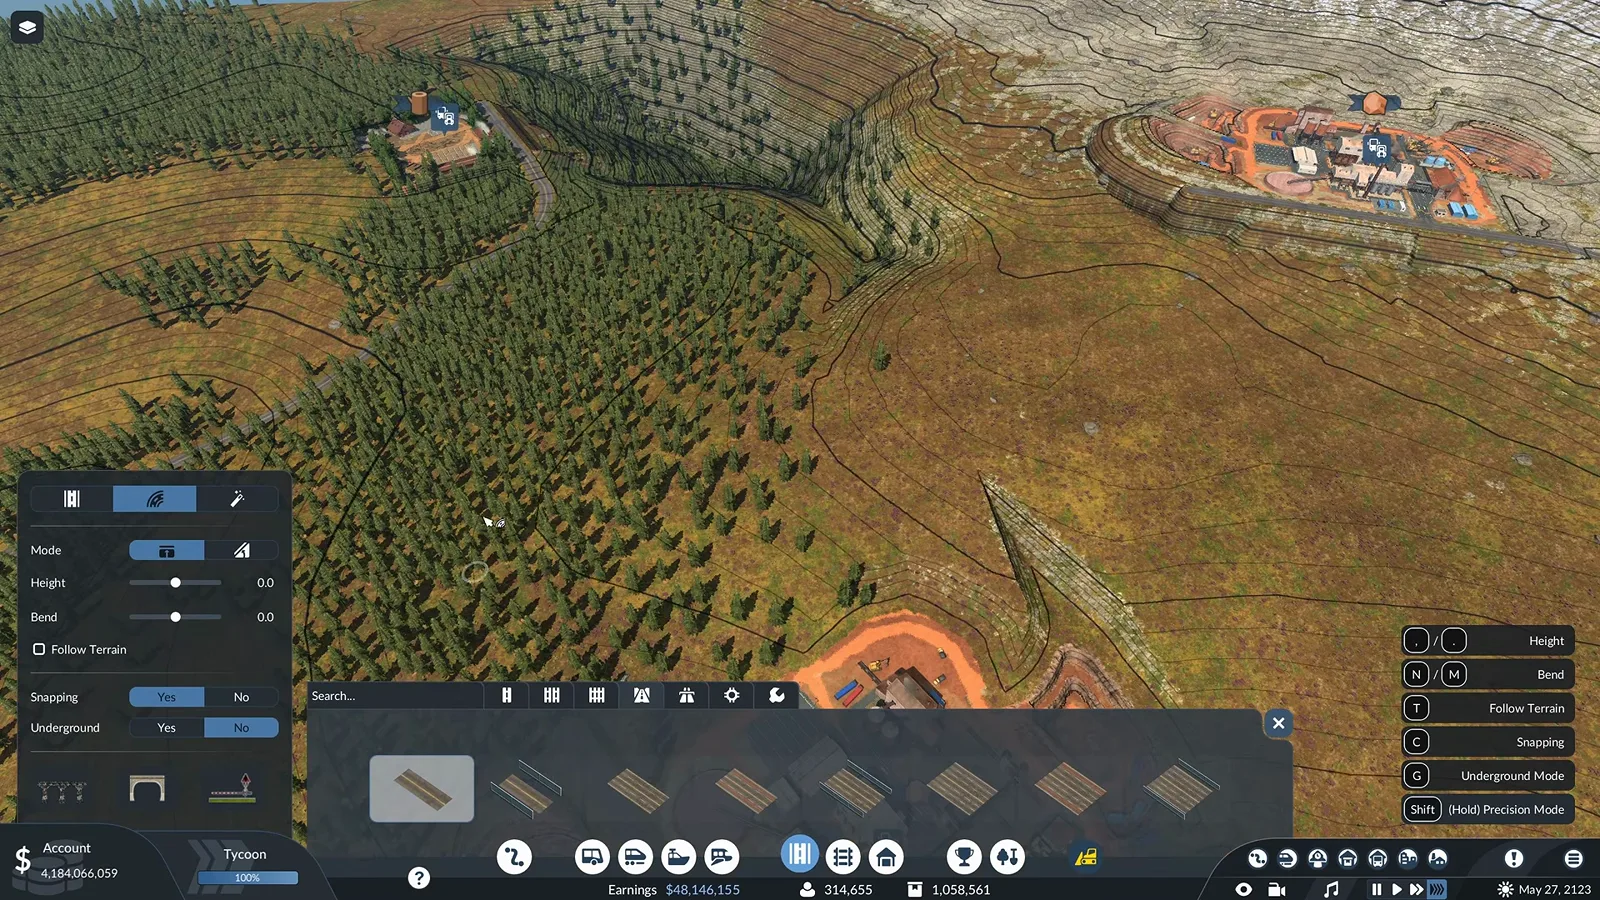
Contours cost a few minutes of travel time; tunnels and cuttings cost hundreds of thousands. Watch this step at 9:41
Terrain is the largest single cost a beginner never plans for. Cutting and filling is paid for once, but it also costs town reputation, and the video’s comparison is not marginal: following the ground came out at roughly 150,000 where forcing a straight tunnel came out at about half a million. The same logic applies to stations, where the build tooltip lists the monthly upkeep next to the one-off price. Buying a four-track terminus “for later” buys the upkeep today and the capacity later.
Run the fleet you already own
-
Compare a replacement vehicle before you buy it
The compare view puts the vehicle you own next to the one you are considering, capacity and running figures included. Check that the line can fill the new capacity before you pay for it.
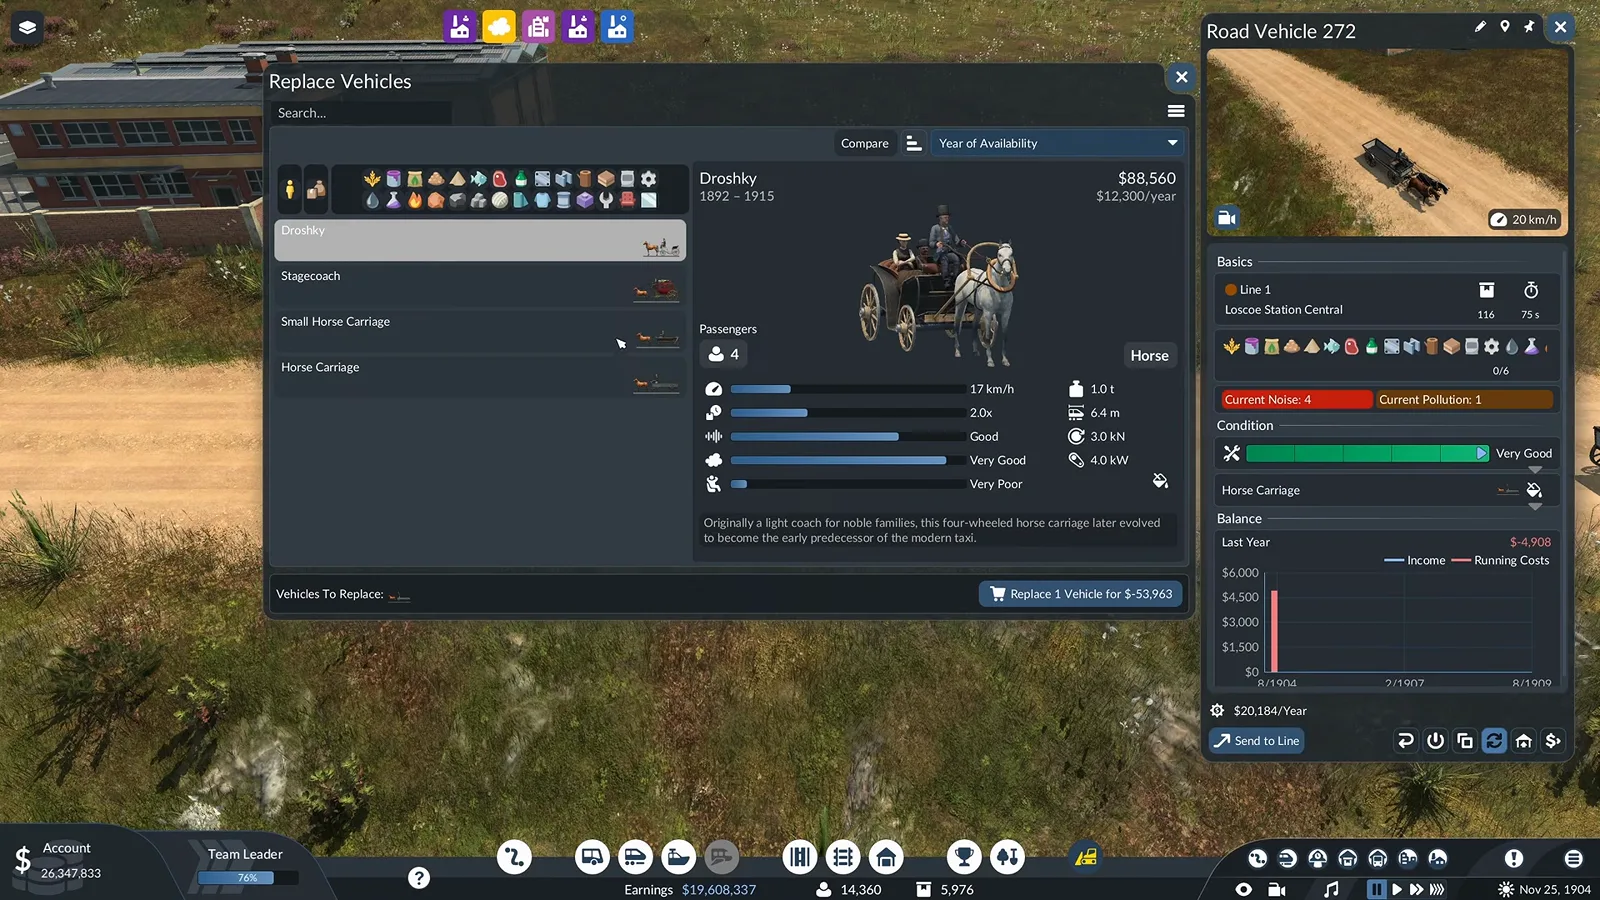
Compare before you spend: the panel sets the vehicle you own against the one on offer. Watch this step at 3:34 -
Read the Delivery Time tab before promising perishables
The account view charts the expected delivery time of every cargo as bars. Sort them once and you know which goods cannot survive a multi-leg chain without a warehouse to pause the clock.
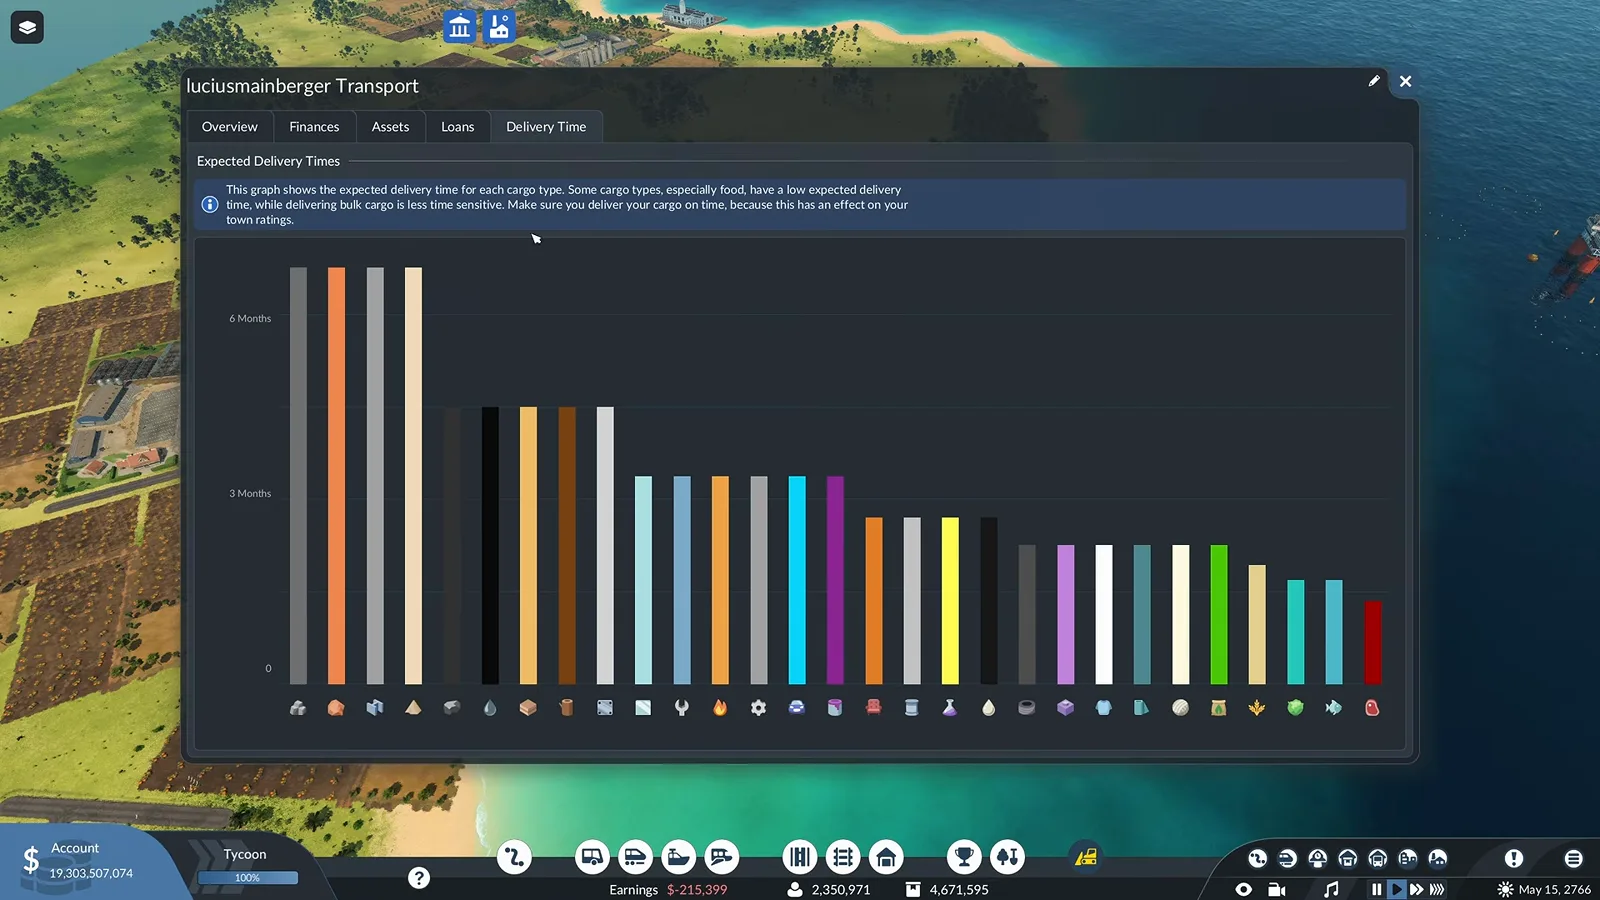
The tall bars are the cargo that will not forgive a long route. Watch this step at 3:52 -
Watch the Cargo Satisfaction overlay for bottlenecks
The overlay maps delivery-time pressure across your network. Open it when town deliveries start falling instead of guessing which line is slow.
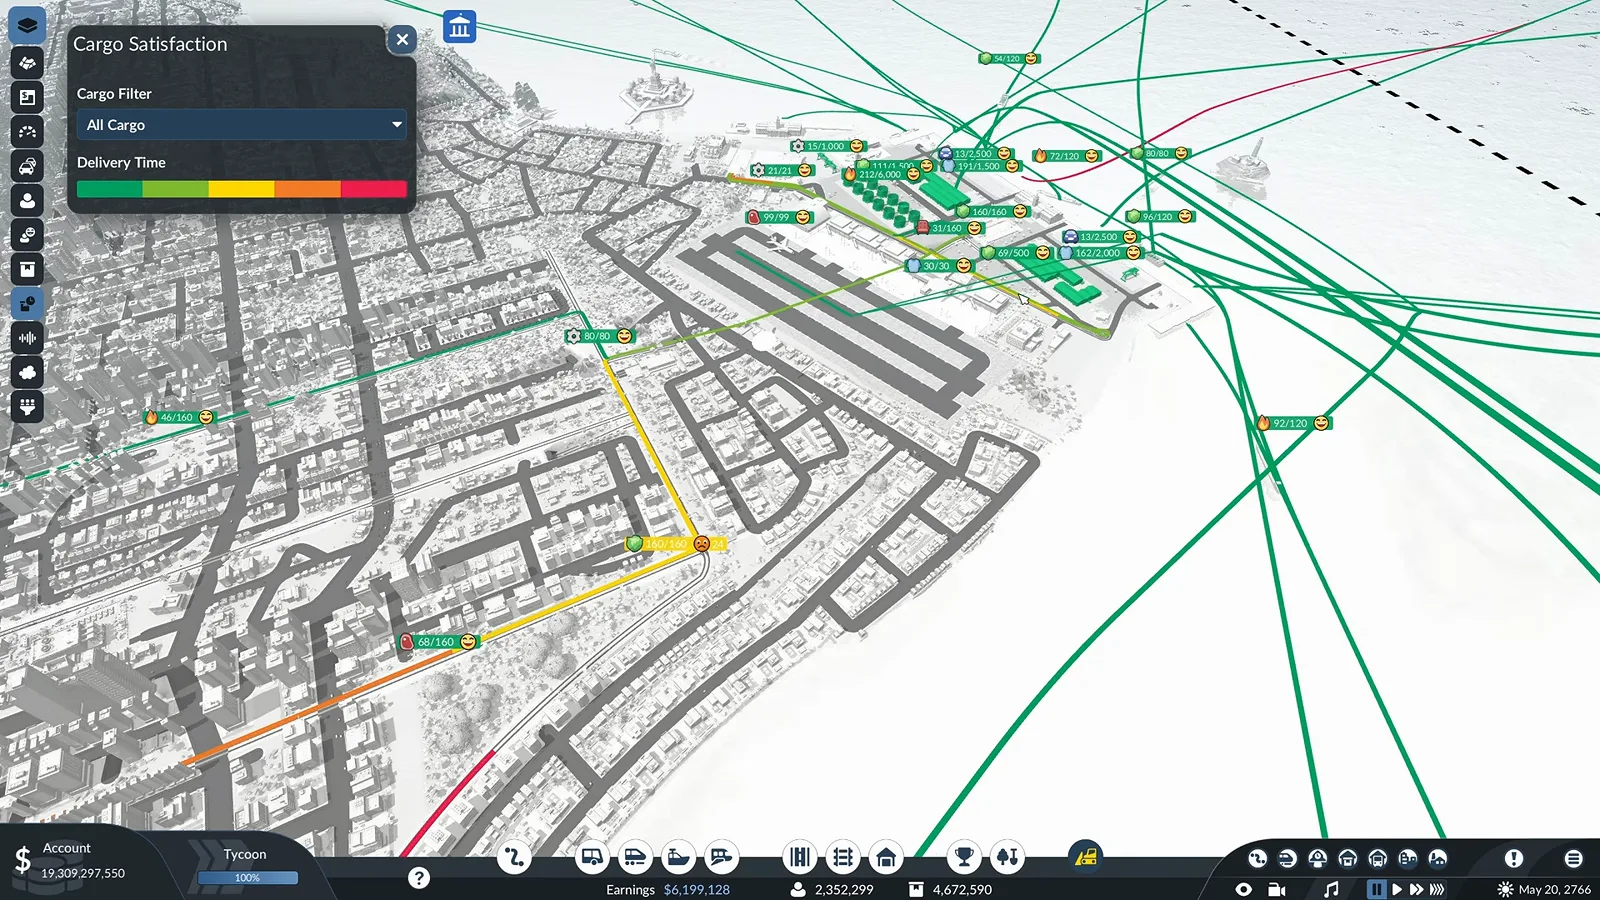
The overlay turns delivery-time pressure into something you can see at a glance. Watch this step at 4:35 -
Give loading and unloading their own stops and terminals
Set the terminal each stop uses, and keep a delivery stop separate from a collection stop. If a truck waiting to load has to queue behind one that cannot unload, the station gridlocks itself.
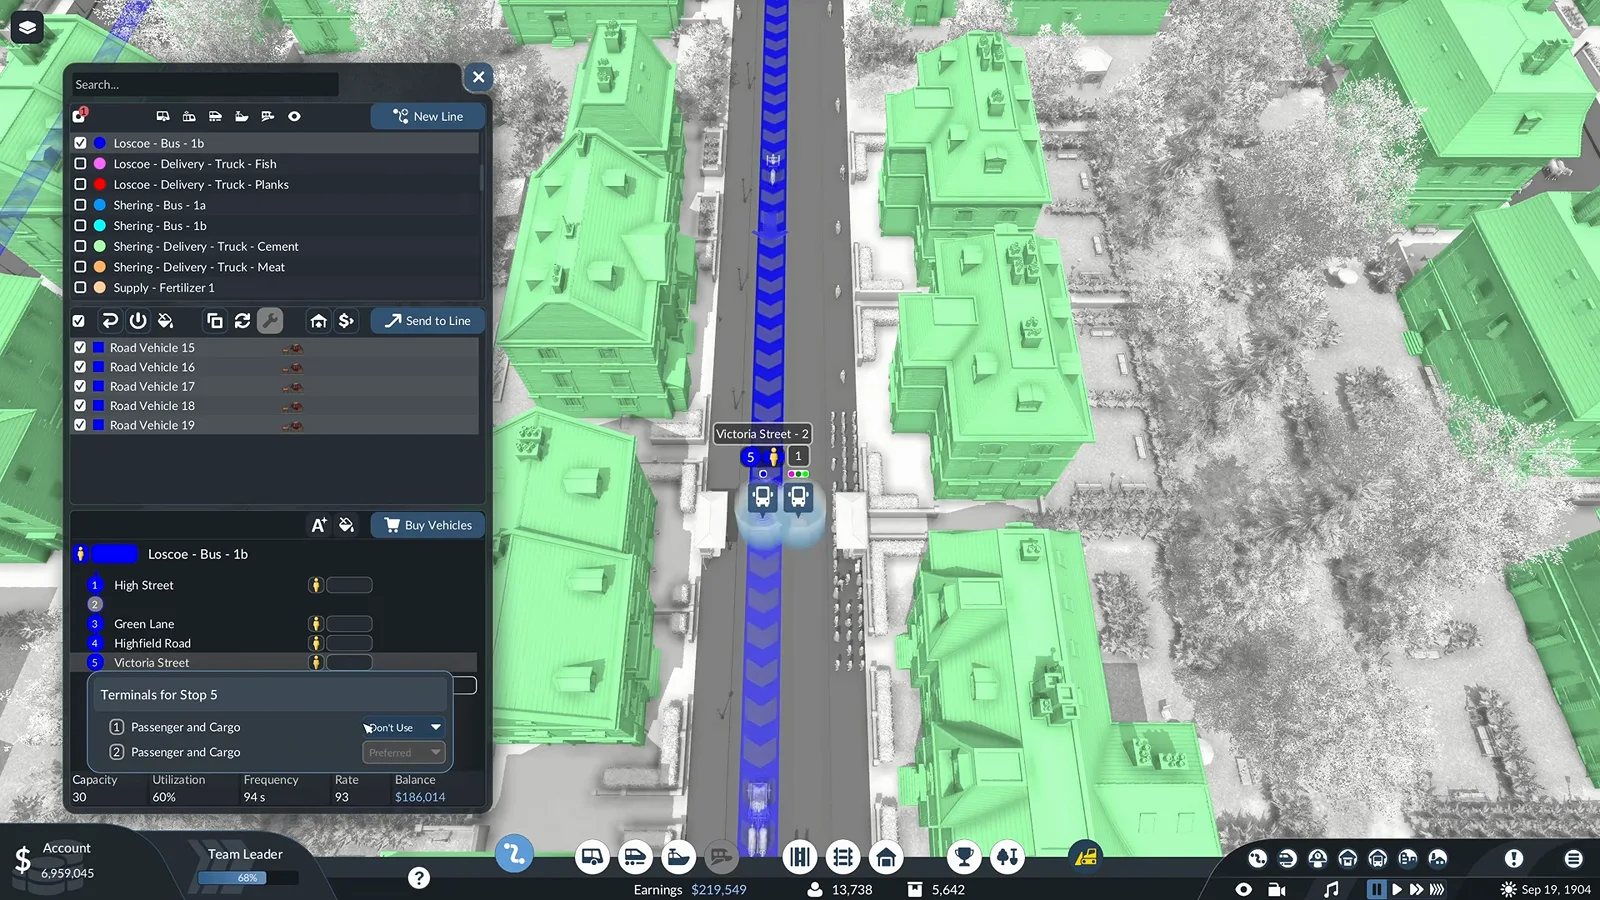
A stop with its own terminal stops loading and unloading fighting for the same platform. Watch this step at 11:40
Most “unprofitable” lines in Transport Fever 3 are really underloaded or late. Before ordering extra vehicles, confirm that the vehicles you have are carrying something worth carrying: the account Delivery Time tab tells you which cargo expires on the way, the Cargo Satisfaction overlay shows where delivery pressure is building, and per-stop terminals keep a loading truck from blocking one that needs to unload. If the cargo has a short window and a long route, a warehouse that pauses the timer is the fix — the cargo and warehouse guide walks through that pattern, and the fishing guide shows the same chain in practice.
Tune the line, not the bank balance
-
Tick only the cargo the line is meant to carry
Each stop has a cargo grid that decides what may be loaded there. Tick only what the chain needs instead of letting the vehicle fill up with whatever happens to be lying around, and keep the fill level deliberate.
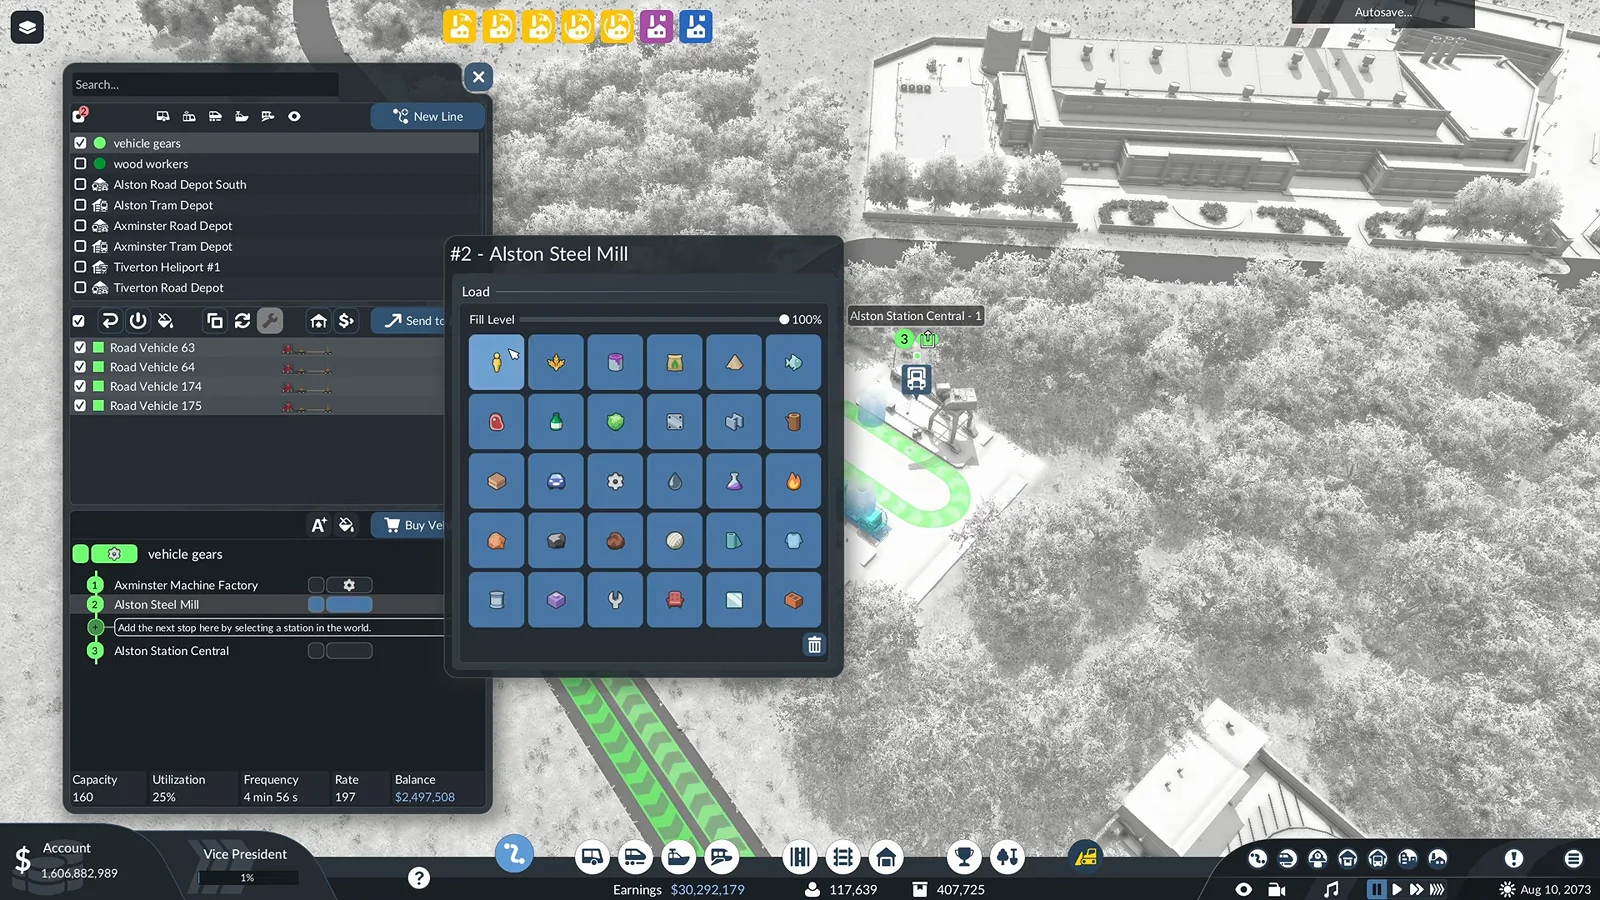
The grid is the whole filter: ticked cargo loads here, everything else stays where it is. Watch this step at 14:22 -
Set the departure behaviour per stop
A stop window carries the load level, an option to force unload on arrival, and a departure configuration with minimum and maximum stop times. The video is explicit that the vehicle leaves with exactly what you set here, so decide it stop by stop.
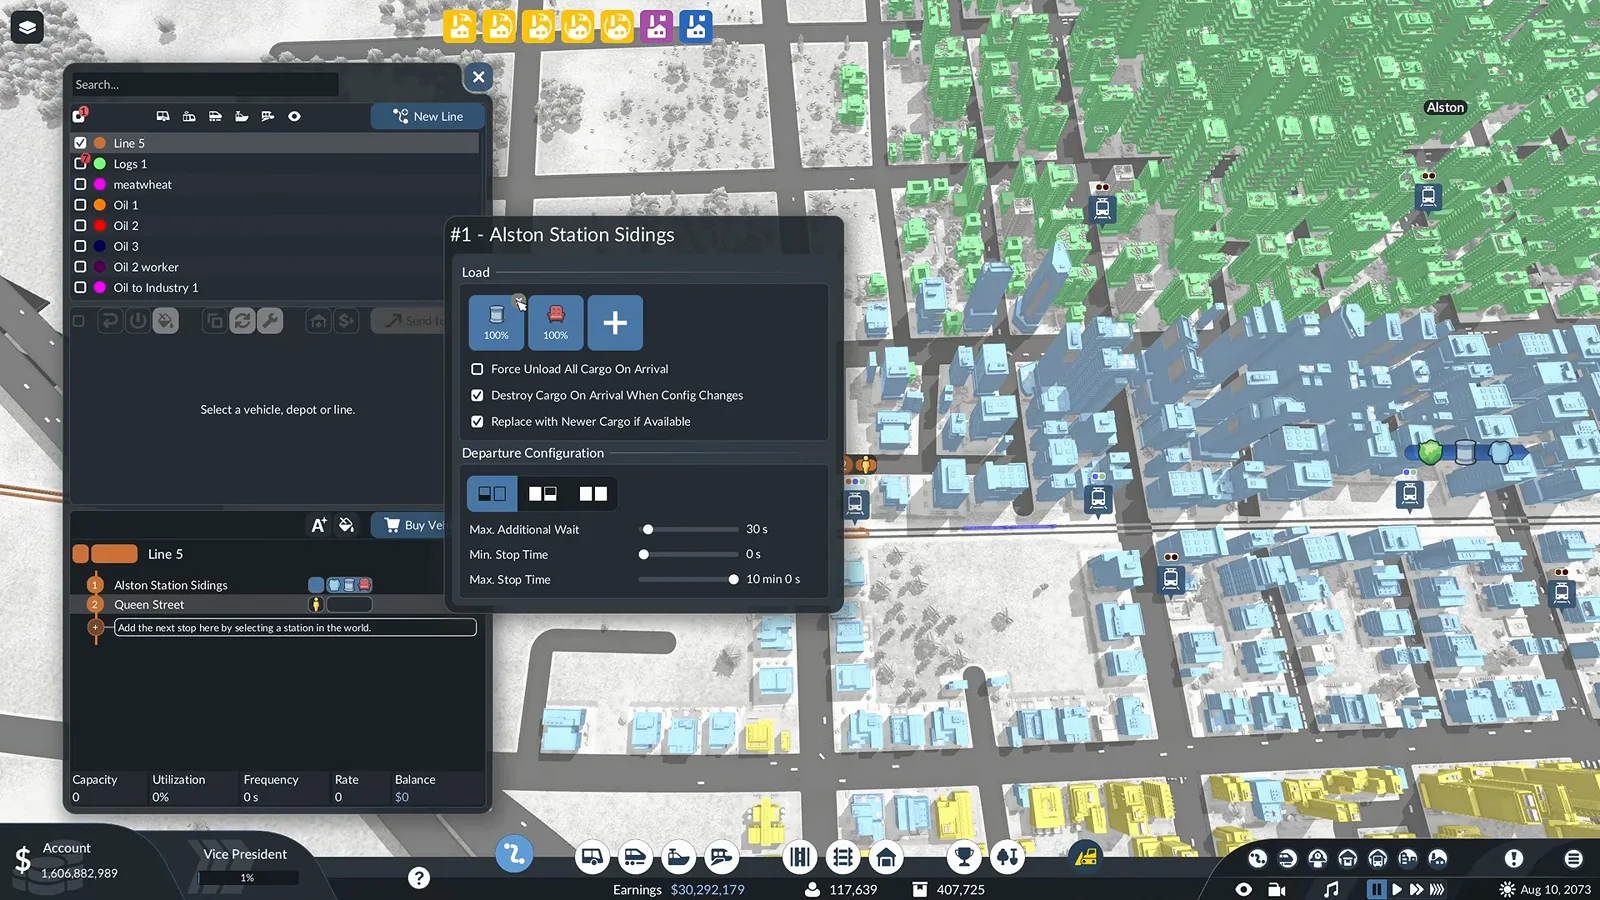
Load level, forced unloading and stop-time limits all live in one stop window. Watch this step at 13:05 -
Read capacity and utilization before adding vehicles
The line window reports capacity, utilization, frequency and the running balance side by side. Utilization is the honest number: it shows how much of the capacity the line actually uses, so you can see whether the vehicles you own are earning before you buy more.
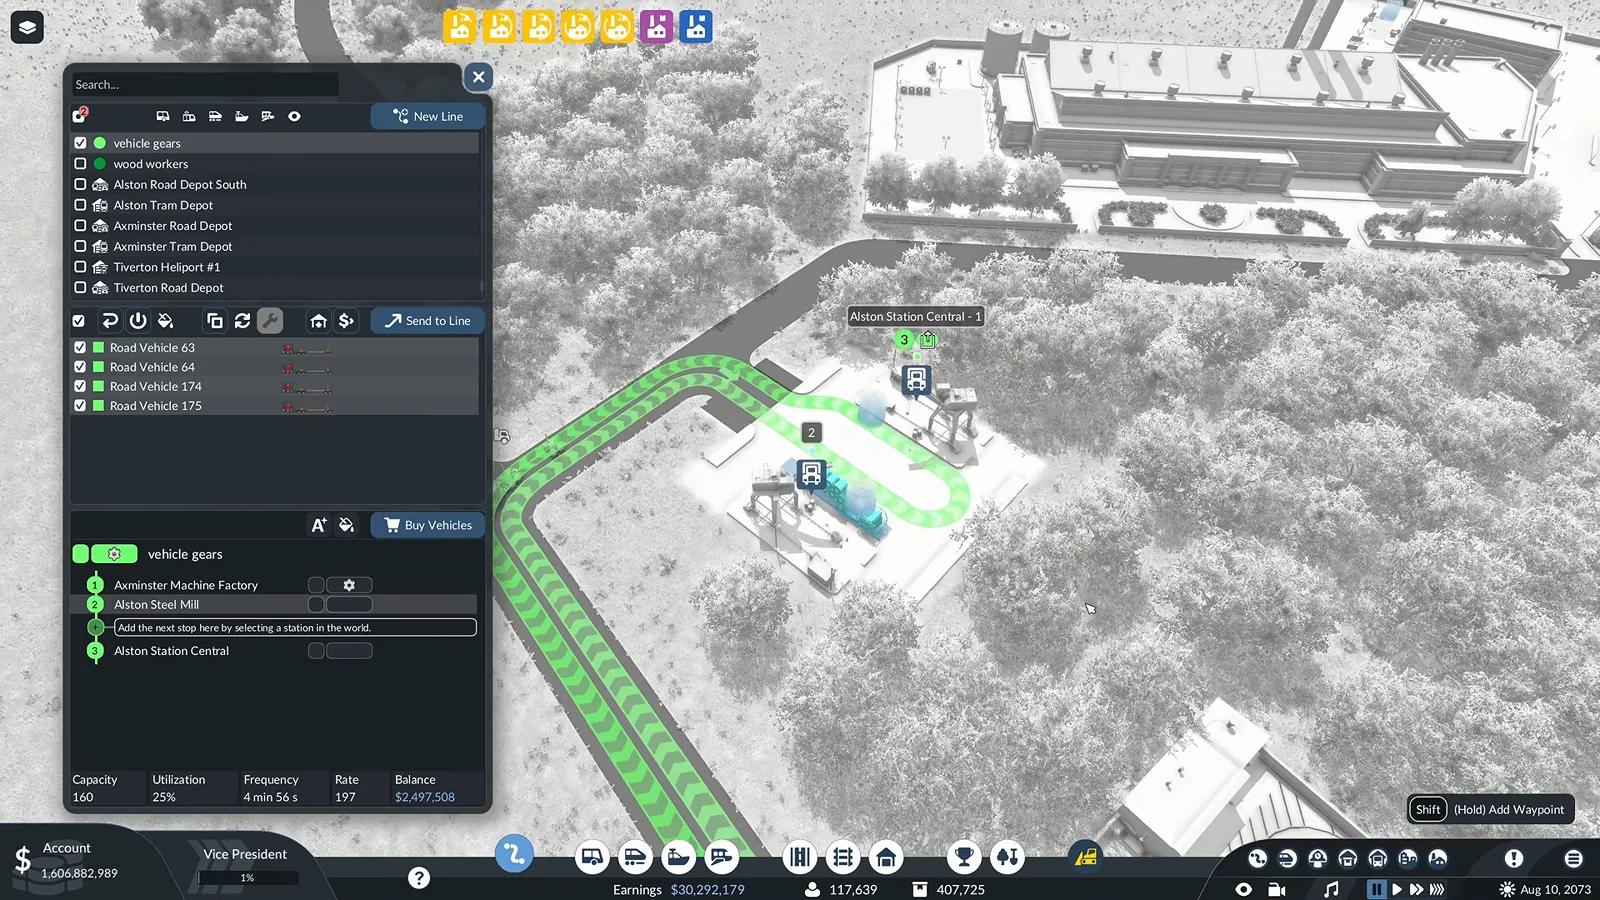
Utilization next to capacity tells you whether the line is being worked or just paid for. Watch this step at 14:05 -
Check the output stock before adding vehicles
An industry window shows production, boost and where the output goes. If the stock is not moving, the bottleneck is the chain around it, not the number of vehicles on the line.
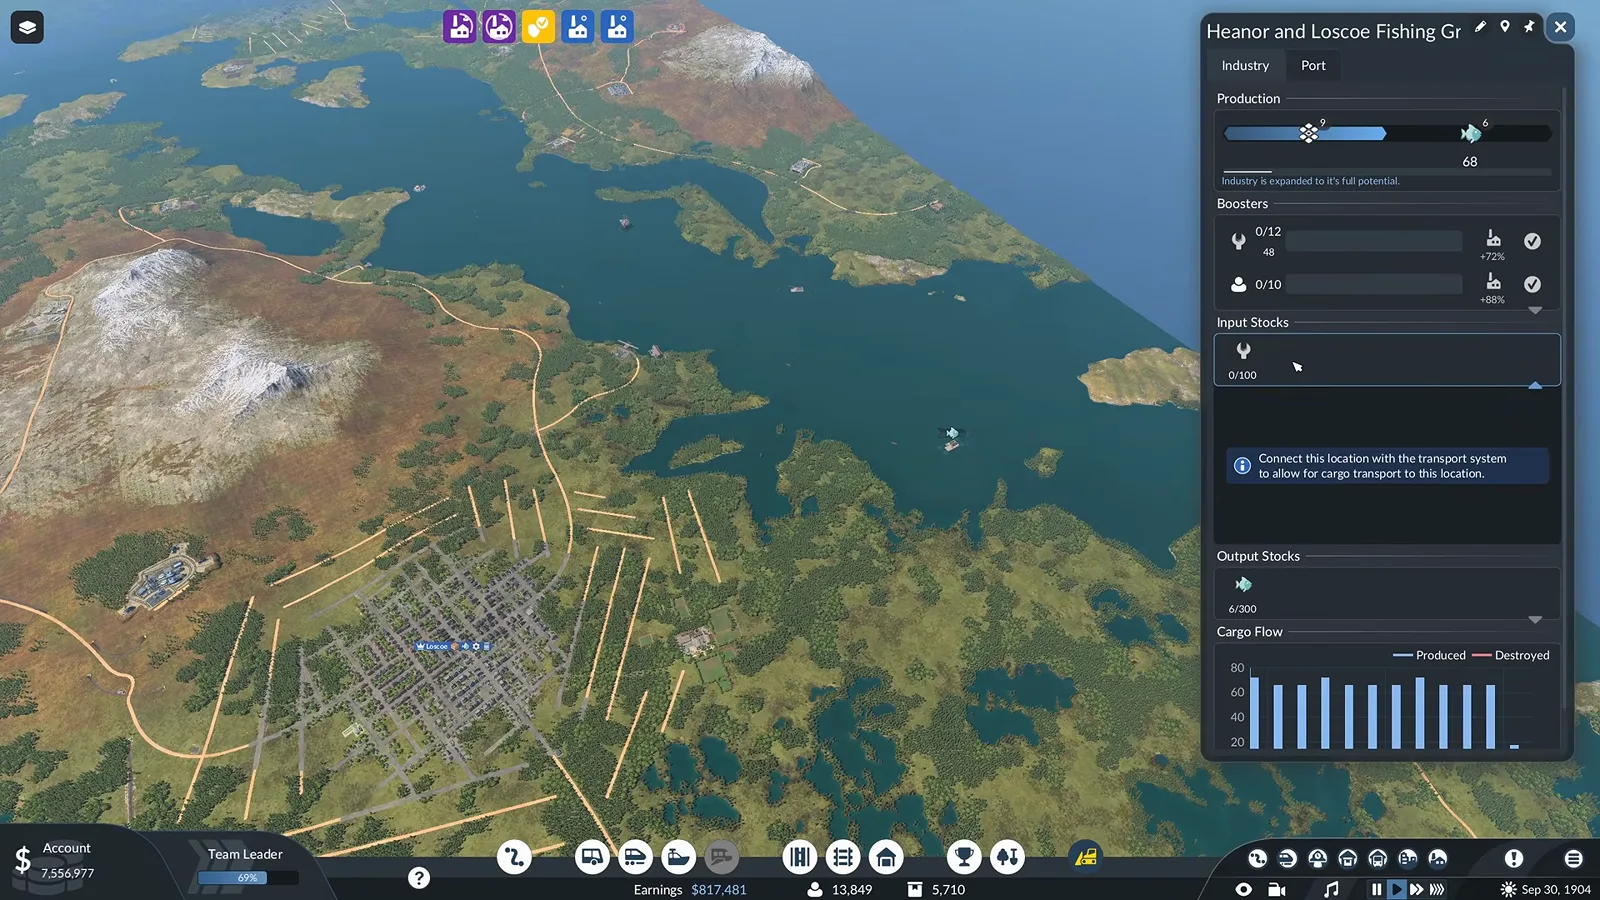
Output stock tells you whether a chain is moving its goods or only producing them. Watch this step at 15:50
Line settings are free to change and they compound. The cargo grid on each stop decides what a vehicle may pick up, the departure rule decides when it leaves, and the utilization readout tells you whether any of it is working. The video’s partial-load trick belongs here too: the load percentage is what the vehicle leaves the station with, so loading half at a collection stop leaves the other half of the capacity free for the rest of the run. The same discipline sits behind the delivery-time and empty-running advice in the Transport Fever 3 tips, and if you are still sizing consists, run the numbers in the calculator instead of guessing.
Source
The walkthrough above is built from Flowengineer’s video 50+ Transport Fever 3 Tips I Wish I Knew Sooner! (21:31), which covers the loans, subsidies, station costs, terrain comparison, delivery-time panels and line settings used here. Each step links to the exact second it is demonstrated. Screenshots are the creator’s footage and are used only to illustrate the written steps.
Related reading
- Transport Fever 3 tips for a profitable first line — the wider beginner checklist this page builds on.
- Cargo and warehouse guide — how to stop short-lived cargo from expiring in transit.
- Starting position guide — pick the map before you pick the loan.
- Performance settings guide — the other side of the map-size trade-off.
- Mods guide — the supported way to change how the game plays.
Related Articles
guides
Transport Fever 3 Campaign Guide: All 8 Missions and Star Goals
Every Transport Fever 3 campaign mission in order, with each star goal and medal task, plus how stars, medals, saves and campaign achievements work.
guides
Fish Not Unloading in Transport Fever 3: 10 Causes and Fixes
Cargo reached the warehouse but never unloaded? Ten verified causes — navigable water, catchment radius, cargo class, force unload and the delivery timer.
guides
Transport Fever 3 Mission 3 Walkthrough: Desert Adventure
Complete Transport Fever 3 Mission 3 in Wadi Rum: the objective order, the maintenance-camp routing that saves every truck, and how to earn all three stars.
Was this helpful?
Thanks for the feedback!