Fish Not Unloading in Transport Fever 3: 10 Causes and Fixes
Cargo reached the warehouse but never unloaded? Ten verified causes — navigable water, catchment radius, cargo class, force unload and the delivery timer.
FAQ
Why is my cargo not unloading at the warehouse?
Why is my fishing ship not unloading at the port?
Why does my truck keep the cargo after it reaches the stop?
Why can my vehicle not carry this cargo at all?
Why is my ship waiting offshore instead of docking?
Why does the fish vanish before it reaches town?
Should I build a universal or a specialized warehouse for fish?
Ships dock, trucks pull up, and the fish stays exactly where it is. Nothing unloads, the town keeps asking for a delivery that never arrives, and the line earns nothing for the trip. Every one of those reports traces back to a short list of settings, and this page walks them in the order worth checking, starting at the water and ending at the moment the cargo changes hands.
Payment only lands when freight reaches a town building or a consuming factory, so anything stalled earlier in the chain is money already spent and never earned. The cargo and warehouse guide covers the economy side; this page is the fault-finding side.
Match your symptom to the likely cause
Work down the table until a row matches what you are seeing, then jump to that step of the walkthrough below. The checks run from the cheapest fix to the most expensive, so it pays to start at the top.
| What you are seeing | What it usually is | Step |
|---|---|---|
| The ship never reaches the quay | The water is not navigable, or no entry point is marked | 1, 3 |
| The ship docks but the port stays empty | No warehouse inside the port service circle | 2 |
| The warehouse fills up but the town stays unhappy | Nothing carries the cargo the last leg into the commercial district | 4 |
| The line loads nothing at all | The wrong cargo icons are set on the stop | 5 |
| Vehicles drive off empty | Their cargo class does not match the freight | 6 |
| A vehicle arrives and leaves still loaded | Force unload is off for that stop | 7 |
| Ships queue offshore while cargo waits afloat | One platform is taking every line | 8, 9 |
| Fish disappears between the port and the town | The delivery window expired | 10 |
Walk the ten checks in order
These are the self-checks that resolve almost every “it will not unload” report. Each step links to the exact second in the source video the still was taken from, so you can watch the mechanic in motion.
-
Confirm the berth water is navigable
Turn on the terrain overlay that paints navigable water in blue and hover your port. If the mooring spot is not blue, ships never reach the quay and the cargo simply waits on the water. Terraforming can open a channel, but it costs money and drains town reputation.
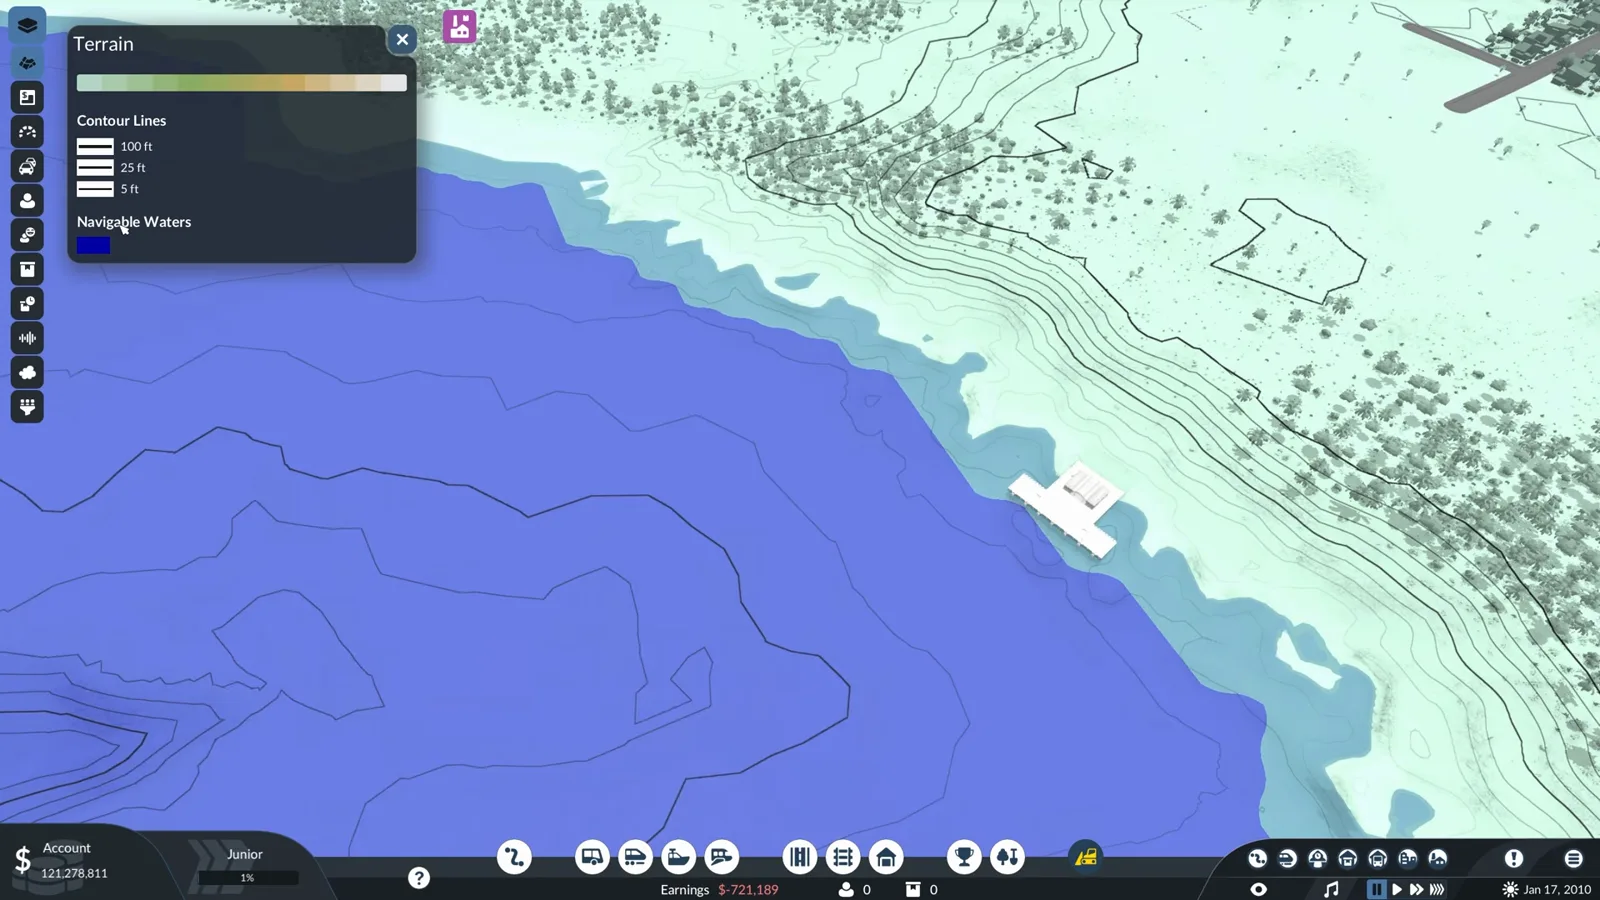
Blue is the only water your ships can use. Watch this step at 3:10 -
Put a warehouse inside the port service circle
Cargo crosses from the port to a warehouse by catchment radius alone, so the warehouse has to sit inside that station service area. No road or rail connection is required. A warehouse outside the circle receives nothing at all.
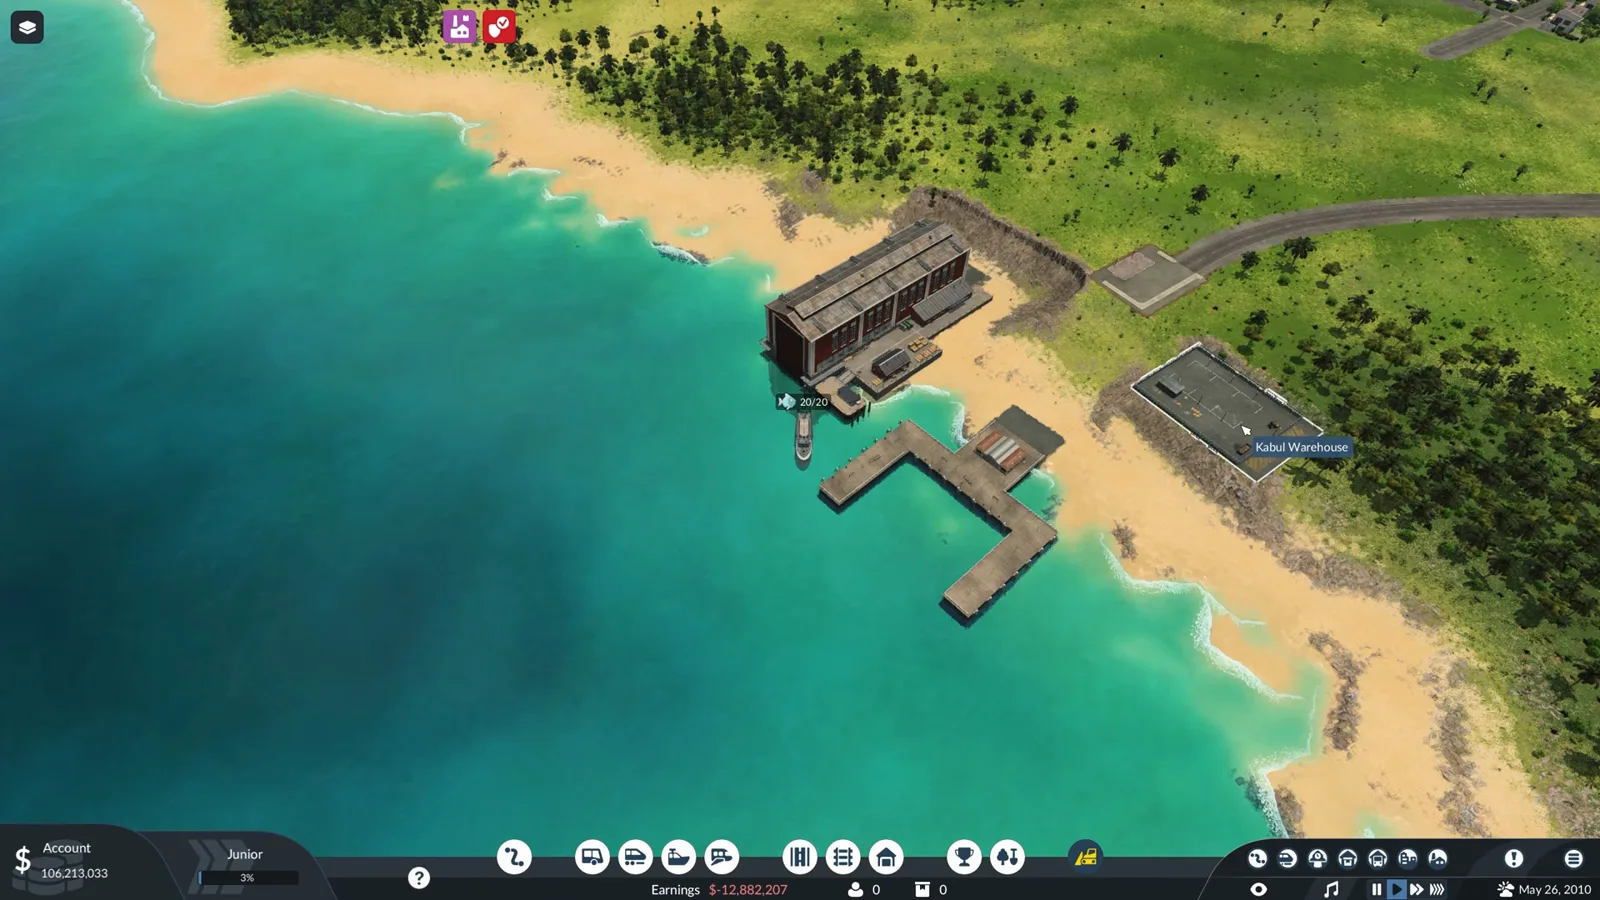
The warehouse sits in the dock own service area, on land, with no road link. Watch this step at 20:50 -
Mark a berth entry point with the anchor icon
A dock is not open just because it exists. Open the port in configuration mode and place the anchor icons on the sides ships should enter from, using the large anchor for large berths. Extend the quay with extra docks when a single one cannot keep up.
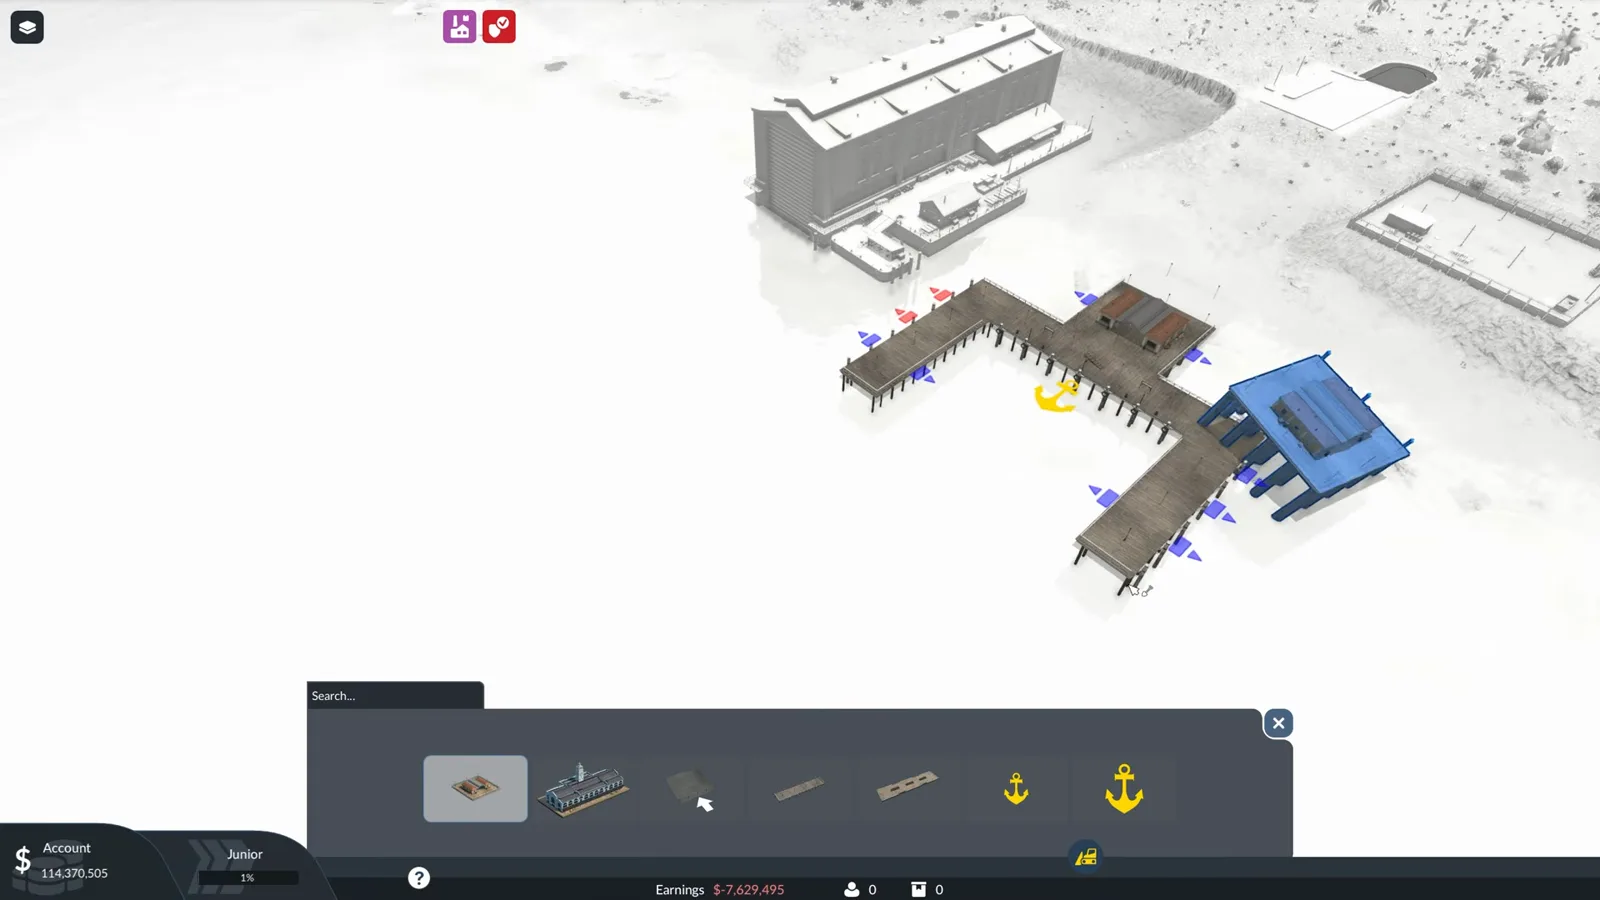
Anchors mark where ships may enter; the coloured arrows show the approach direction. Watch this step at 9:00 -
Deliver into the commercial district, not just to the shore
Fish is bought by town shops and consumed by food factories, so the last stop has to sit on the commercial zone rather than anywhere near the water. A stop placed on the wrong side of town receives cargo but generates no deliveries.
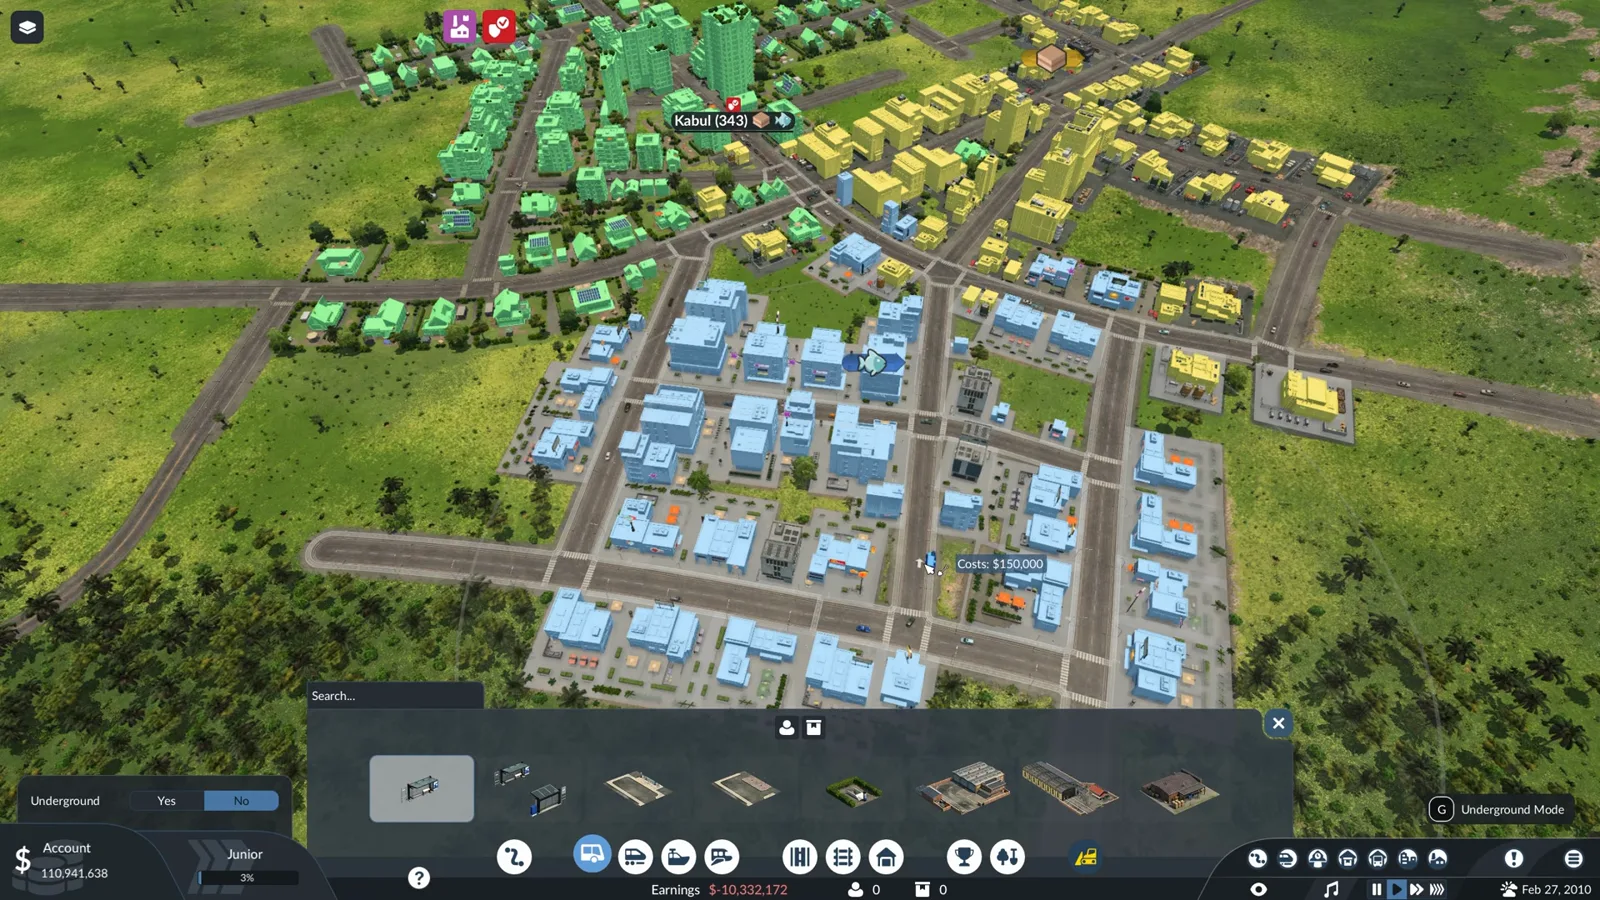
Yellow blocks are the commercial district where your fish is actually bought. Watch this step at 18:00 -
Set the cargo icons on every line stop
Each stop carries its own load list. Open Configure Stop and add the cargo you want handled there, such as passengers for a commuter leg or fish and tools for the fishing run. A cargo that is never added to a stop is never picked up, and a lapsed service shows as a red marker on the line.
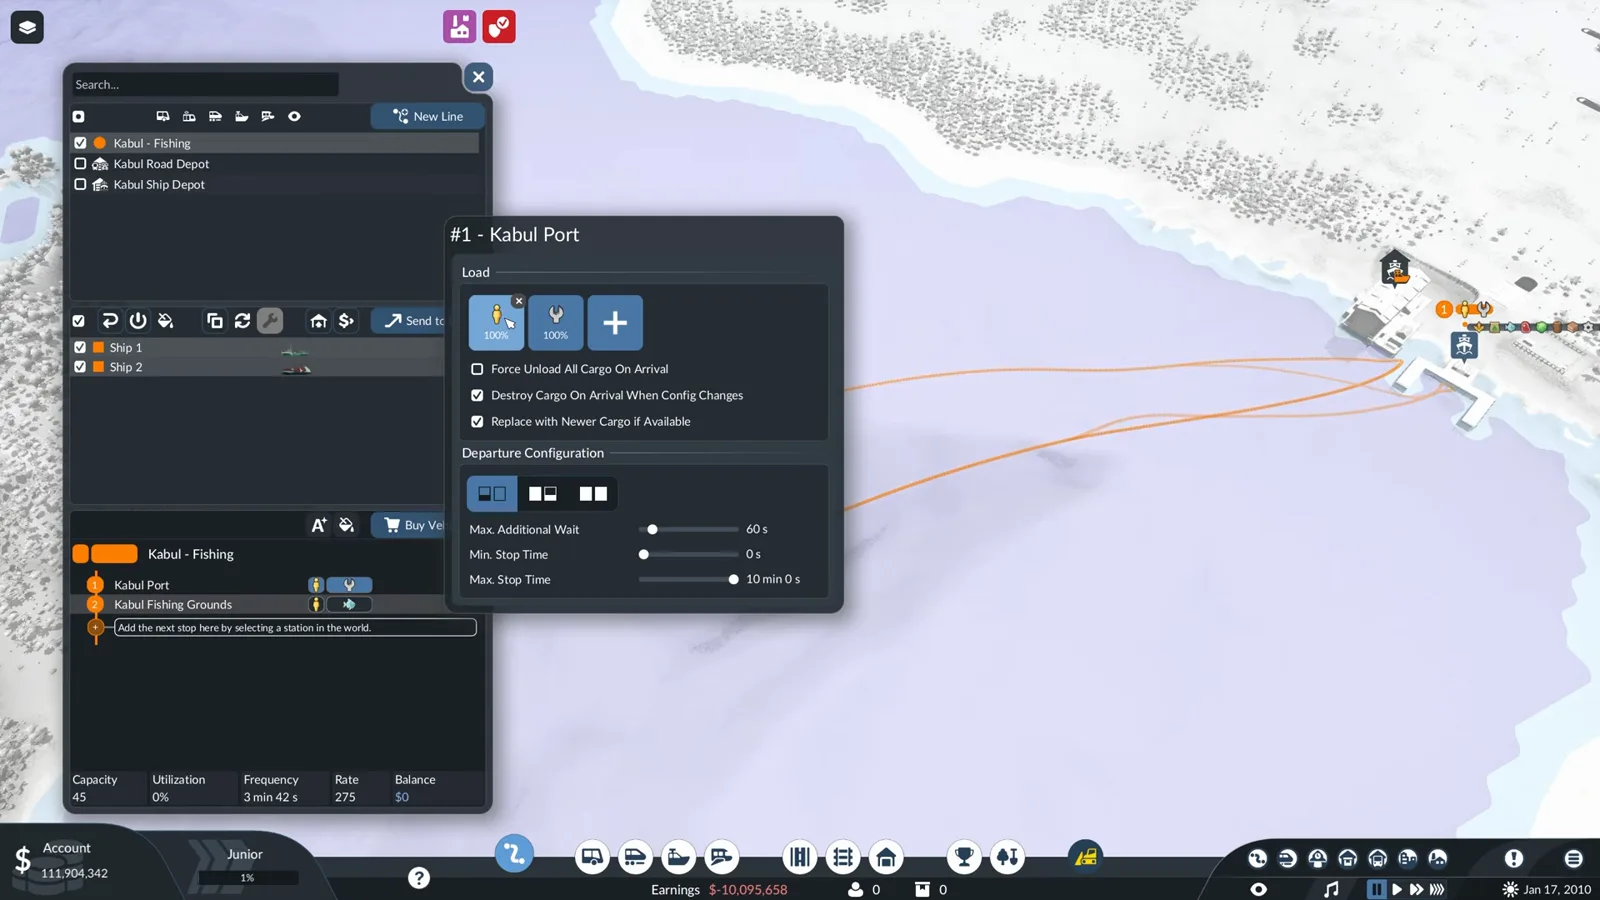
Force unload is unticked here, so a ship can leave with its load still aboard. Watch this step at 15:50 -
Match the vehicle cargo class to the freight
Vehicles are built for cargo classes, and a truck rated only for bulk and fertilizer will never accept goods or bricks. The purchase window filters models by class, so check that row before you spend, because selling a bad buy returns only part of the price.
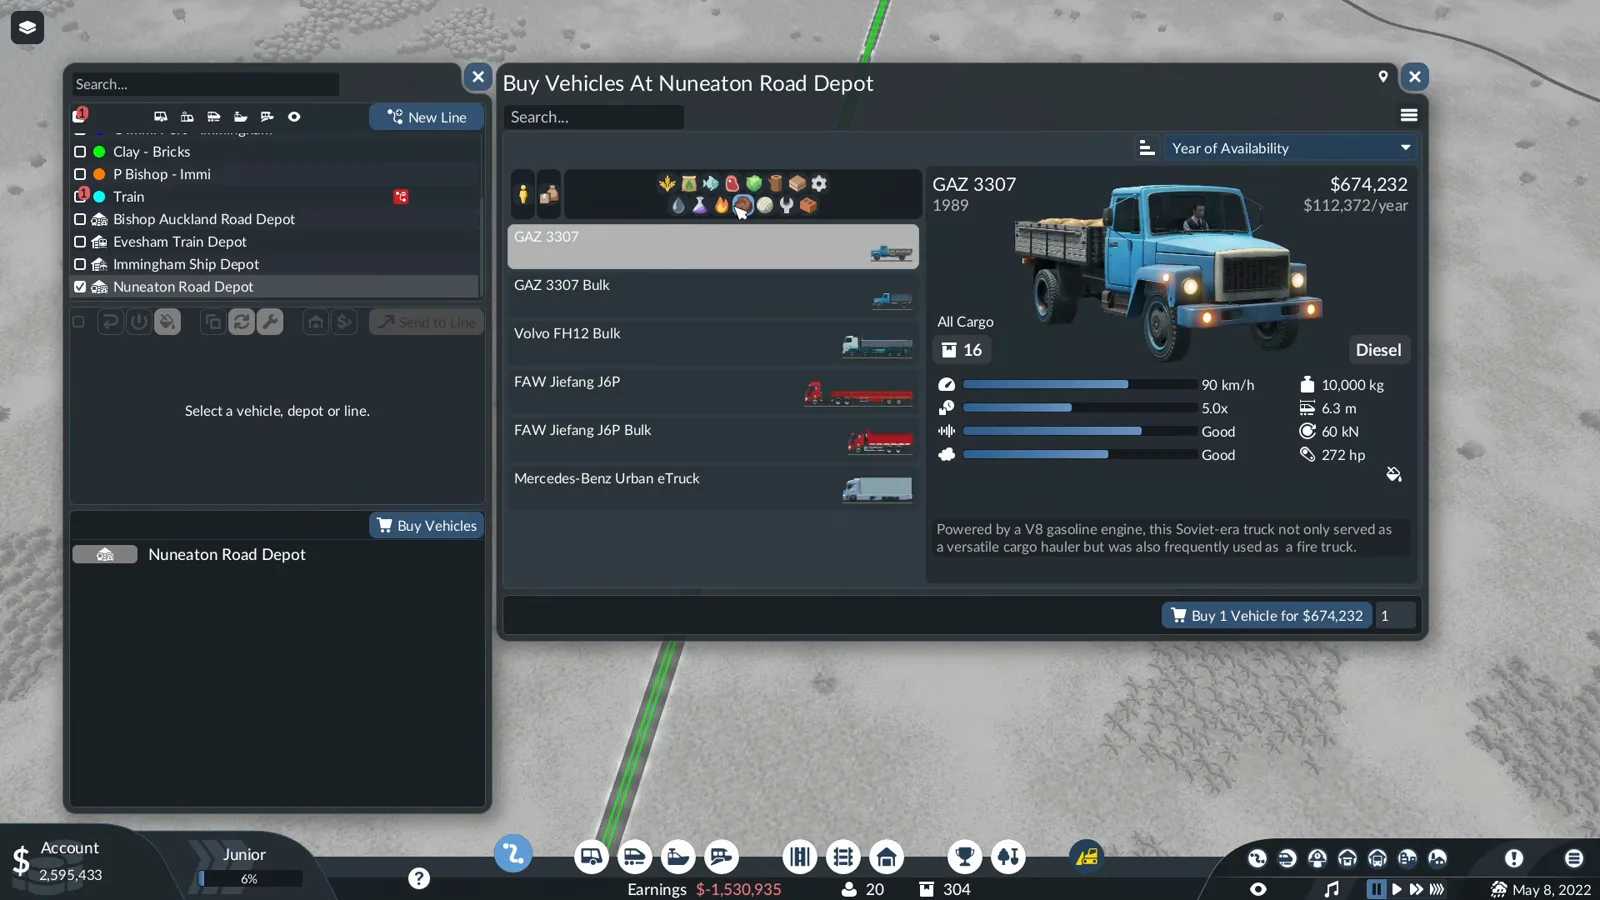
The icon row across the top is the cargo-class filter. Use it before buying. Watch this step at 13:50 -
Turn on Force Unload All Cargo On Arrival
If a vehicle reaches the destination and leaves still holding freight, this is the setting that fixes it. Tick Force Unload All Cargo On Arrival on the delivery stop so the load is dropped even when the town has not asked for it yet.
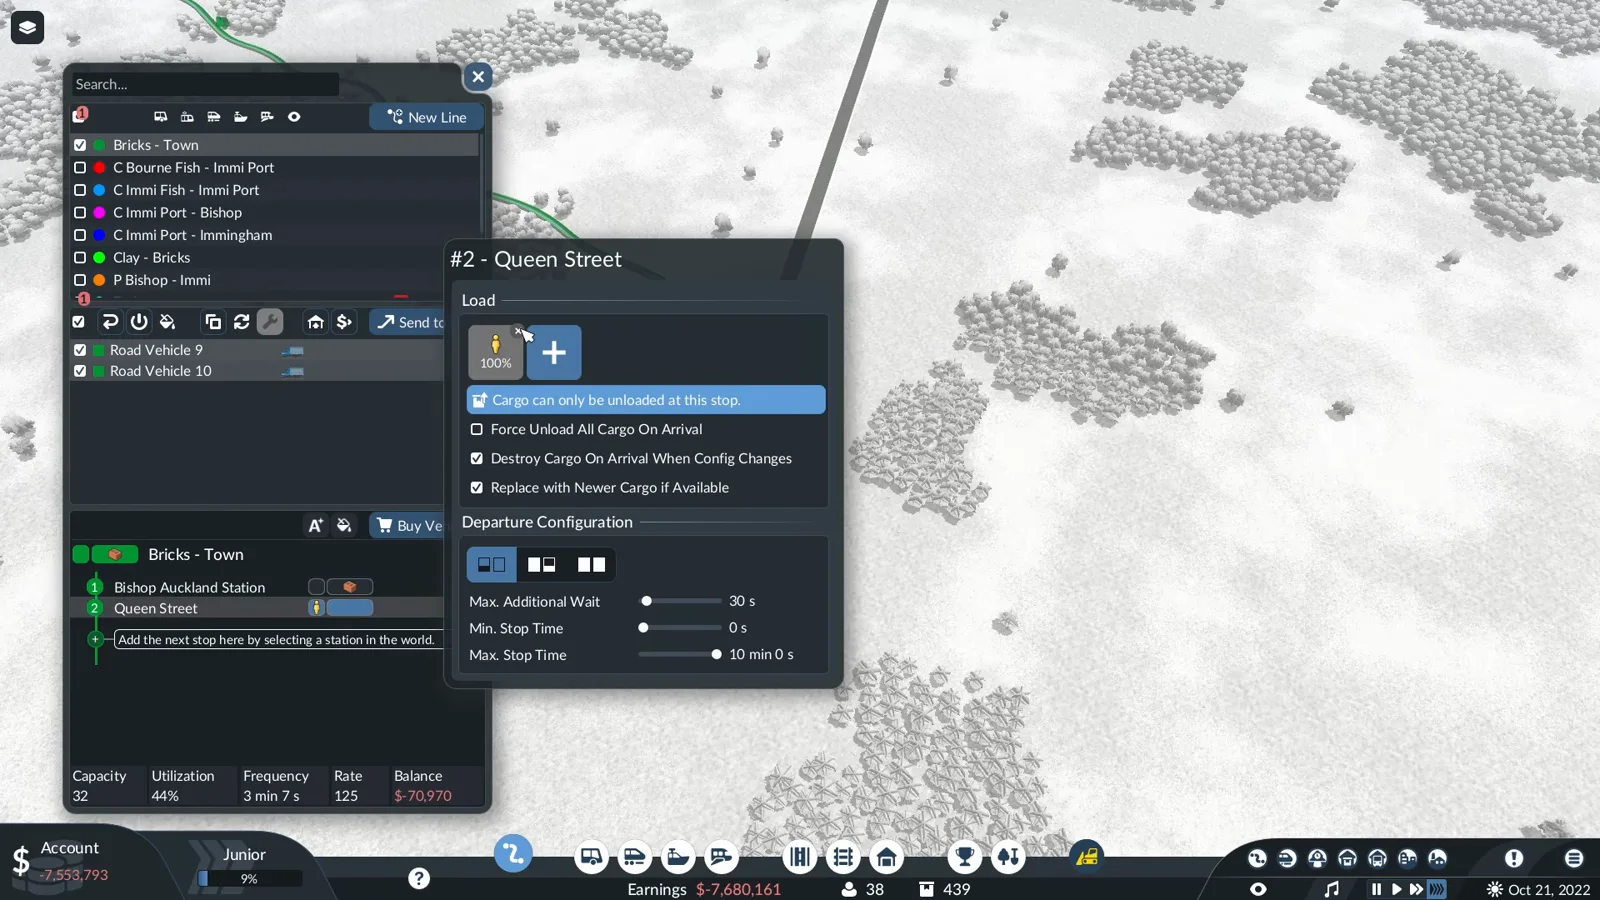
The box is still unticked in this frame — ticking it stops the truck carrying the load home again. Watch this step at 16:40 -
Check whether one berth is doing all the work
When several lines all end at the same platform, ships queue offshore and cargo sits afloat while its delivery window runs. Look at the port: if the traffic lines converge on one berth, the stop is the bottleneck, not the fleet.
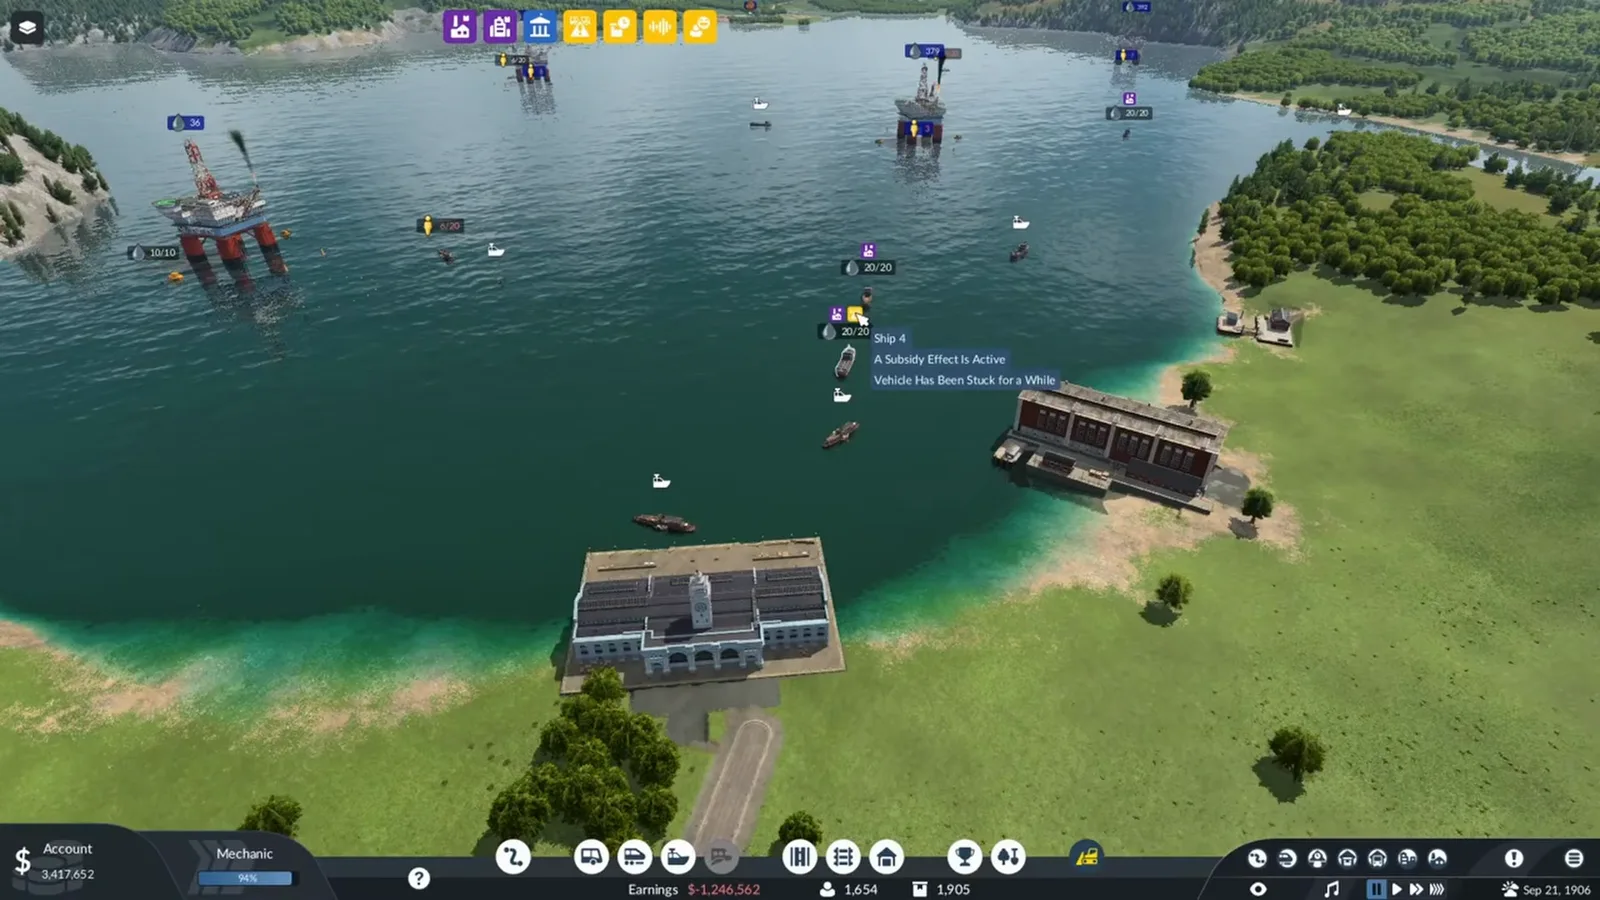
Every coloured line ends at the same platform, which is where the jam is. Watch this step at 0:40 -
Spread the lines across the berths you built
Fix congestion one line at a time. Select a line, hover the offending stop and move it onto a free platform, then repeat until the traffic is evenly divided. Adding berths without reassigning lines leaves the queue exactly where it was.
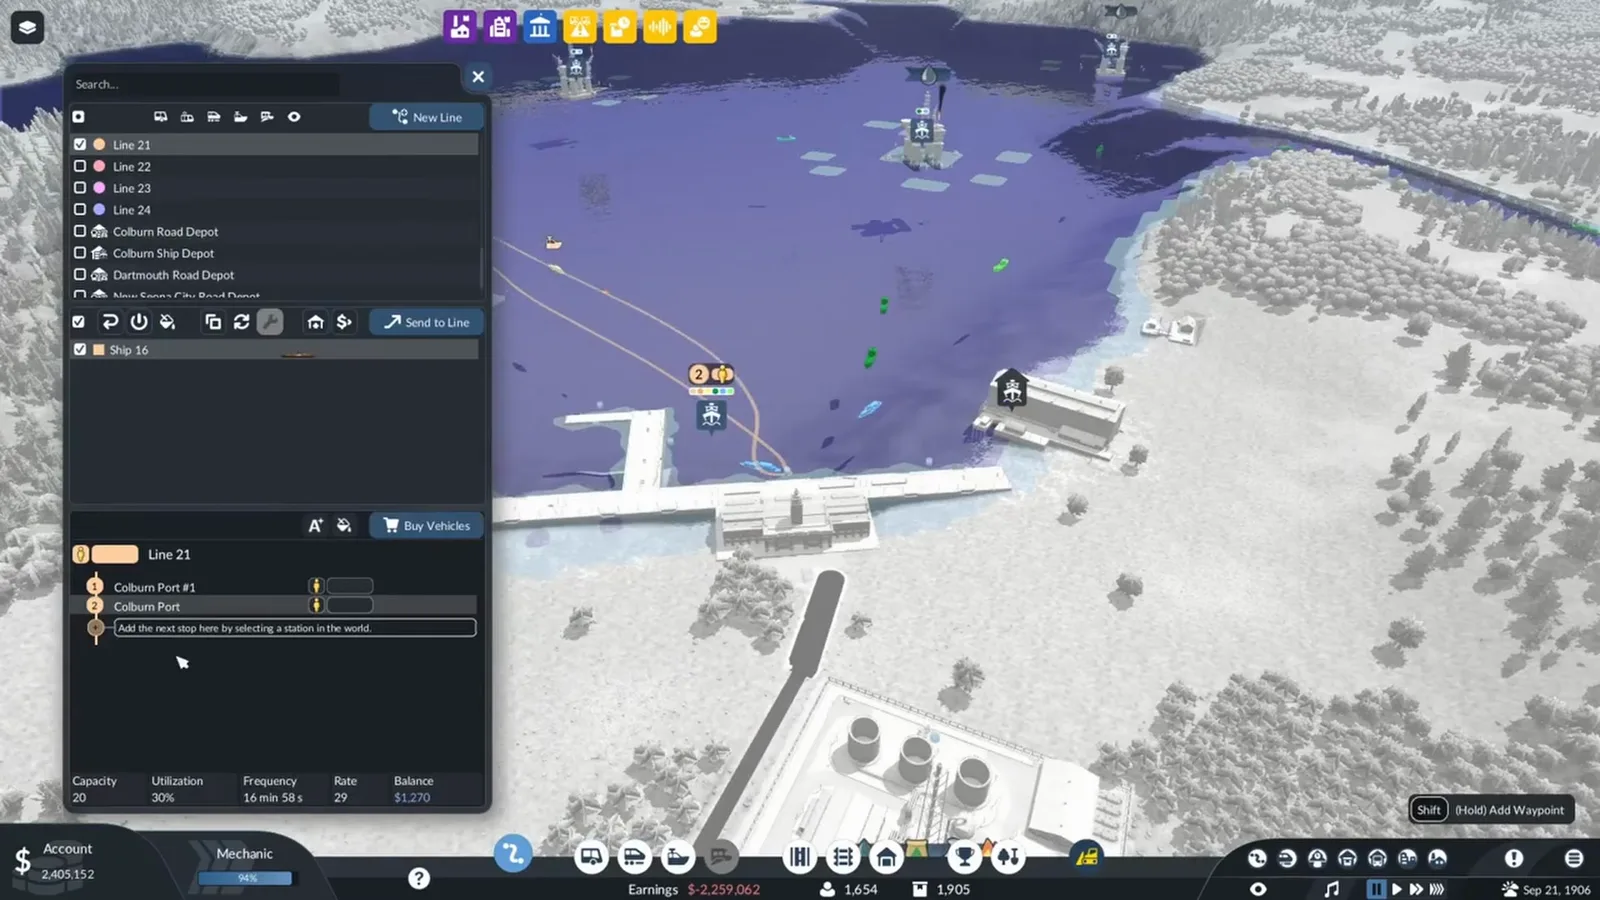
Line 21 now targets berth one instead of the crowded main stop. Watch this step at 3:10 -
Do not let the delivery window expire
Fish carries one of the shortest acceptable delivery times in the game. Cargo waiting in a warehouse pauses that countdown and resumes it when a vehicle loads it again, so split a long run at the warehouse instead of hauling it in one leg. Every cargo window is listed on the rightmost tab of the finance view.
Why a warehouse does not count as a delivery
This is the misunderstanding behind most of the help threads. A warehouse stores cargo and hands it between transport modes; it is not a customer.
Which warehouse should hold your fish?
A universal warehouse accepts every cargo type and is the cheapest way to prove a route works, which is why the fishing walkthrough starts there. Look at the build card and you will also find a goods warehouse carrying the fish logo. Specialized modules hold a single cargo type at a time, load and unload faster, and are the documented way to freeze that cargo delivery timer while it waits — worth the money once a route has proven itself. The cargo and warehouse guide breaks down each module type.
Why fish is the hardest cargo to keep moving
Fish sits at the short end of the delivery-time table, and no amount of good fleet management changes that. Two consequences shape a fishing route:
- Keep the geometry short. Every kilometre a fishing ship sails is time off the window, so put the dock where the catch actually is and the town close behind it.
- Use the warehouse as a pause button. Cargo waiting in a warehouse has its countdown frozen and picks it up again once a vehicle loads it, which is what makes the dock, warehouse and truck pattern in the fishing guide work instead of spoiling at the quay.
Industries add a second way for cargo to vanish. An industry whose output storage is full keeps producing and destroys the surplus, so a factory that never receives its input sits at zero output while the mine feeding it silently wastes everything it makes. If your delivery is arriving but nothing downstream changes, check whether the receiving building is already full.
Where to look when nothing loads at all
Four settings decide whether a vehicle takes anything on board, and they are all one click deep:
- The stop load list — open Configure Stop on the line and confirm the cargo icon is present on the pickup stop, not only on the drop-off stop.
- The vehicle class — the purchase window lists cargo classes; a bulk-only truck will not touch goods.
- Force unload — tick Force Unload All Cargo On Arrival at the delivery stop so a returning vehicle cannot keep its load.
- The service circle — warehouses and stations work by radius, never by a road link, so a building a few metres outside the circle behaves as if it were on another map.
If none of that explains it, step back a level: a platform shorter than the train serving it slows loading and unloading, so a long consist at a small station can look like a stalled line. The details are in our beginner tips.
Sources
The screenshots on this page are stills from three community videos, used to illustrate our own written checks. Every step links back to the second it came from.
- SizzlingPopcorn — Transport Fever 3 Fishing Guide: Everything You Need to Know (24:31). The full chain from supply and demand through the port, the warehouse, the ship line and the last truck leg, told as a list of mistakes to avoid.
- Born 2 Game — Transport Fever 3 How to Setup Lines for Maximum Efficiency (19:48). Line and stop configuration, including a truck bought in the wrong cargo class and the force-unload setting that stops a vehicle carrying its load home again.
- Pinstar — Why This Port is a Problem and How to Fix It (4:43). Berth congestion at a port where every line converged on one platform, and the dock configuration that spreads them out.
Keep reading
- The full economy behind these checks, including how carriers split payment: cargo and warehouse guide.
- The dock, warehouse and truck pattern in detail, plus where fish is actually consumed: fishing guide.
- The twelve habits that keep young companies solvent while you debug: beginner tips.
- Choosing a map with a fishing coast worth building on: best starting city.
Related Articles
guides
Transport Fever 3 Campaign Guide: All 8 Missions and Star Goals
Every Transport Fever 3 campaign mission in order, with each star goal and medal task, plus how stars, medals, saves and campaign achievements work.
guides
Transport Fever 3 Cheats and Trainers: Legit Money Strategies
No working cheat code exists in Transport Fever 3 — but loans, purple subsidy contracts, cargo specialisations and line settings all pay. Twelve legitimate steps.
guides
Transport Fever 3 Mission 3 Walkthrough: Desert Adventure
Complete Transport Fever 3 Mission 3 in Wadi Rum: the objective order, the maintenance-camp routing that saves every truck, and how to earn all three stars.
Was this helpful?
Thanks for the feedback!