Transport Fever 3 Performance Settings: Best Values for Higher FPS
Every in-game option that moves frame rate in Transport Fever 3, with the values a launch-week walkthrough picks for textures, shadows and resolution scale.
FAQ
Does Transport Fever 3 support DLSS or FSR?
What are the best performance settings for Transport Fever 3?
Should V-sync be on or off?
Is Fullscreen or Borderless better in Transport Fever 3?
What does leaving Presets on Custom mean?
Do these settings work on a low-end PC?
Transport Fever 3 ships a compact graphics menu — a dozen rows, with no upscaling toggle hiding anywhere else. This page turns a launch-week video walkthrough into a written, screenshot-by-screenshot pass over every option it touches, so you can set the same values without scrubbing through footage. If the machine itself is still the open question, settle the AVX2 and SSD gates in our system requirements breakdown before tuning anything.
What the settings menu actually contains
Open the gear icon in the top-right corner of the main menu and the Settings screen splits into tabs: Interface, Mouse, Keyboard, Controller, Graphics, Audio, Advanced. Everything this walkthrough changes sits on the Graphics tab, inside two blocks — Window Settings (Display Mode, Resolution, Resolution Scale, V-sync) and Graphics Settings (Presets, Textures, Terrain Textures, Anti-Aliasing, Ambient Occlusion, Reflections, Geometry, Shadows, Terrain, Grass).
There is no DLSS switch to hunt for. The Resolution Scale slider is the game’s upscaling control, and its own help text names AMD FidelityFX Super Resolution as the upscaler it uses. That matters for how you read the profile below: the author raises the slider to 100% for image quality, which means the same slider is your most direct route back to frames if you need them.
The recommended values at a glance
| Option | Value in the walkthrough | Note |
|---|---|---|
| Display Mode | Fullscreen (recording kept Borderless) | The author recommends fullscreen even though his own menu is borderless |
| Resolution Scale | 100% (default 75%) | FSR upscaling — lowering it is the quickest way to more frames |
| V-sync | Off | Re-check the row after updates |
| Textures | Very High | The top of the range |
| Terrain Textures | High | One notch below maximum |
| Anti-Aliasing | 8x | Highest smoothing level |
| Ambient Occlusion (SSAO) | On | More natural shadows, more rendering load |
| Reflections (SSR) | Medium | Middle of the range |
| Geometry | Medium | Middle of the range |
| Shadows | Low | The only row pushed to its minimum |
| Terrain | High | Landscape detail kept high |
| Grass | High | Last row of the block |
| Presets | Custom | Left on Custom because the rows were set by hand |
Map size multiplies every one of those costs, so the map sizes comparison is worth reading alongside this page: a bigger world charges you twice, once in simulation and once in rendering.
Every setting, step by step
-
Set Display Mode to Fullscreen
The recorded menu runs Borderless, but the author recommends Fullscreen: the help panel explains that fullscreen uses the entire screen while borderless lets the mouse leave the window.
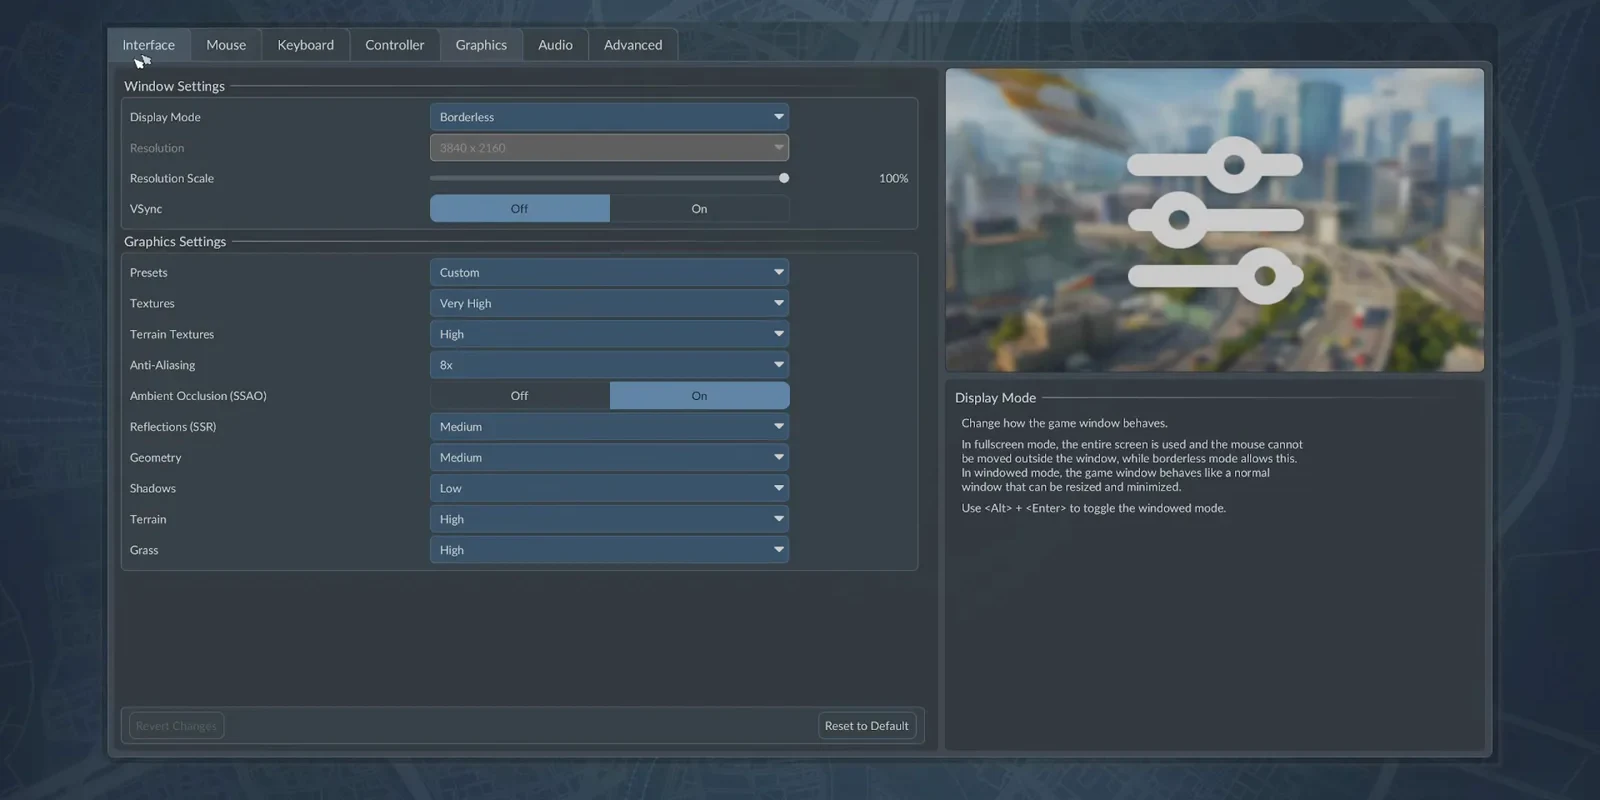
The recording is borderless; the author still recommends fullscreen. Watch this step at 0:20 -
Turn V-sync off
V-sync is switched to Off here. The author warns it can switch itself back on, so the row is worth re-checking after an update.
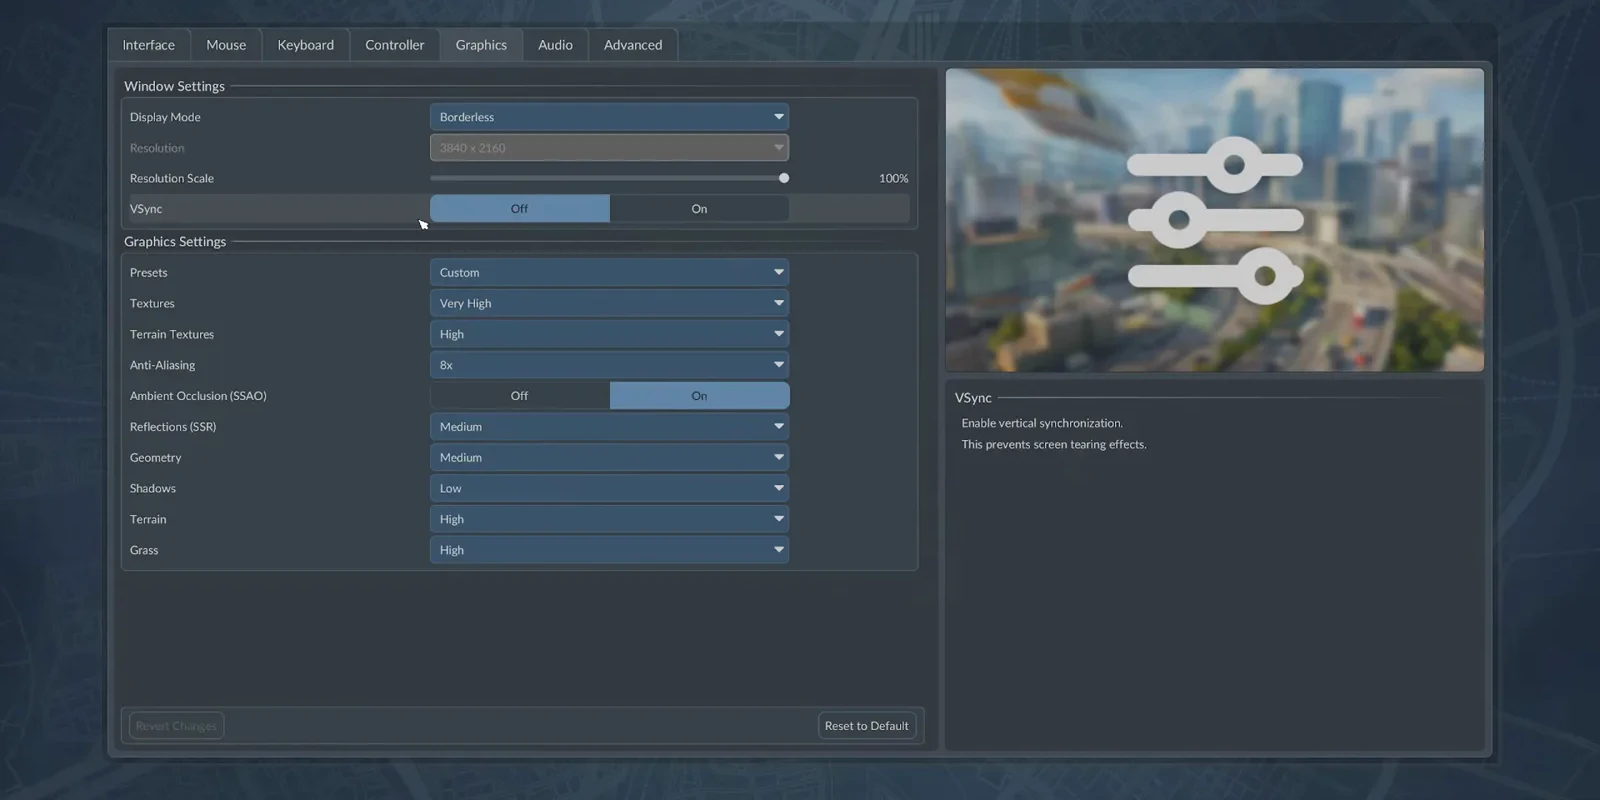
Off, with a note to re-check it after updates. Watch this step at 0:26 -
Raise Resolution Scale to 100%
The slider starts at 75% and the author pushes it to 100% for a sharper picture. Its help text says upscaling is handled by AMD FidelityFX Super Resolution, so this is also the fastest lever back to more frames.
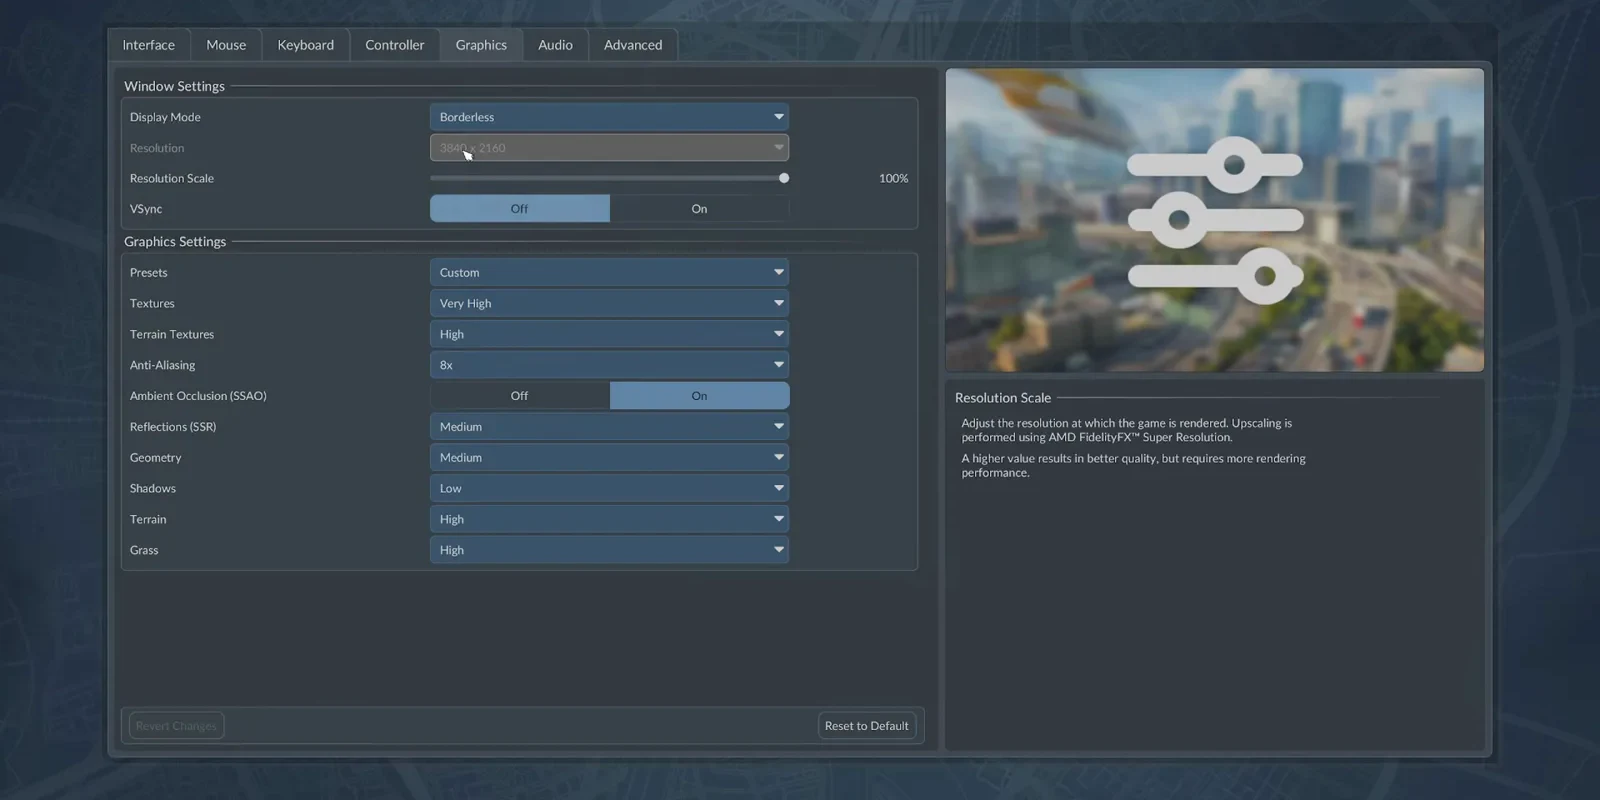
100% for sharpness — lower it if you need frames back. Watch this step at 0:34 -
Set Textures to Very High
Texture quality goes to the top of the list. Its help text notes that better quality means more detailed objects but requires more performance.
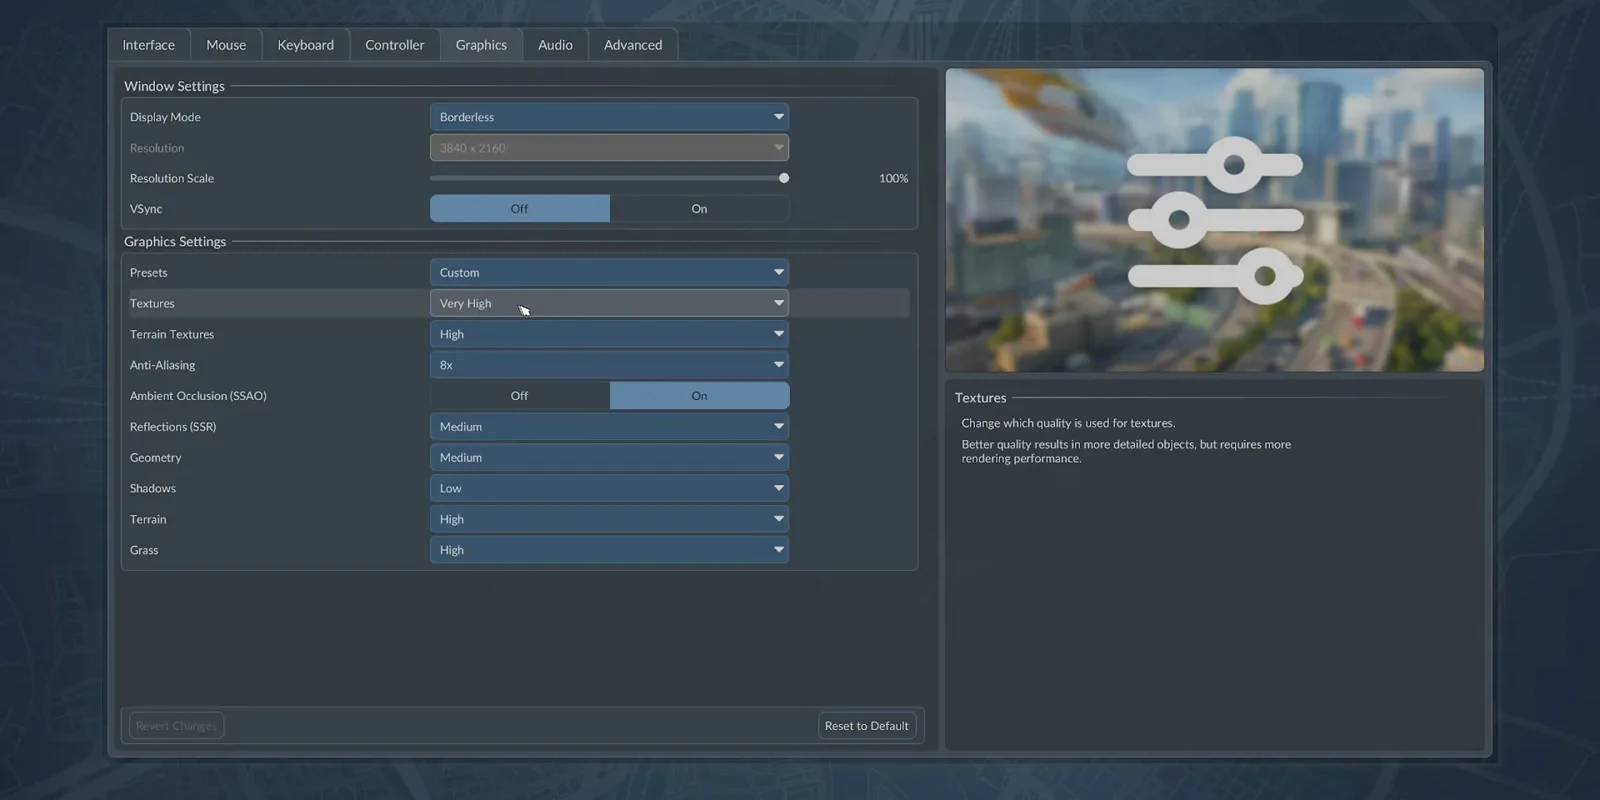
Top-tier textures, the author’s first priority. Watch this step at 0:54 -
Set Terrain Textures to High
Terrain textures stop one notch below maximum, at High, and stay there for the rest of the walkthrough.
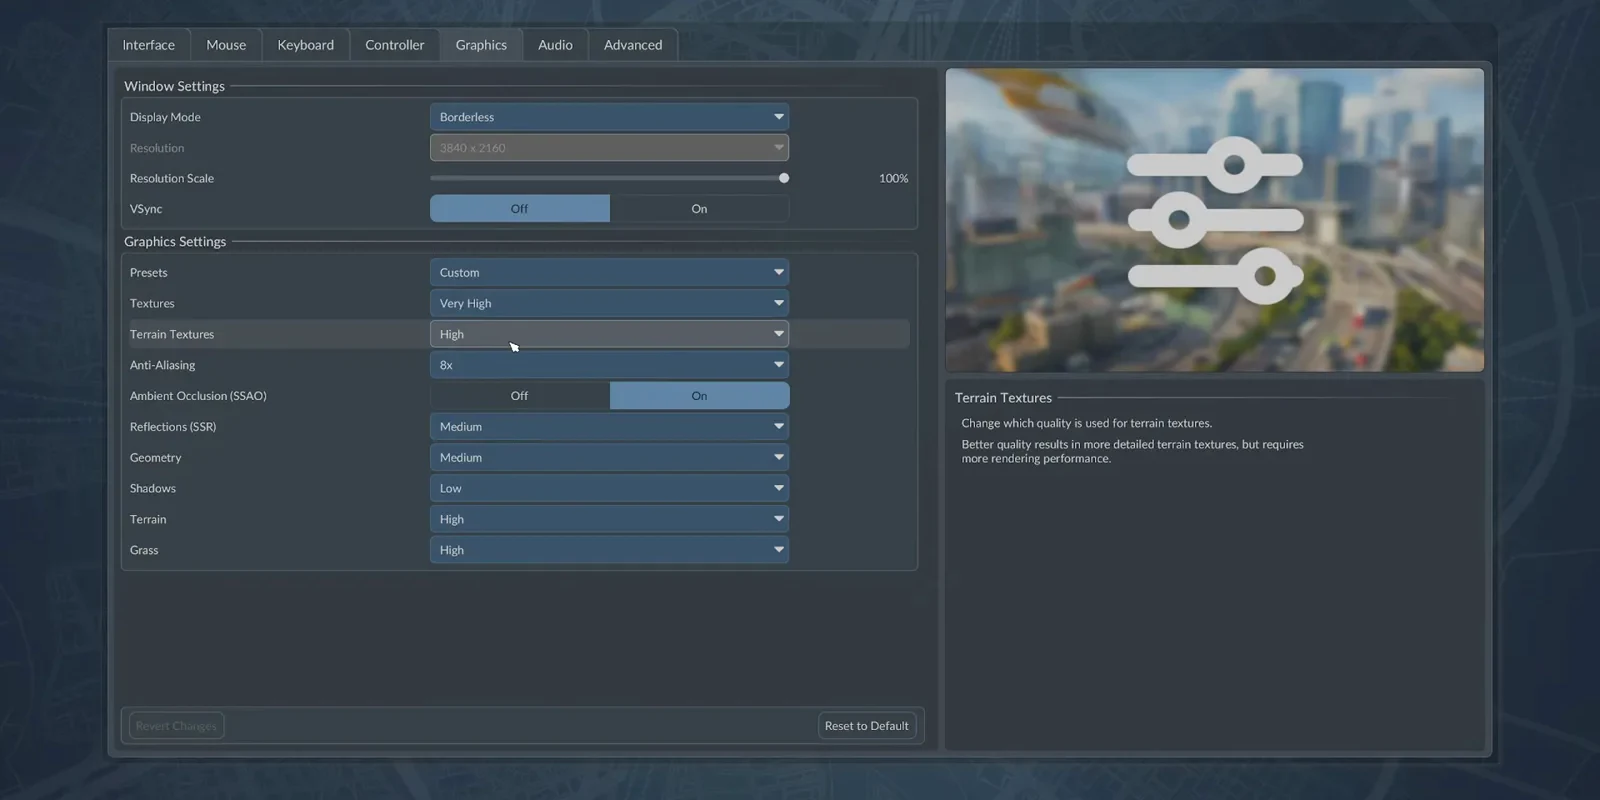
One notch below maximum. Watch this step at 0:58 -
Set Anti-Aliasing to 8x
Anti-aliasing is raised to 8x. The help text warns that higher values smooth jagged diagonal lines and curves at a performance cost.
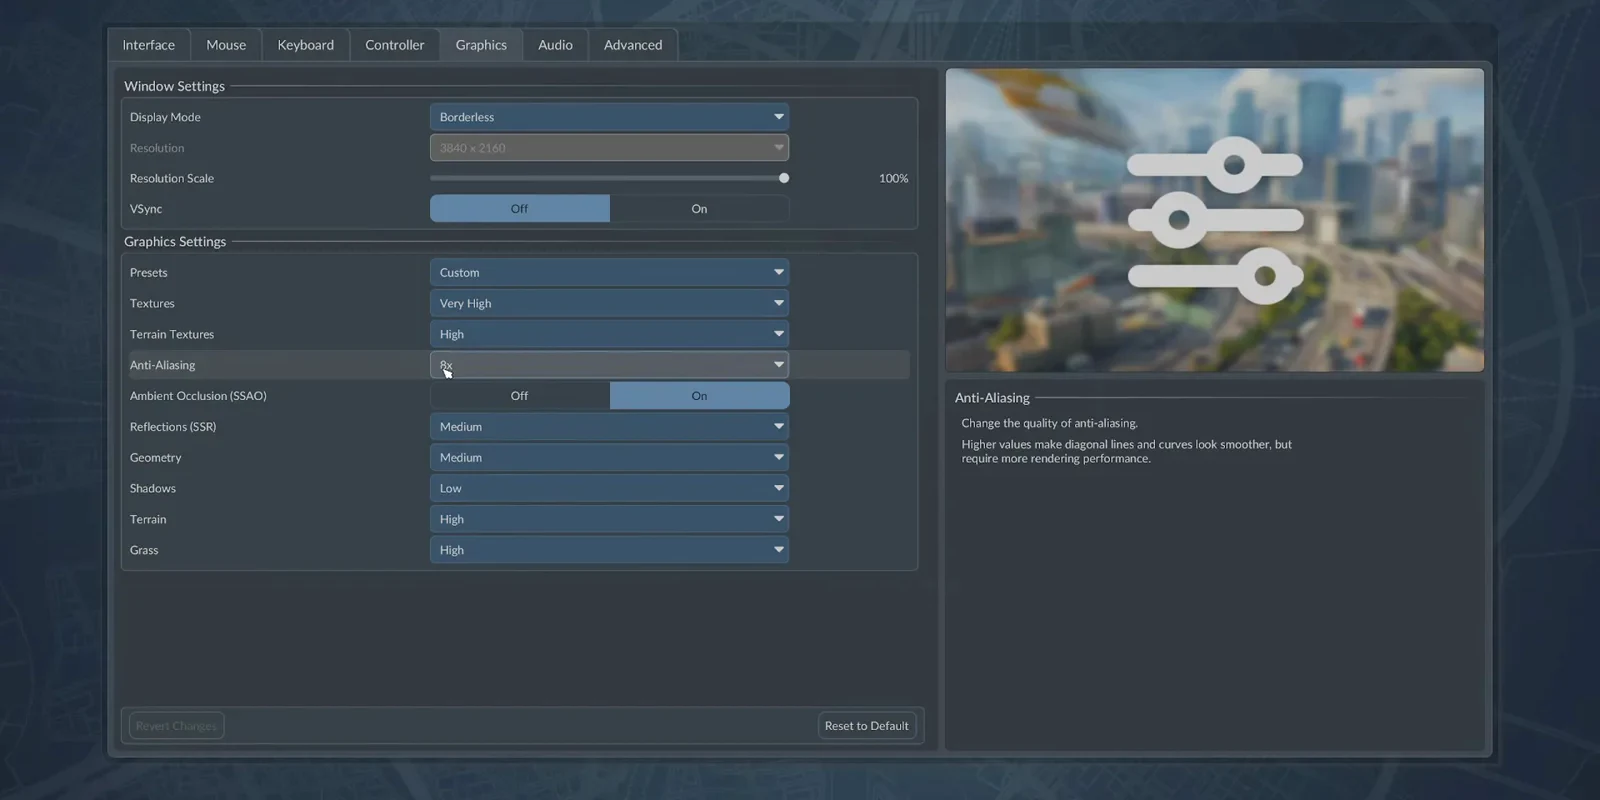
The highest smoothing level in the list. Watch this step at 1:02 -
Turn Ambient Occlusion (SSAO) on
SSAO is enabled here. The help panel describes it as more natural shadows that require more rendering performance.
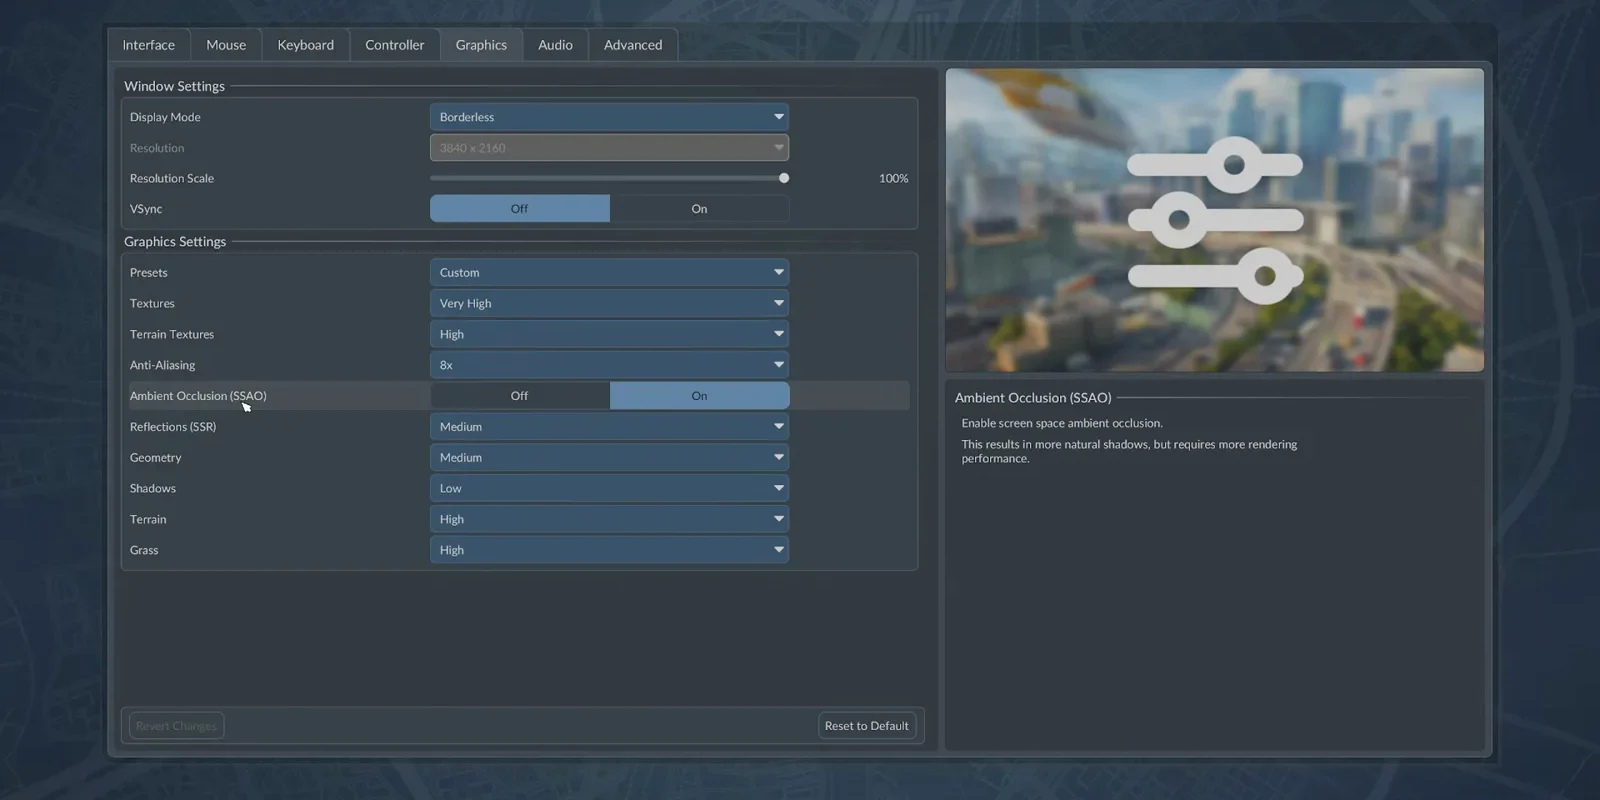
Enabled for more natural contact shadows. Watch this step at 1:04 -
Set Reflections (SSR) to Medium
Screen-space reflections sit in the middle of their range rather than at maximum.
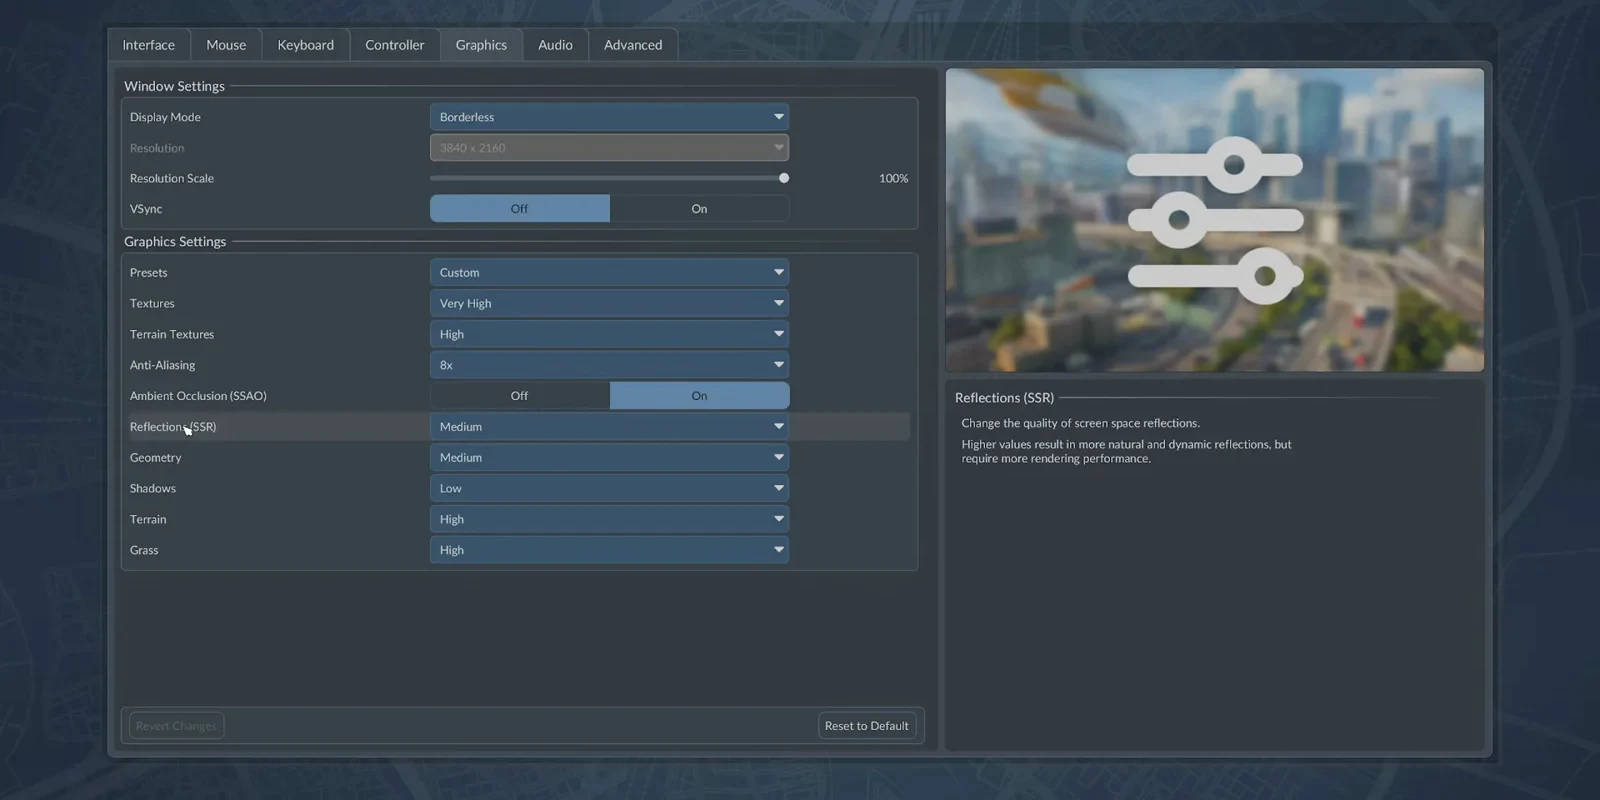
A middle setting, not the maximum. Watch this step at 1:06 -
Set Geometry to Medium
Geometry detail also stops at Medium, trading object detail for rendering time.
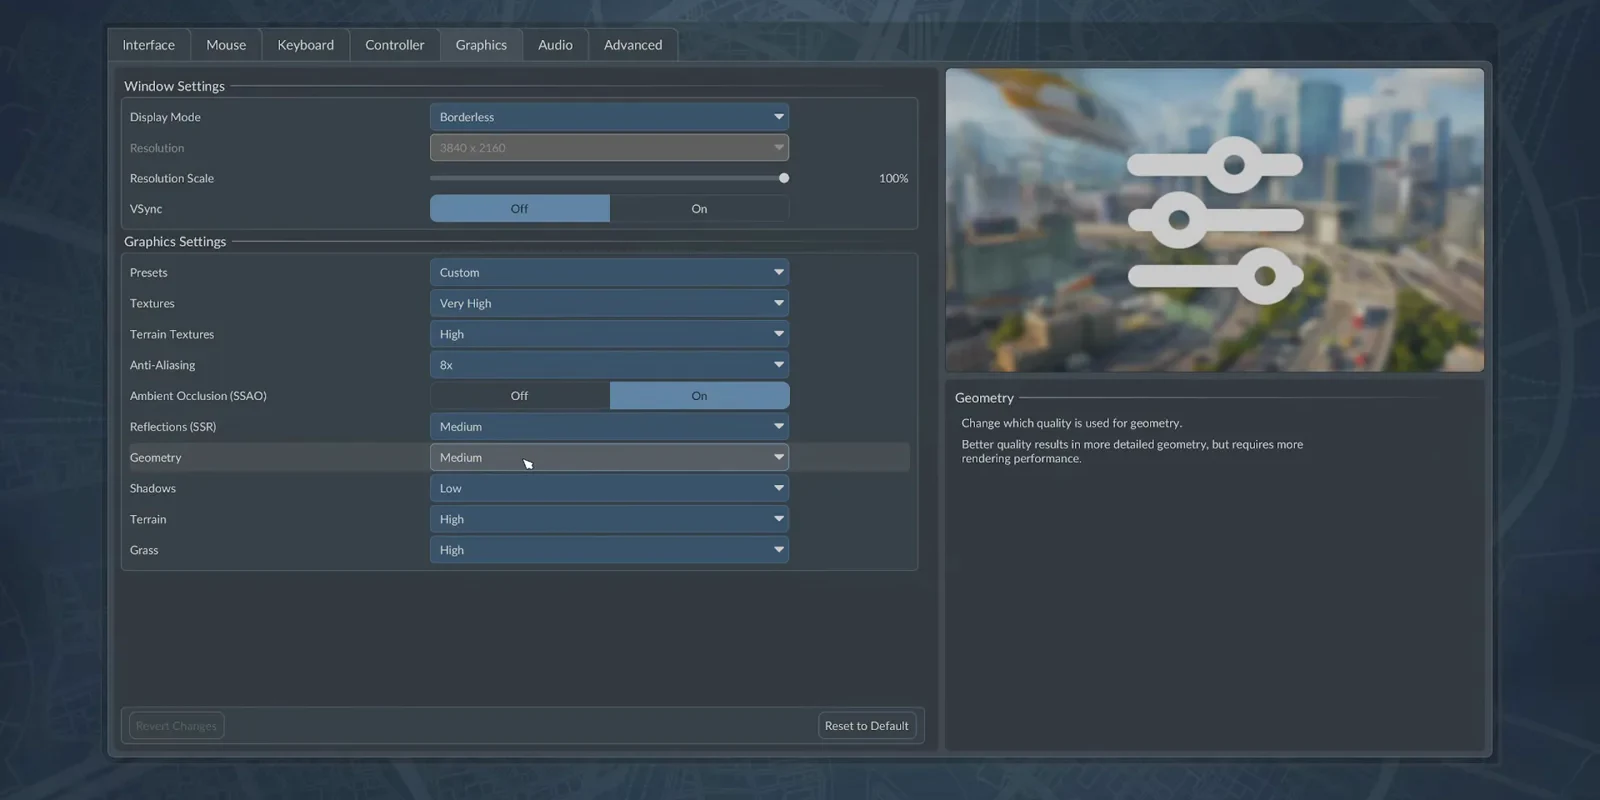
Object detail paid for in rendering time. Watch this step at 1:10 -
Drop Shadows to Low
Shadows are the one quality row the walkthrough pushes all the way down to Low.
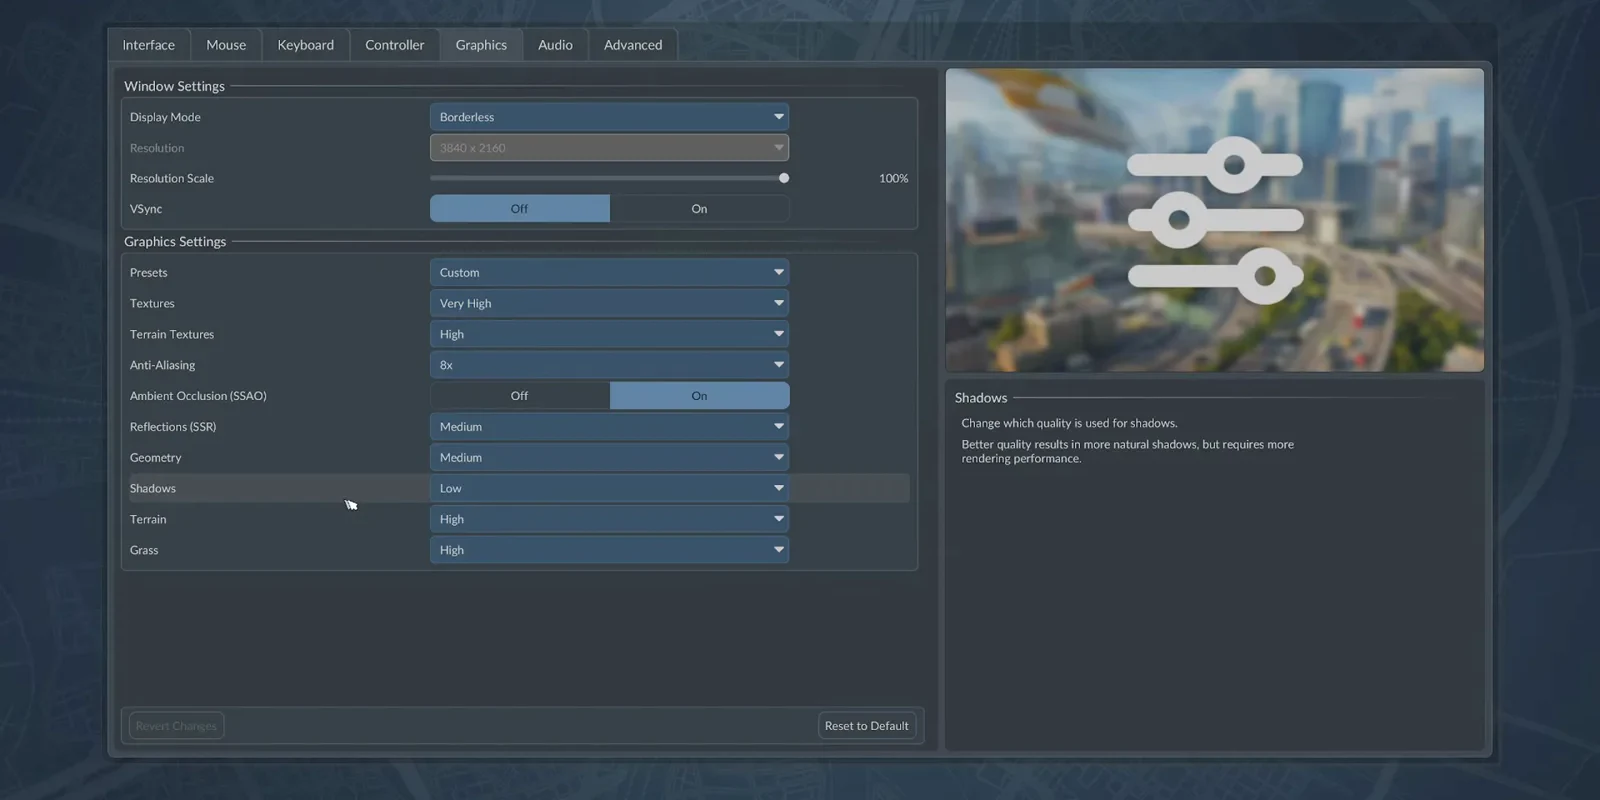
The biggest single quality cut in this setup. Watch this step at 1:12 -
Set Terrain to High
Terrain detail returns to High while the Shadows row above it stays at Low.
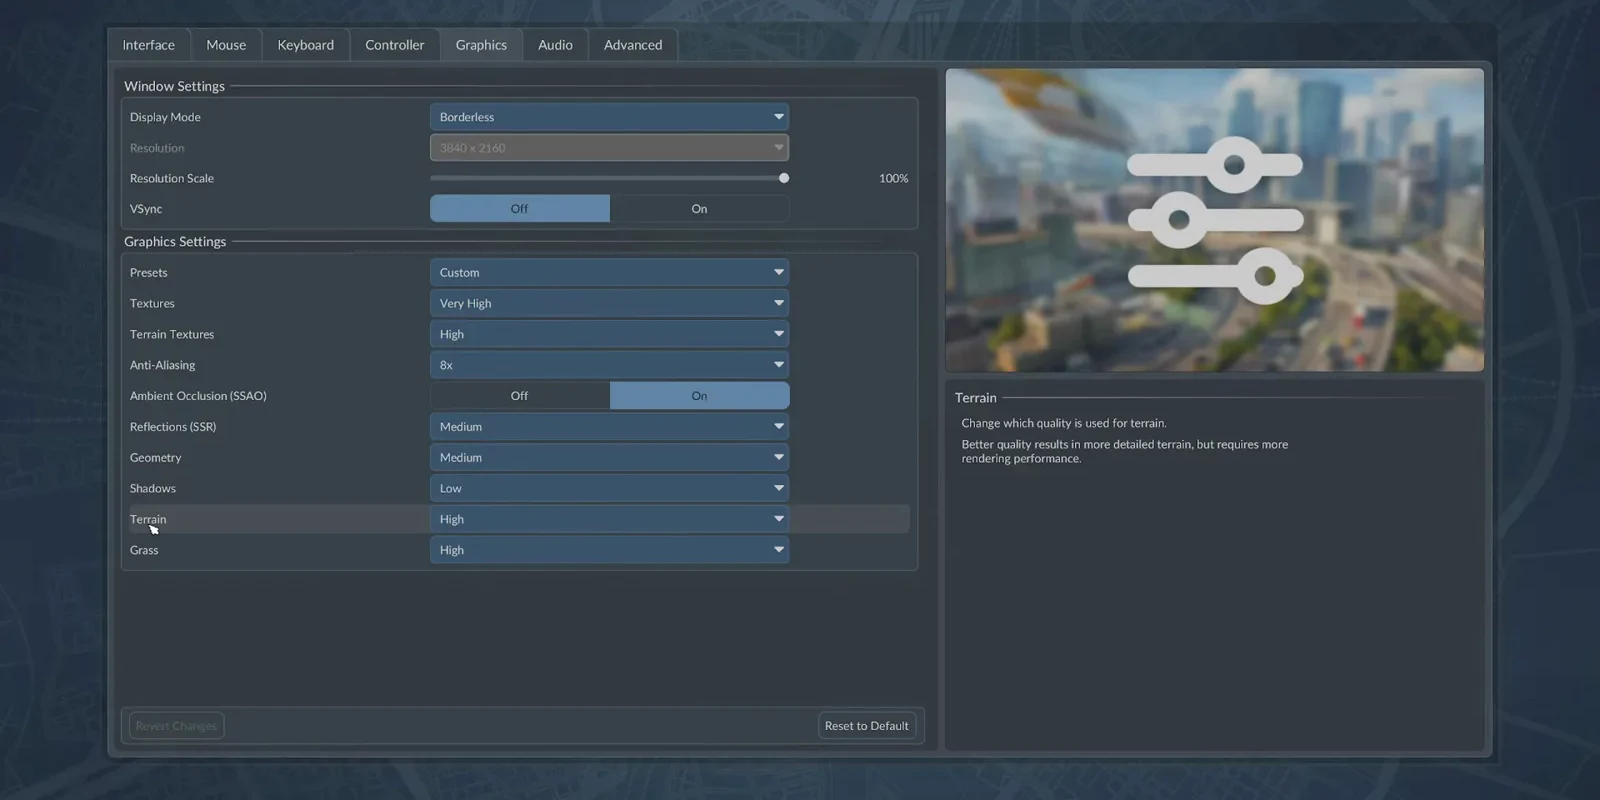
Landscape detail stays high. Watch this step at 1:14 -
Set Grass to High
Grass quality finishes the list at High, the last row of the Graphics Settings block before the Reset to Default button.
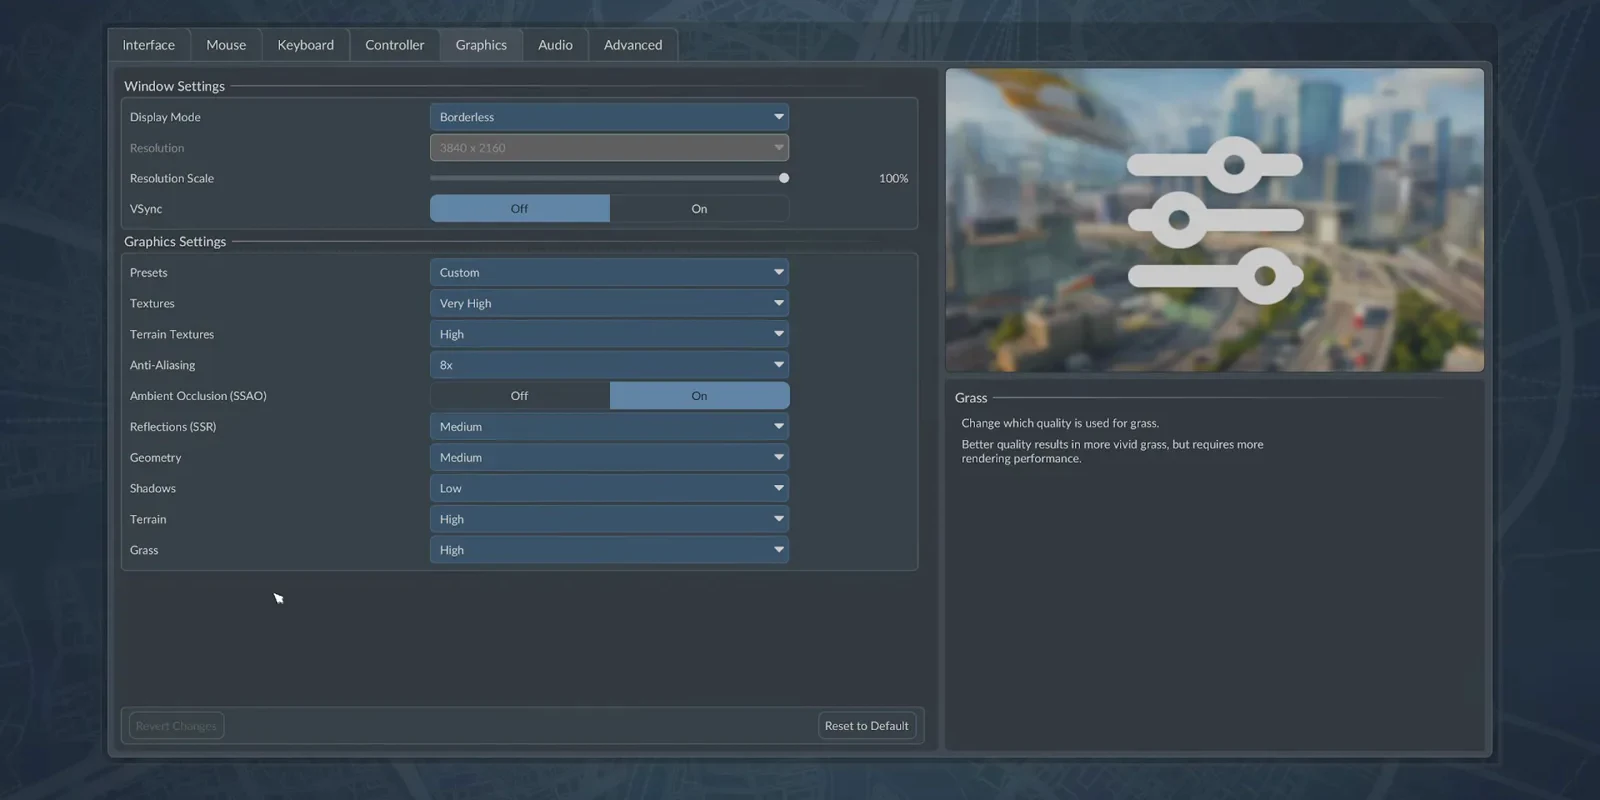
The final row of the Graphics Settings block. Watch this step at 1:20
Which rows to roll back first
If frames are still short after the profile above, the video’s own choices hint at where the cost sits. Shadows is the one row the author drops to its lowest value, so it is the first candidate to lower further. Reflections and Geometry were deliberately capped at Medium instead of left at maximum, and the help text for anti-aliasing, ambient occlusion, terrain and grass all warn that higher values require more rendering performance — those are the rows to step down next.
Resolution Scale is the other big lever. The author picks 100% for sharpness, so moving back below 100% is the most direct way to buy frames back, and that is exactly what the FidelityFX Super Resolution upscaling path is for. On smaller hardware, the beginner tips recommend smaller maps and fewer vehicles, and the Transport Fever 3 calculator can help you size a fleet that will not outrun your frame rate.
Source
The screenshots on this page are frames from Transport Fever 3 Best Graphics Settings 2026 | Max FPS & Best Visuals by Fuzzi Official ツ, used to illustrate our own written instructions. Every step links back to the exact second its frame was taken from. The frames were cropped to the settings panel to remove the recorder’s on-screen performance counter; no other editing was applied. All text on this page is original.
Related guides
- Transport Fever 3 system requirements — confirm the AVX2 and SSD gates before you tune settings.
- Transport Fever 3 beginner tips — line design and fleet sizing that keep the simulation load down.
- Map sizes compared — how world size changes what your hardware has to draw.
- Transport Fever 3 calculator — size trains, wagons and lines without overbuilding.
Related Articles
guides
Transport Fever 3 Campaign Guide: All 8 Missions and Star Goals
Every Transport Fever 3 campaign mission in order, with each star goal and medal task, plus how stars, medals, saves and campaign achievements work.
guides
Transport Fever 3 Cheats and Trainers: Legit Money Strategies
No working cheat code exists in Transport Fever 3 — but loans, purple subsidy contracts, cargo specialisations and line settings all pay. Twelve legitimate steps.
guides
Fish Not Unloading in Transport Fever 3: 10 Causes and Fixes
Cargo reached the warehouse but never unloaded? Ten verified causes — navigable water, catchment radius, cargo class, force unload and the delivery timer.
Was this helpful?
Thanks for the feedback!