Transport Fever 3 Beginner Guide: Your First Hour, Step by Step
Your first hour in Transport Fever 3, step by step: map settings, town layers, loans, depots, a first cargo and bus line, subsidies and the delivery clock.
FAQ
What should I do first in Transport Fever 3?
Should beginners play Transport Fever 3 on Easy?
Do industries need their own station in Transport Fever 3?
How do subsidies work in Transport Fever 3?
Where is the delivery time panel in Transport Fever 3?
Why is my first line losing money in Transport Fever 3?
Transport Fever 3 dumps you on a map with a dozen menus, a loan you never asked for and a clock that is already running. The good news: the first hour is always the same shape. You read the map, find a short chain with real demand, borrow carefully, and build one line that works before you build anything else. This page turns a full beginner walkthrough into fourteen steps you can follow in your own save, with the exact screens from the video at every step.
Read the map before you spend
-
Set up a forgiving first map
Map size, terrain and town density are chosen before the save exists, and this walkthrough starts in 1900 on the Easy difficulty so the short vehicle list does the deciding for you. Few mountains and close towns keep the first chains short.
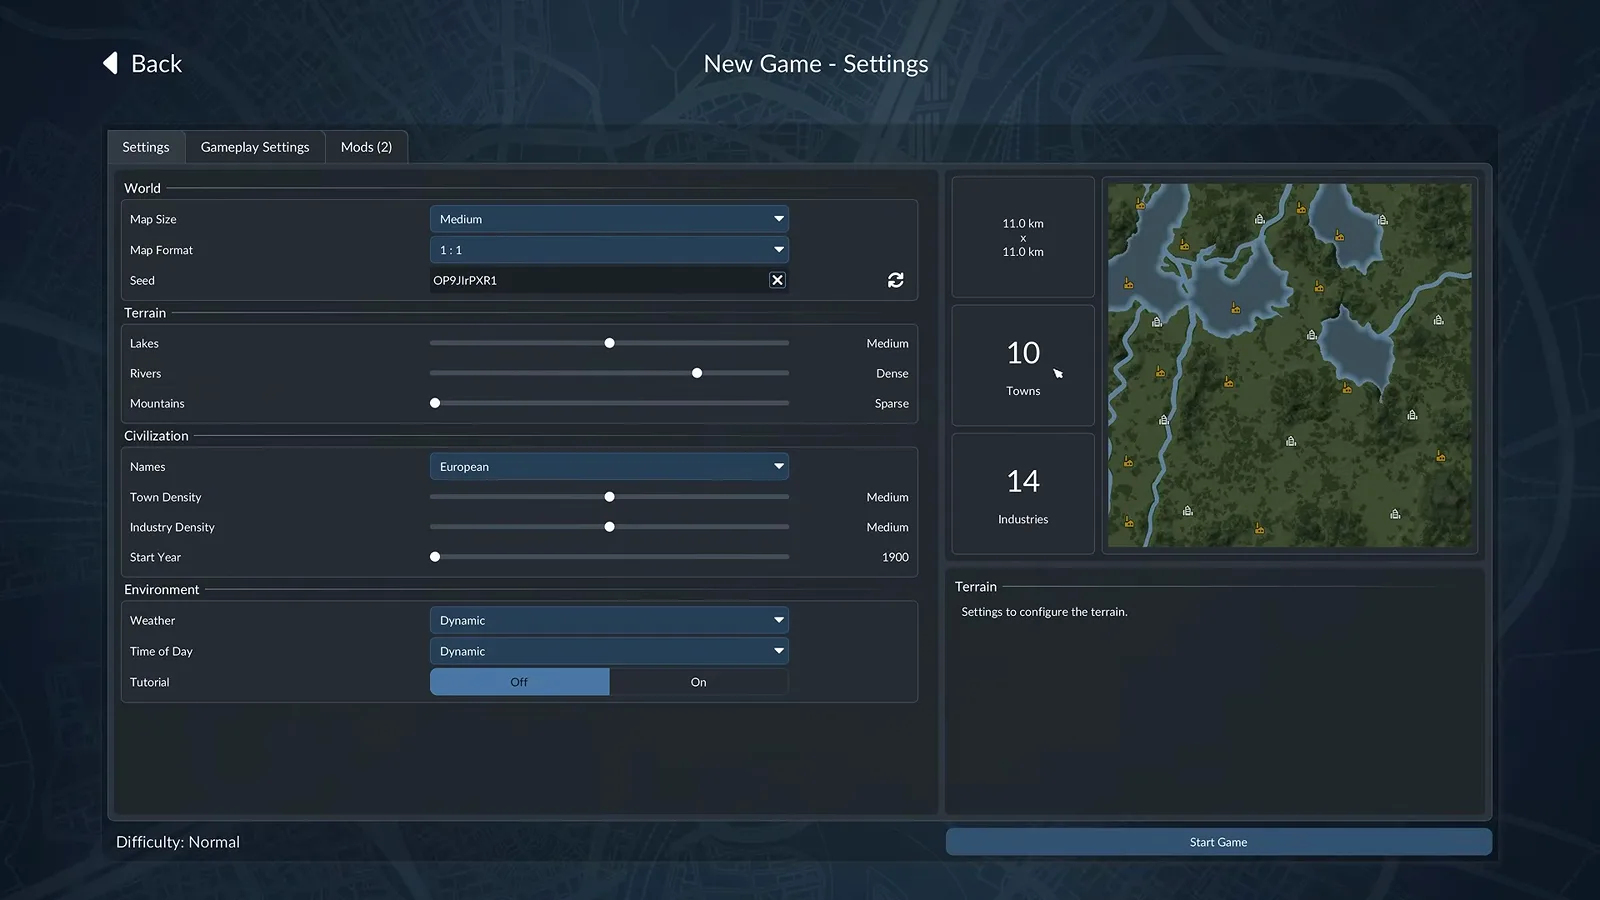
Everything expensive is decided before the first track is laid. Watch this step at 0:36 -
Learn the town layer before you build
The towns overlay draws each town influence boundary and colors the zoning inside it: green residential, blue commercial and yellow industrial. Residents complain about noise and pollution, industry mostly does not, and each zone wants different cargo.
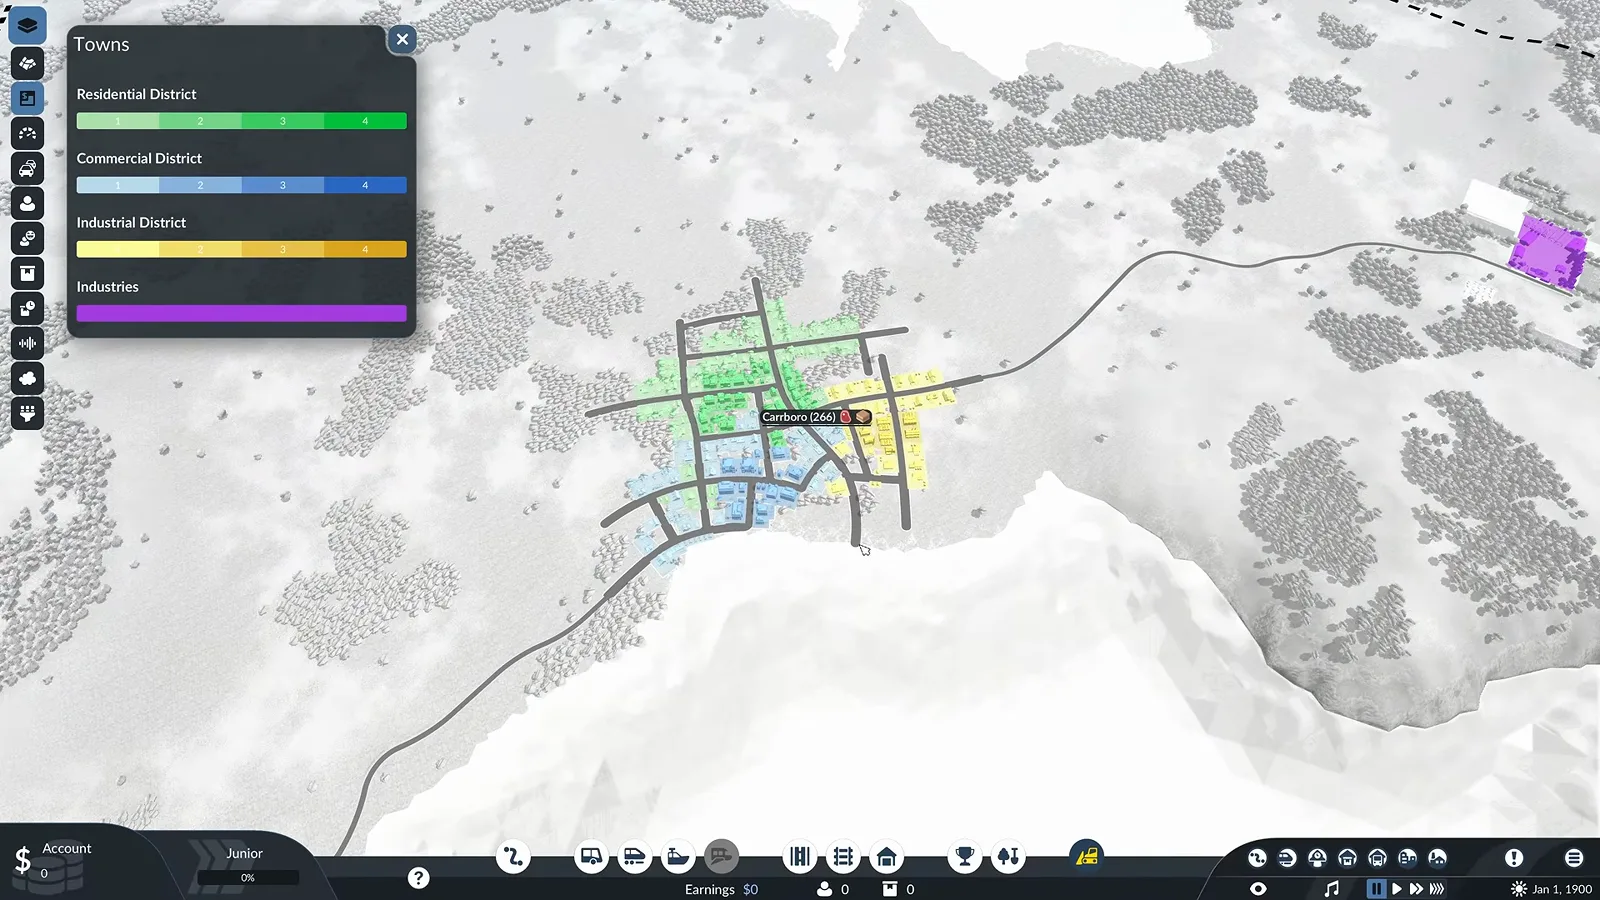
The three colors are three different audiences for your lines. Watch this step at 2:35 -
See what each district is short of
The cargo flow overlay paints commercial supply in blue and industrial supply in yellow, and the badges over each district count how much is missing. Carrboro here is short 87 industrial cargo and 123 commercial cargo.
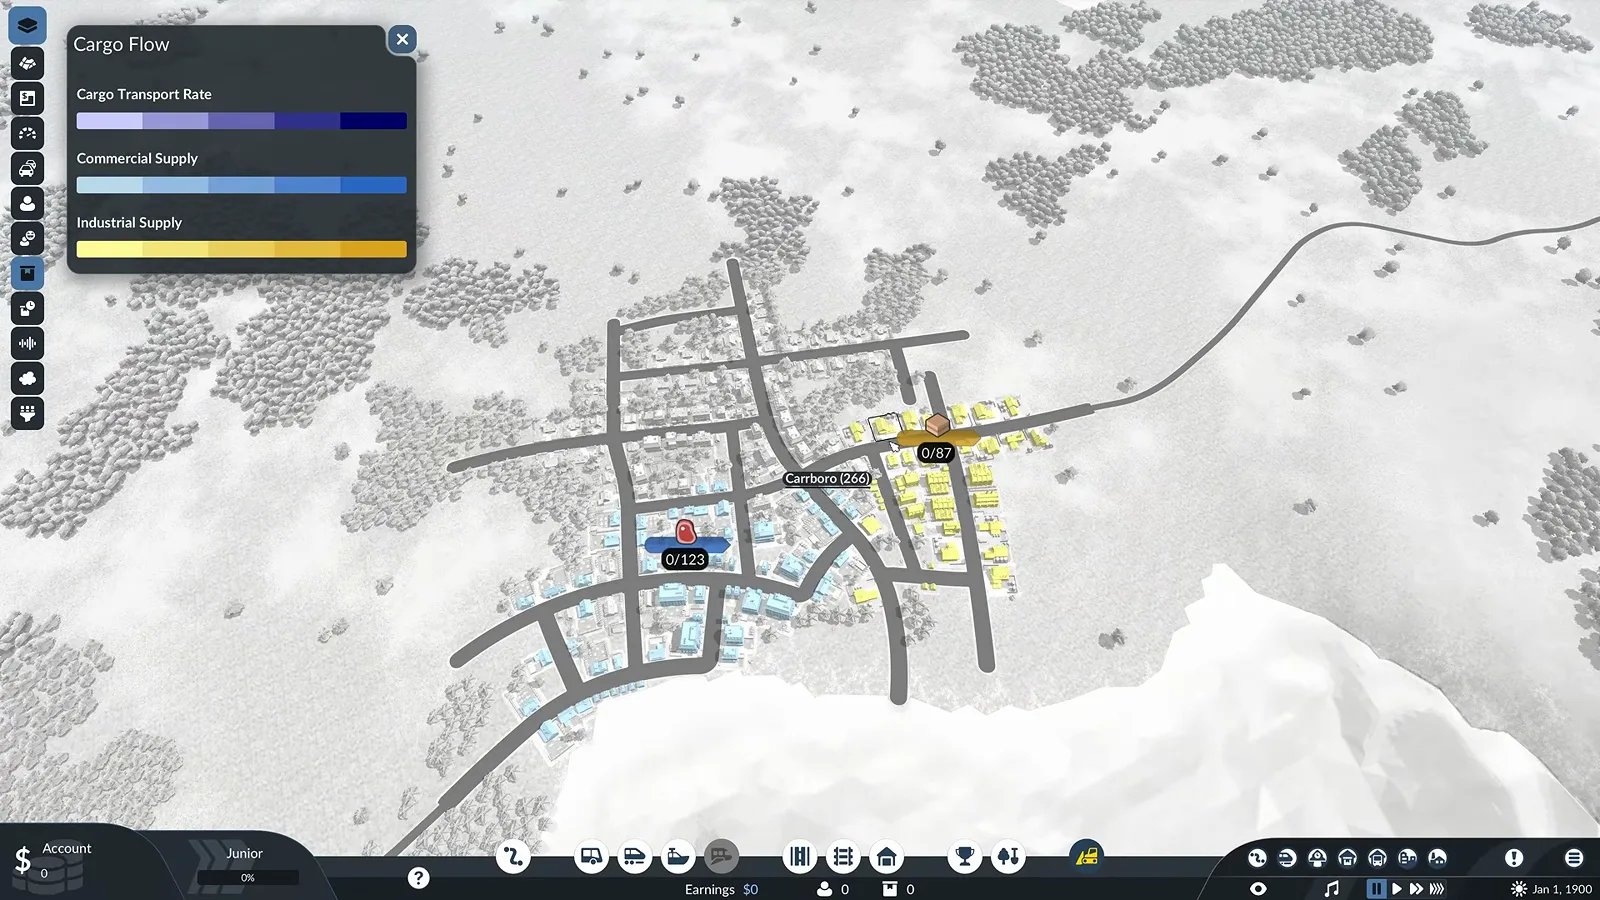
Those two numbers are your first business plan. Watch this step at 3:39 -
Trace the chain from the industry panel
Clicking an industry opens its production panel with input and output storage and the destinations each output ships to. The livestock farm needs wheat and produces meat and wool, which is why the plan here is a grain delivery rather than a direct one.
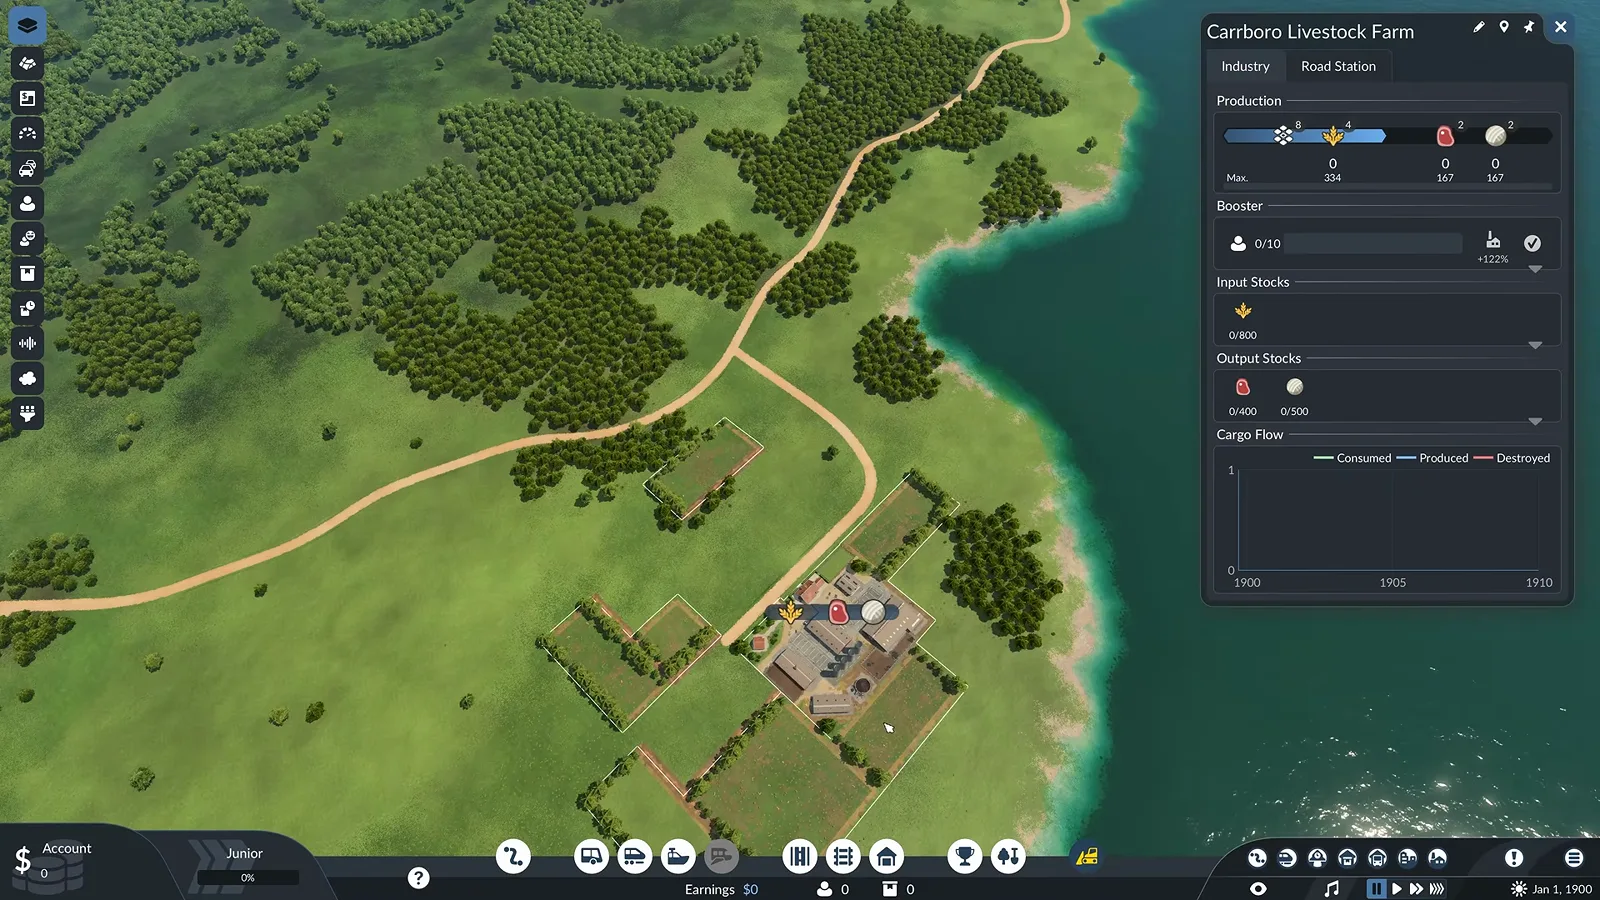
Inputs and outputs tell you which cargo to haul first. Watch this step at 4:23 -
Check every cargo's delivery clock
The Delivery Time tab of the company panel charts how long every cargo type stays acceptable in transit. Meat and other perishables give a fraction of the time that bricks do, and that window decides how long a chain may be.
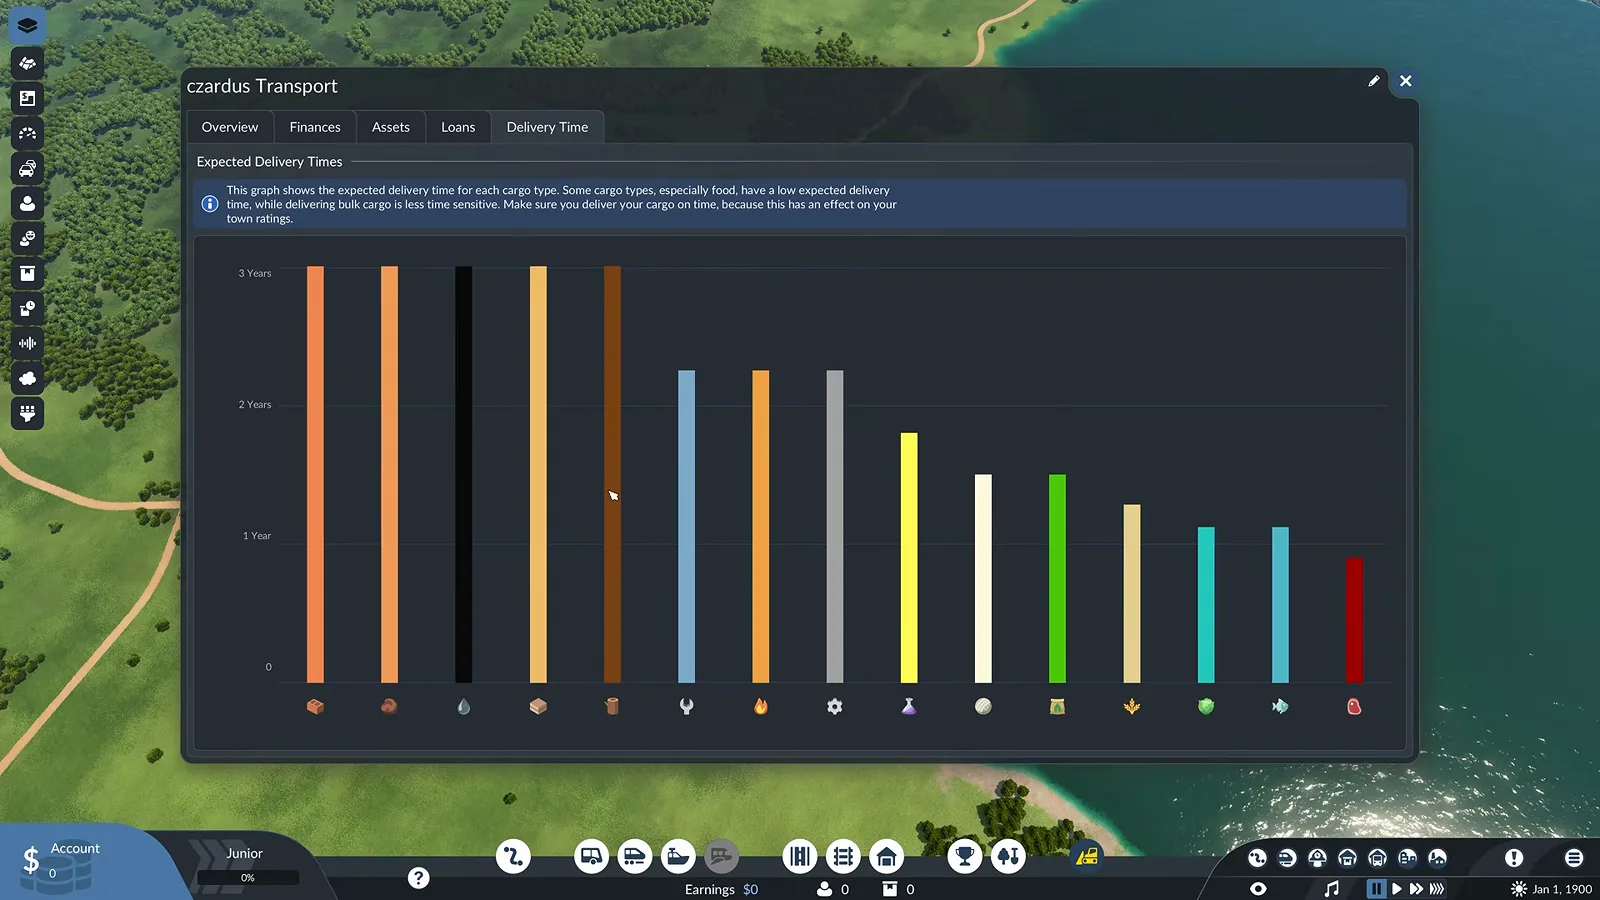
Short bars will not forgive a slow route. Watch this step at 5:53 -
Pick your biggest customer
In the town list, sort by population and open the biggest town. Its unmet demand from the overlays is the demand your first line should feed, because a growing town keeps buying whatever you deliver.
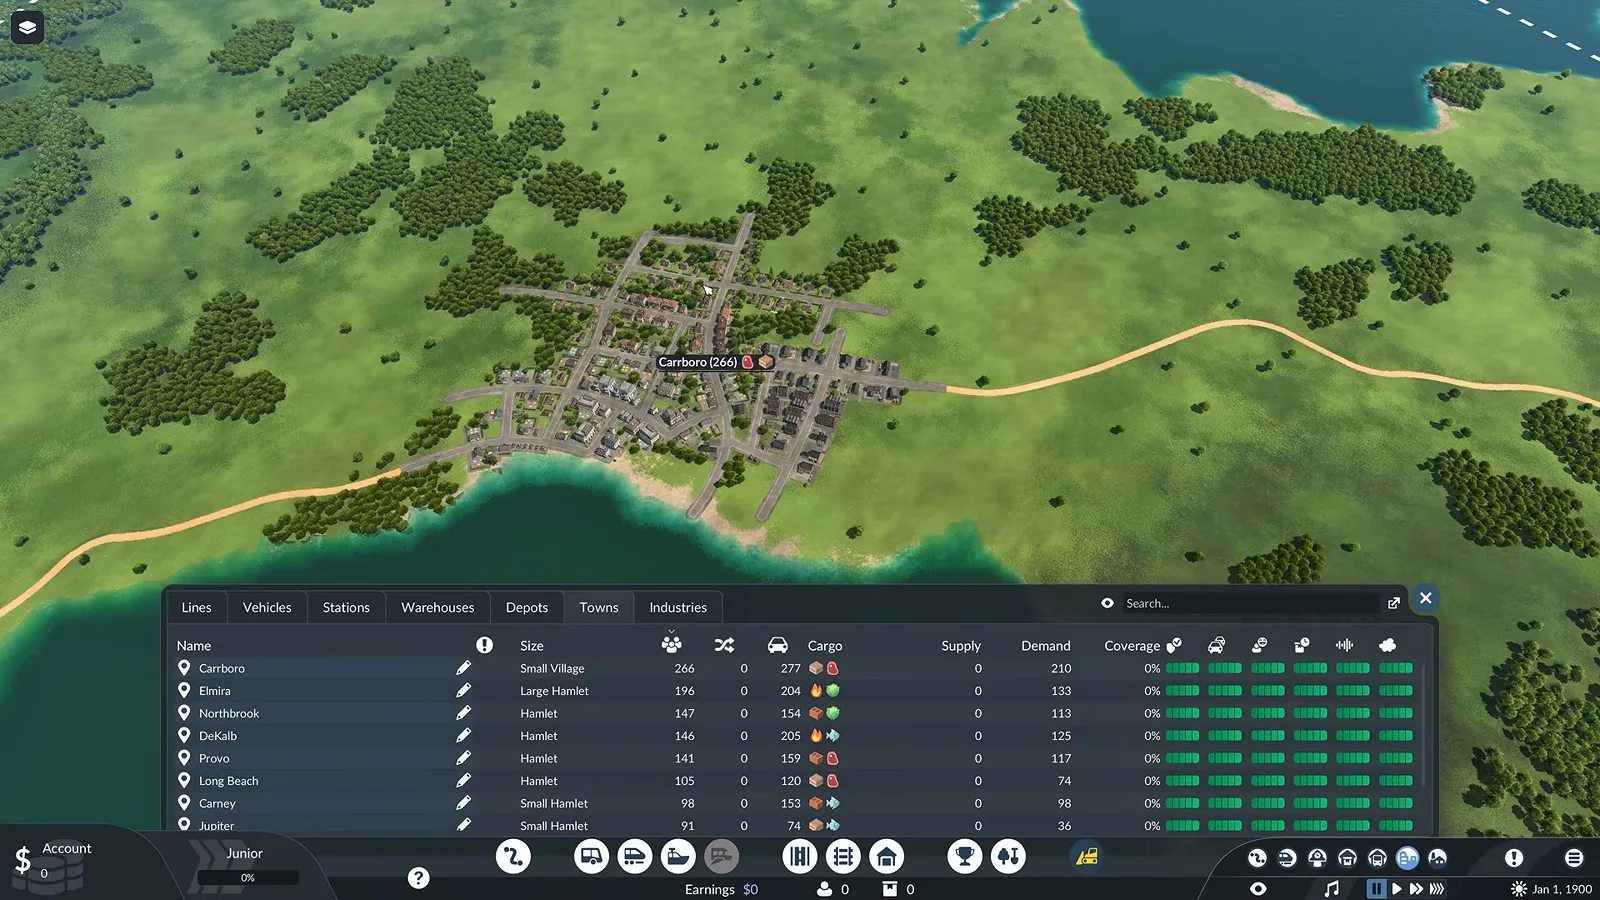
The top of the list is where your first line pays. Watch this step at 8:27
The three overlays do the market research for free. The towns layer tells you whose reputation you damage when you cut a tree too close; the cargo flow layer turns unmet demand into two numbers per district; the industry panels tell you what feeds what; and the delivery-time tab caps how long any of it can ride in a vehicle. If you want a second opinion on where to start on the map itself, the starting position guide compares the map options, and the map sizes comparison explains what a bigger world costs you in simulation and frames.
Build the first line
-
Take the cheapest loan you can service
Loans bridge the months before revenue ramps up. Each offer has its own interest rate and yearly instalment, so pick the lowest rate whose annual payment your cash flow survives, not the biggest headline number.
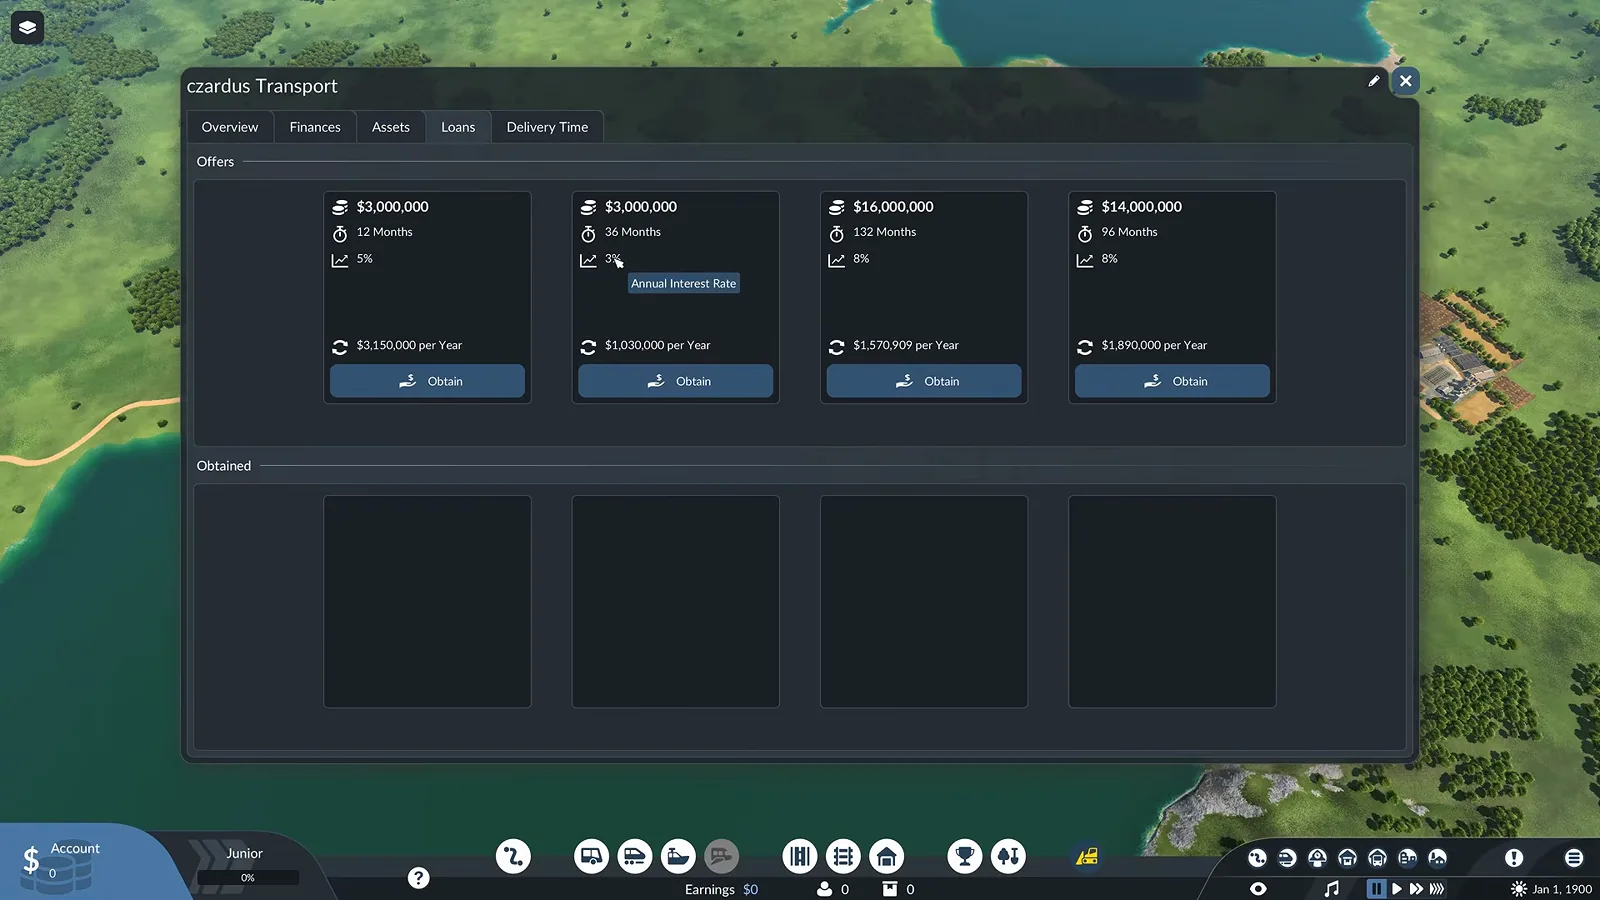
Four offers, four annual bills — check the instalment, not just the rate. Watch this step at 10:51 -
Place a depot and use the industry's own platform
Industries come with their own loading spot, so the depot belongs at the receiving end of the chain. A road depot also carries a maintenance circle that services every vehicle passing through it.
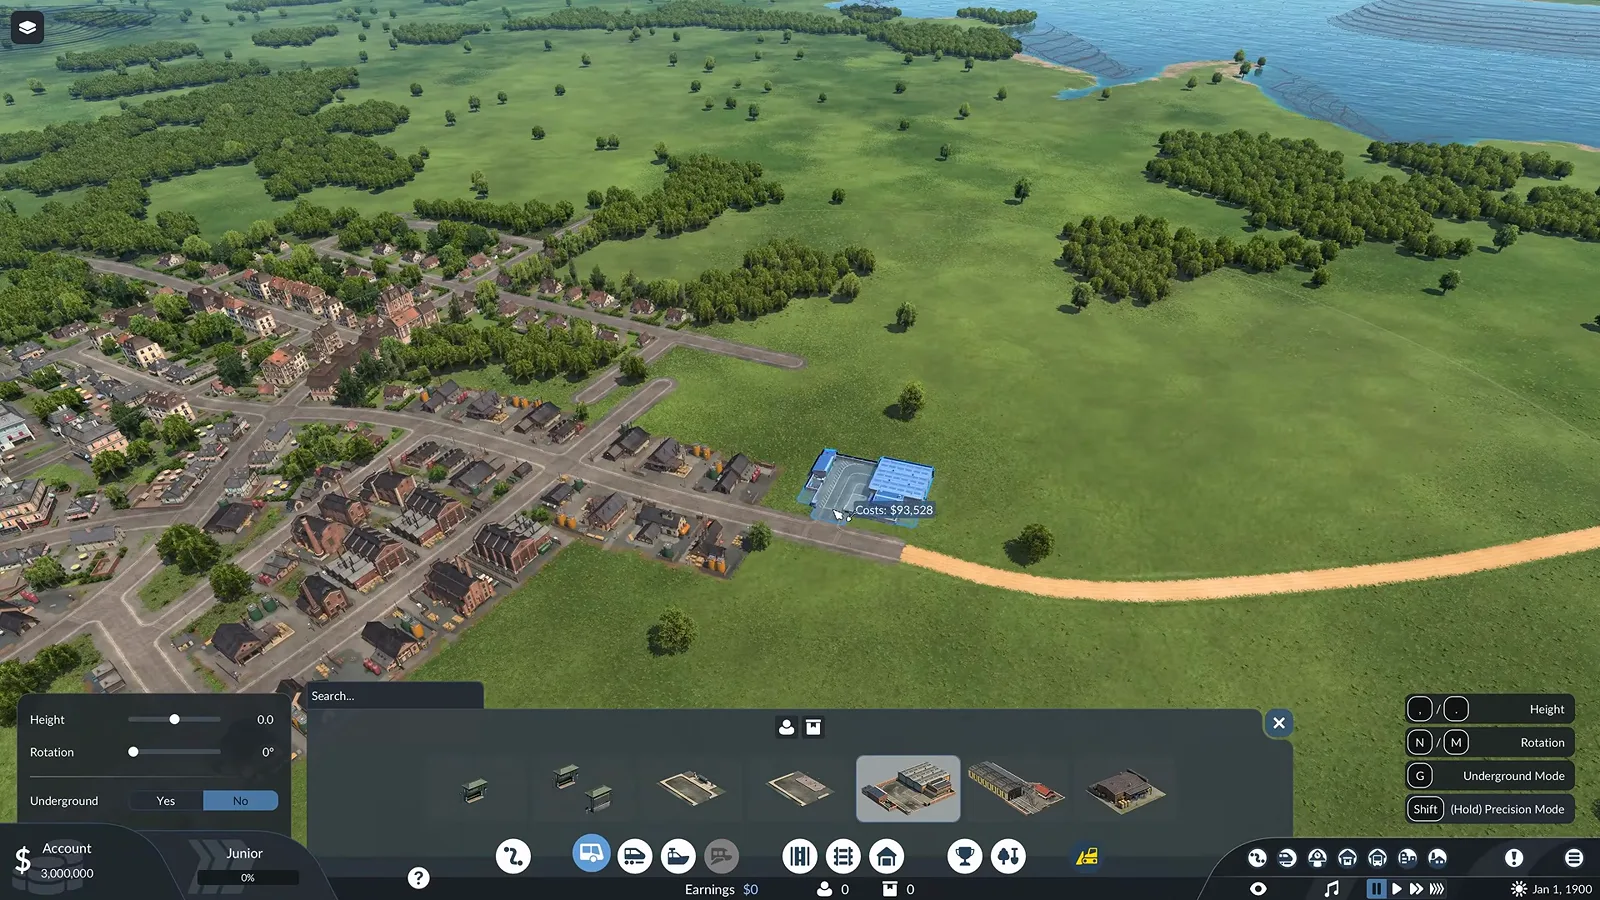
The depot circle services vehicles that drive past it. Watch this step at 11:27 -
Create the line and set its stops
New Line in the line manager waits for you to click stations in the world. Set the industry as the loading stop and a town stop as the unloading stop, and leave passengers out of a freight line.
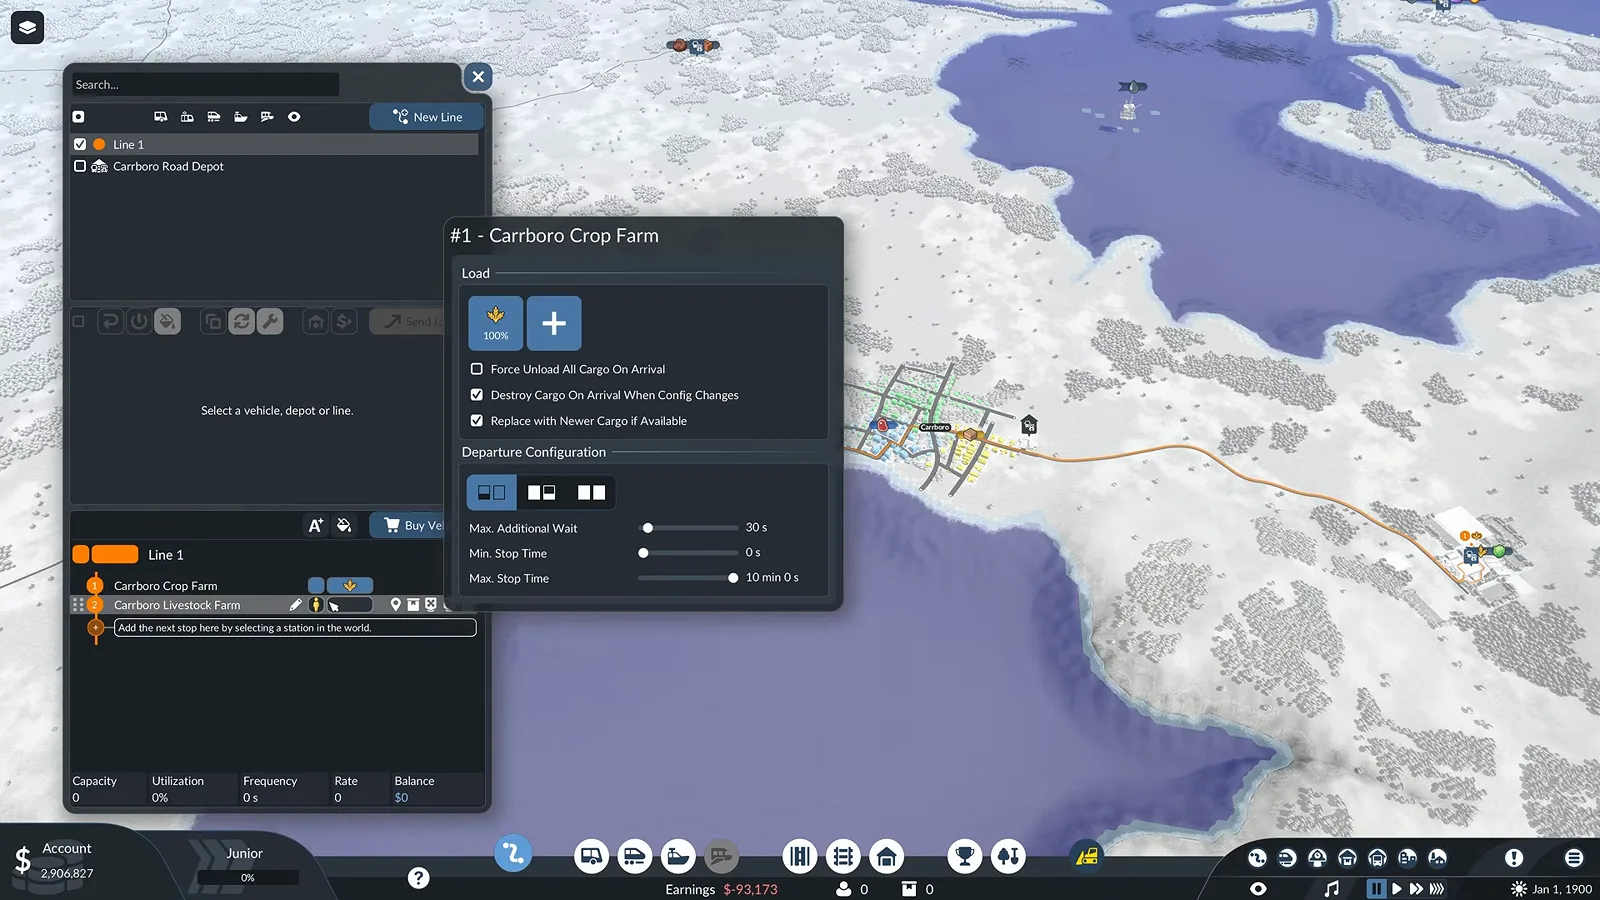
One click on the farm, one on the town — that is a line. Watch this step at 12:10 -
Buy the vehicle that matches the job
The purchase window lists capacity, loading speed and road speed side by side. The walkthrough compares the horse carriage options and takes the cheaper, slower loader, then sends several of them to the line.
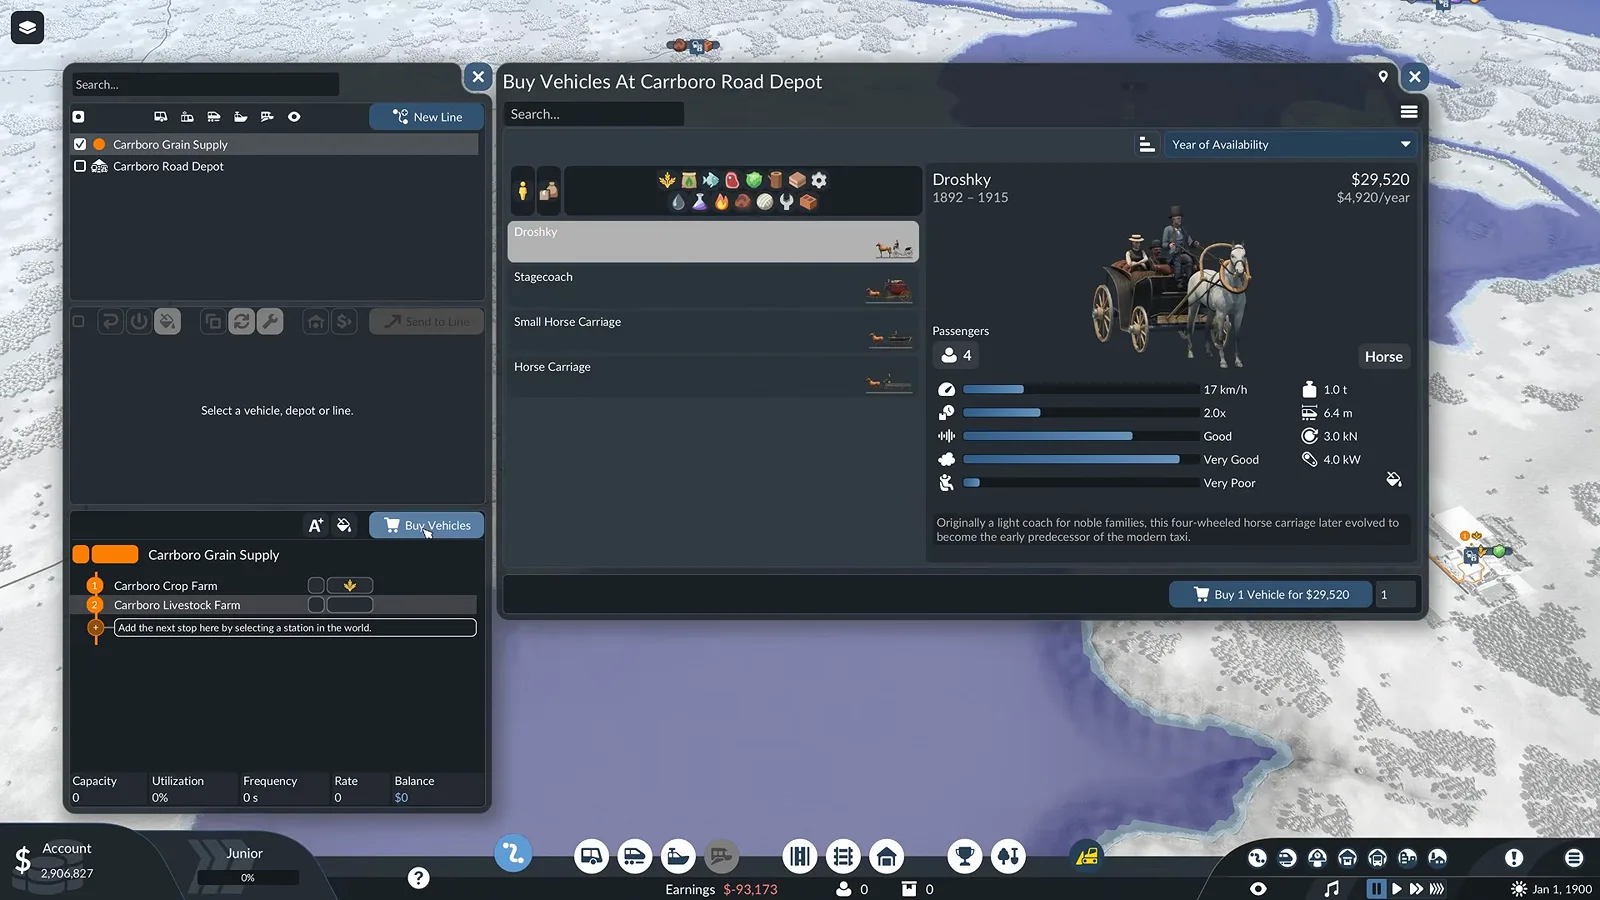
Capacity you cannot fill is money that idles. Watch this step at 12:30 -
Add a town stop so freight reaches the shops
Cargo only pays when it reaches the district that wants it. A small unload-only road stop on the edge of the commercial zone lets the wagon drop the meat in town instead of at the industrial rim.
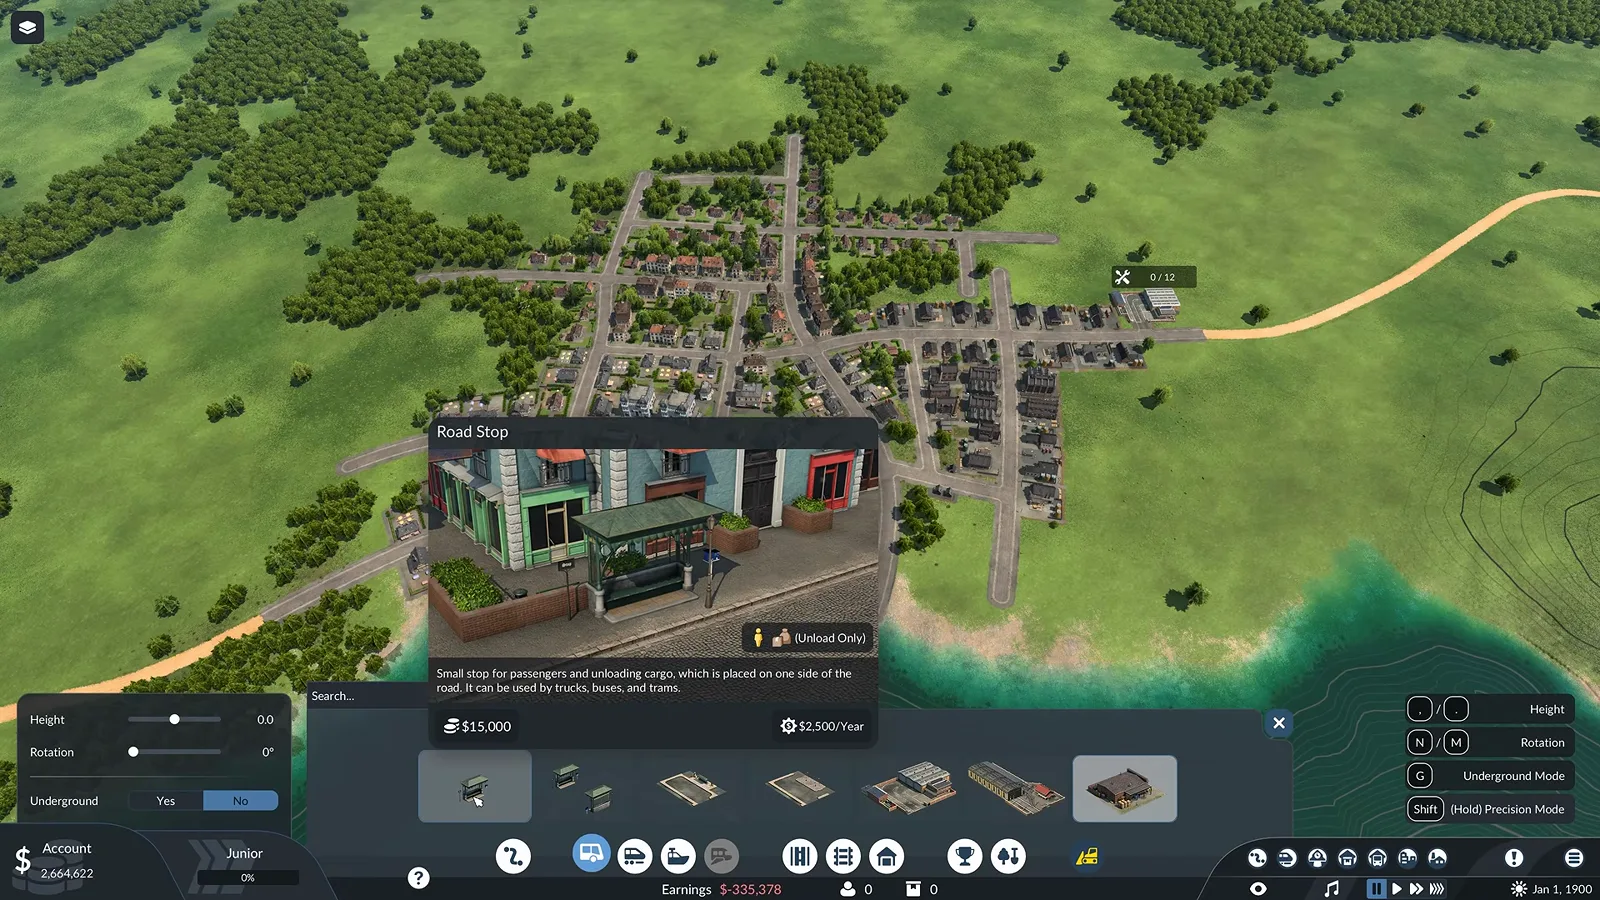
Unload-only is exactly what a delivery stop should be. Watch this step at 13:25
The first line in the video is deliberately unglamorous: grain to a livestock farm, meat onward to the commercial district, horse carriages doing the hauling. That is the pattern worth copying — a short chain where every stop has a customer. When the money starts moving, the cargo and warehouse guide is the next step up in chain design, and if your first chain involves a harbour, the fishing guide walks the dock-to-market route in detail.
Run it, judge it, grow it
-
Follow the first delivery
The vehicle window tracks the load level, noise, pollution and condition of the wagon while it works, and the balance chart shows what the run actually earned. Watch one full round trip before you judge the line.
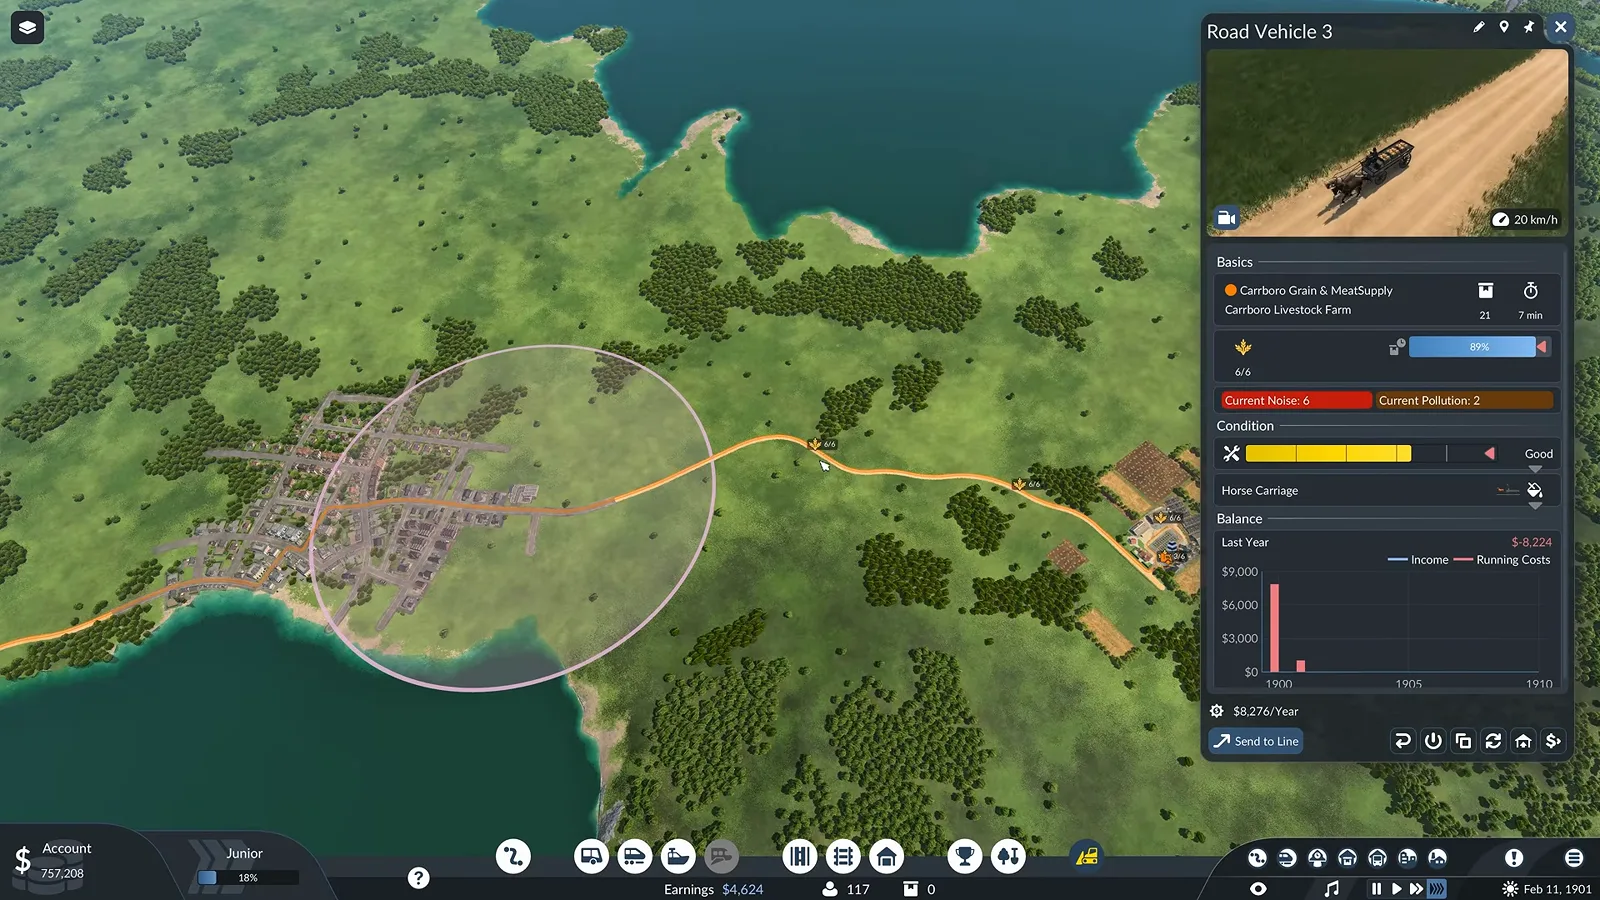
One vehicle window tells you load, condition and earnings at once. Watch this step at 19:03 -
Weigh the subsidy before you accept
Subsidy offers pop up as notifications and pay a large reward for connecting a specific demand — the walkthrough accepts a passenger subsidy for the Provo Clay Pit worth ten million on completion, with a smaller payment just for accepting and six years to deliver.
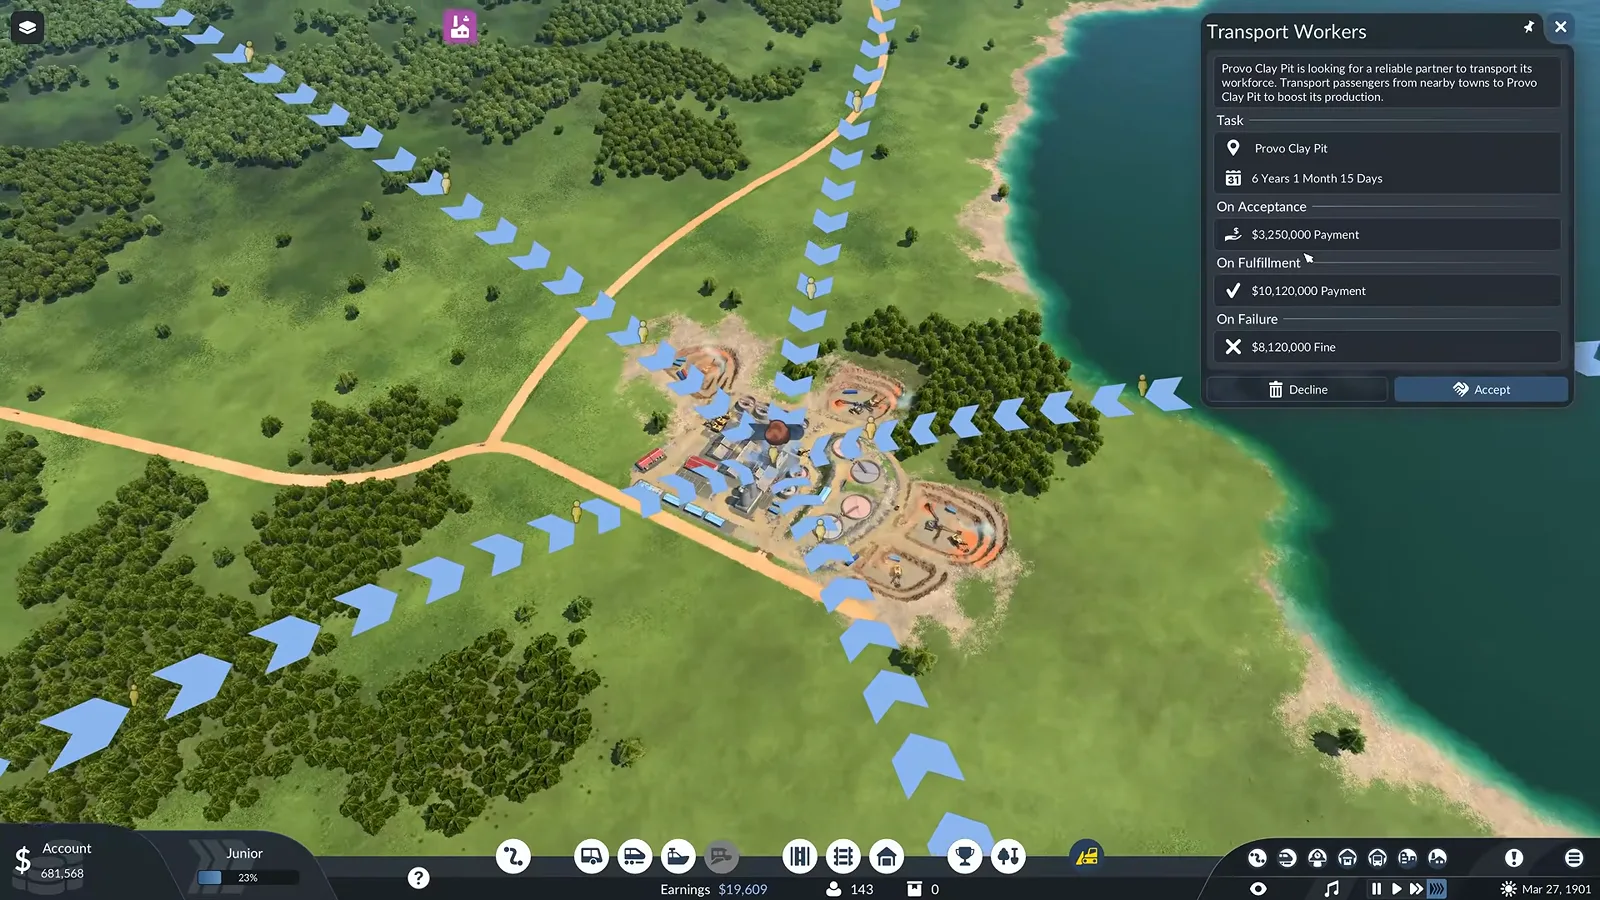
A ten million reward — if the network can actually reach it in time. Watch this step at 19:47 -
Read the ledger before you expand
The lines list shows capacity, utilization, frequency and balance for every line at once. The town bus line is the early star in the video while the grain line catches up — copy what works before you borrow for the next chain.
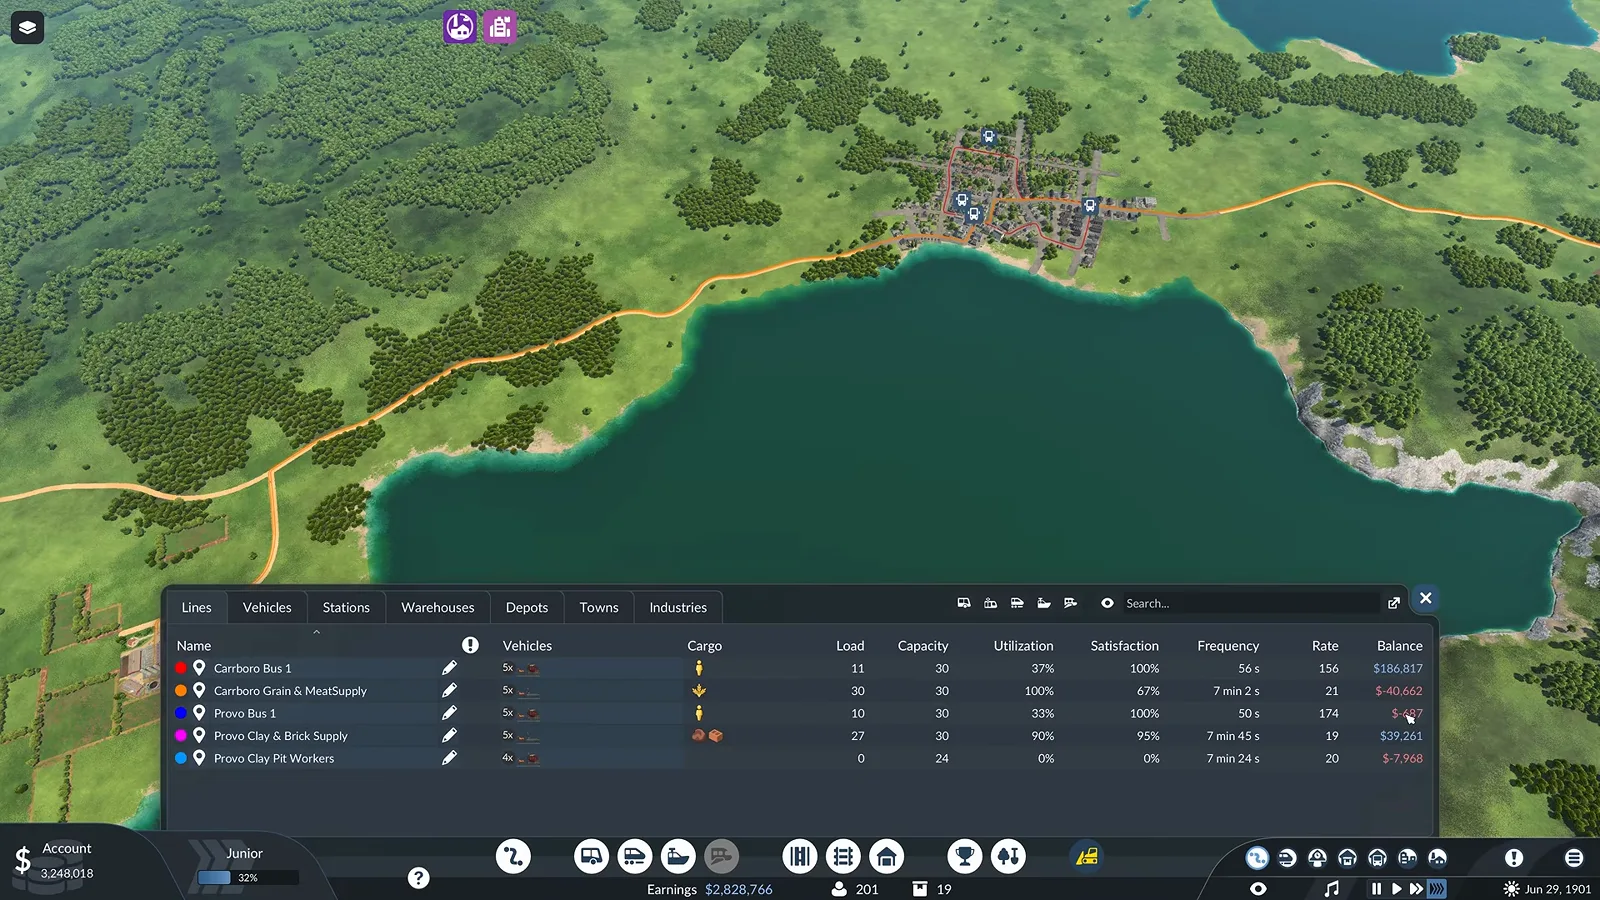
Utilization is the honest number on the page. Watch this step at 23:23
Two habits pay for everything that follows. First, follow your own vehicles: the vehicle window’s load and balance chart is the fastest honest verdict on a line. Second, read the lines list before every purchase — utilization tells you whether the fleet you own is actually worked, and the money strategies page goes deeper into loans and subsidies than we do here. When you are ready for the wider checklist, the beginner tips collect the twelve habits that keep young companies solvent, the Mission 1 walkthrough teaches the campaign’s own tutorial mission step by step, and the underground subway guide shows what to build once a city outgrees its streets.
Source
The walkthrough above is built from Czardus’s video How To Start In Transport Fever 3 | Ultimate Beginners Guide (24:46), which plays a complete first hour: new game setup, the map overlays, the first grain-and-meat line, a town bus loop and the first subsidy. Each step links to the exact second it is demonstrated. Screenshots are the creator’s footage and are used only to illustrate the written steps.
Related reading
- Transport Fever 3 beginner tips — the twelve habits this page builds on.
- Starting position guide — choose the map before the loan.
- Map sizes compared — how world size changes the whole economy.
- Cargo and warehouse guide — the chain design behind the first delivery.
- Legit money strategies — loans and subsidies in more depth.
- Fishing guide — the classic first cargo chain, port to plate.
Related Articles
guides
Transport Fever 3 Bus and Tram Guide: City Passenger Networks
Set up bus and tram networks in Transport Fever 3: read passenger demand, wire the district cycle, add bus lanes, connect towns intercity and upgrade to trams.
guides
Transport Fever 3 First Train Line: A Step-by-Step Rail Guide
Build your first train line in Transport Fever 3 step by step: cargo station, catchment, double track, switches, path signals, loans and the right wagons.
guides
Transport Fever 3 vs 2: What Changed and Should You Upgrade?
Transport Fever 2 to 3 changes compared: biomes, day-night cycle, warehouses, helicopters, mods and price — plus an honest verdict on whether to upgrade.
Was this helpful?
Thanks for the feedback!