Transport Fever 3 First Train Line: A Step-by-Step Rail Guide
Build your first train line in Transport Fever 3 step by step: cargo station, catchment, double track, switches, path signals, loans and the right wagons.
FAQ
How do you build a train line in Transport Fever 3?
Should your first rail line be double track?
What do the M and N keys do in Transport Fever 3?
Is terraforming worth it in Transport Fever 3?
Which engine should you buy for your first train?
Which wagons haul logs in Transport Fever 3?
How do you add a town stop to a rail line?
Your first road line teaches you the loop; your first train line teaches you the map. Rail is where Transport Fever 3 starts charging you for geography — every hill, river and street corner shows up in the track bill — and where a little patience before the first click pays for itself for the rest of the save. This page follows one complete build from a bare logging camp to a three-stop freight service earning over a million a year, with the exact screens from the video at every step.
Lay the rails
-
Place the cargo terminus at the loading end
Start in the Rail menu, not with roads. Pick a terminus station, set its track count and platform length in the Settings panel, and rotate with M and N until the platforms point where the exit track will leave.
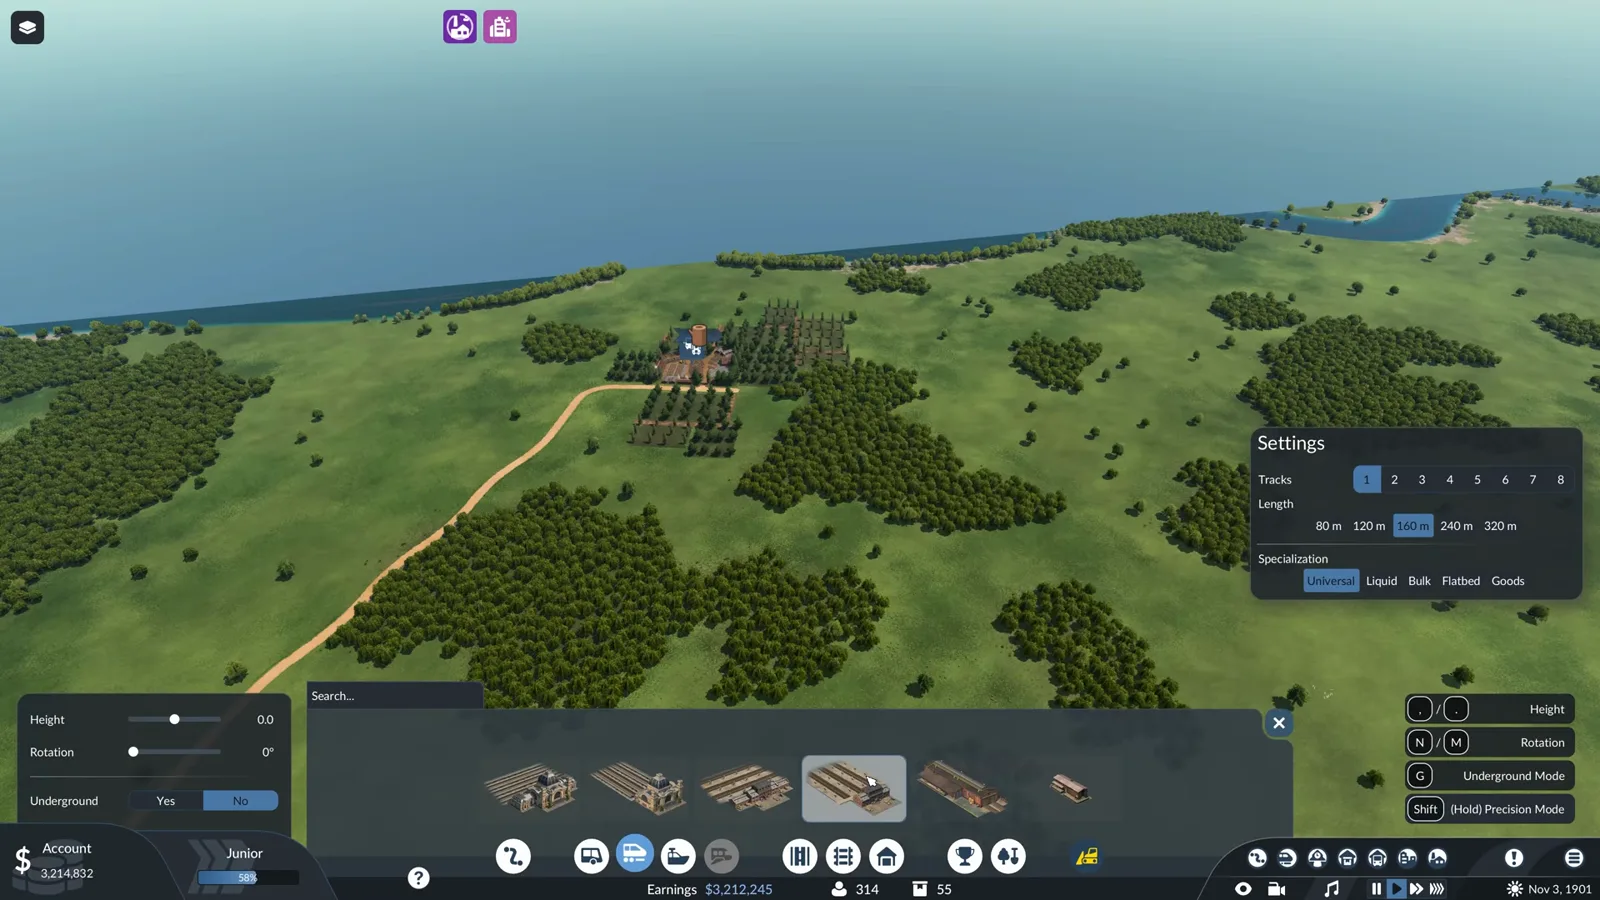
Track count, platform length and specialization are decided before anything is built. Watch this step at 2:06 -
Keep the station inside the industry catchment
The station window draws a blue catchment circle, and cargo only flows if the industry sits inside it. Dekalb Station here reaches the logging camp with room to extend the platforms outward later.
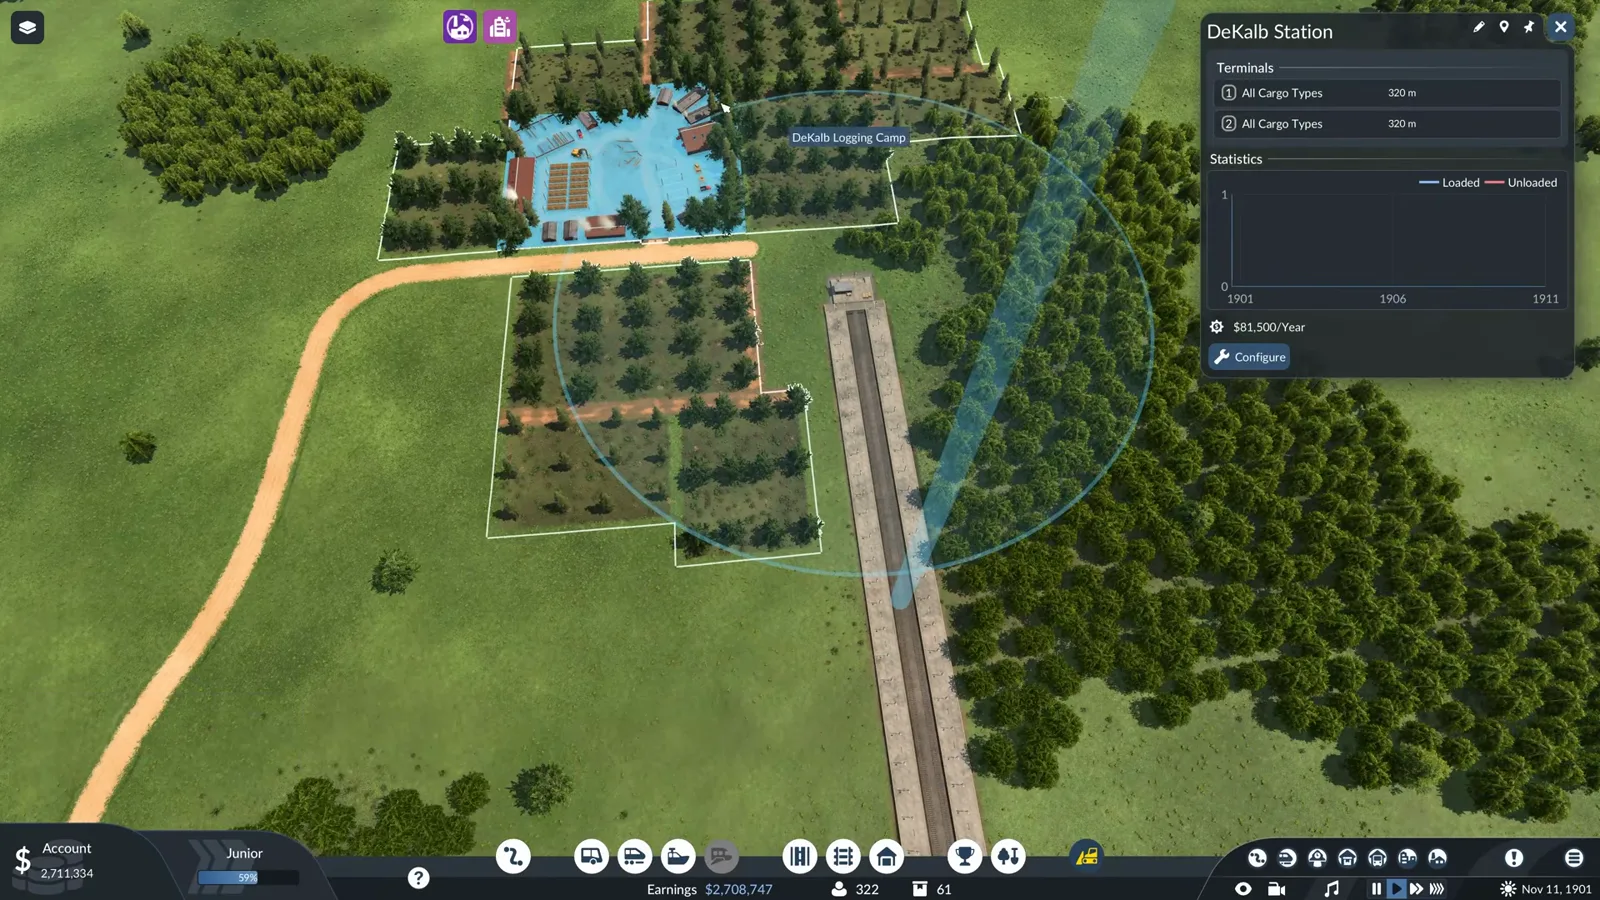
The blue circle has to swallow the industry before the first wagonload moves. Watch this step at 2:38 -
Draw the first track out of the station
With the track tool active, click the station end and blue dots show the segment snapping to the route as you drag. Height, bend and snapping controls stay in the left-hand panel the whole time.
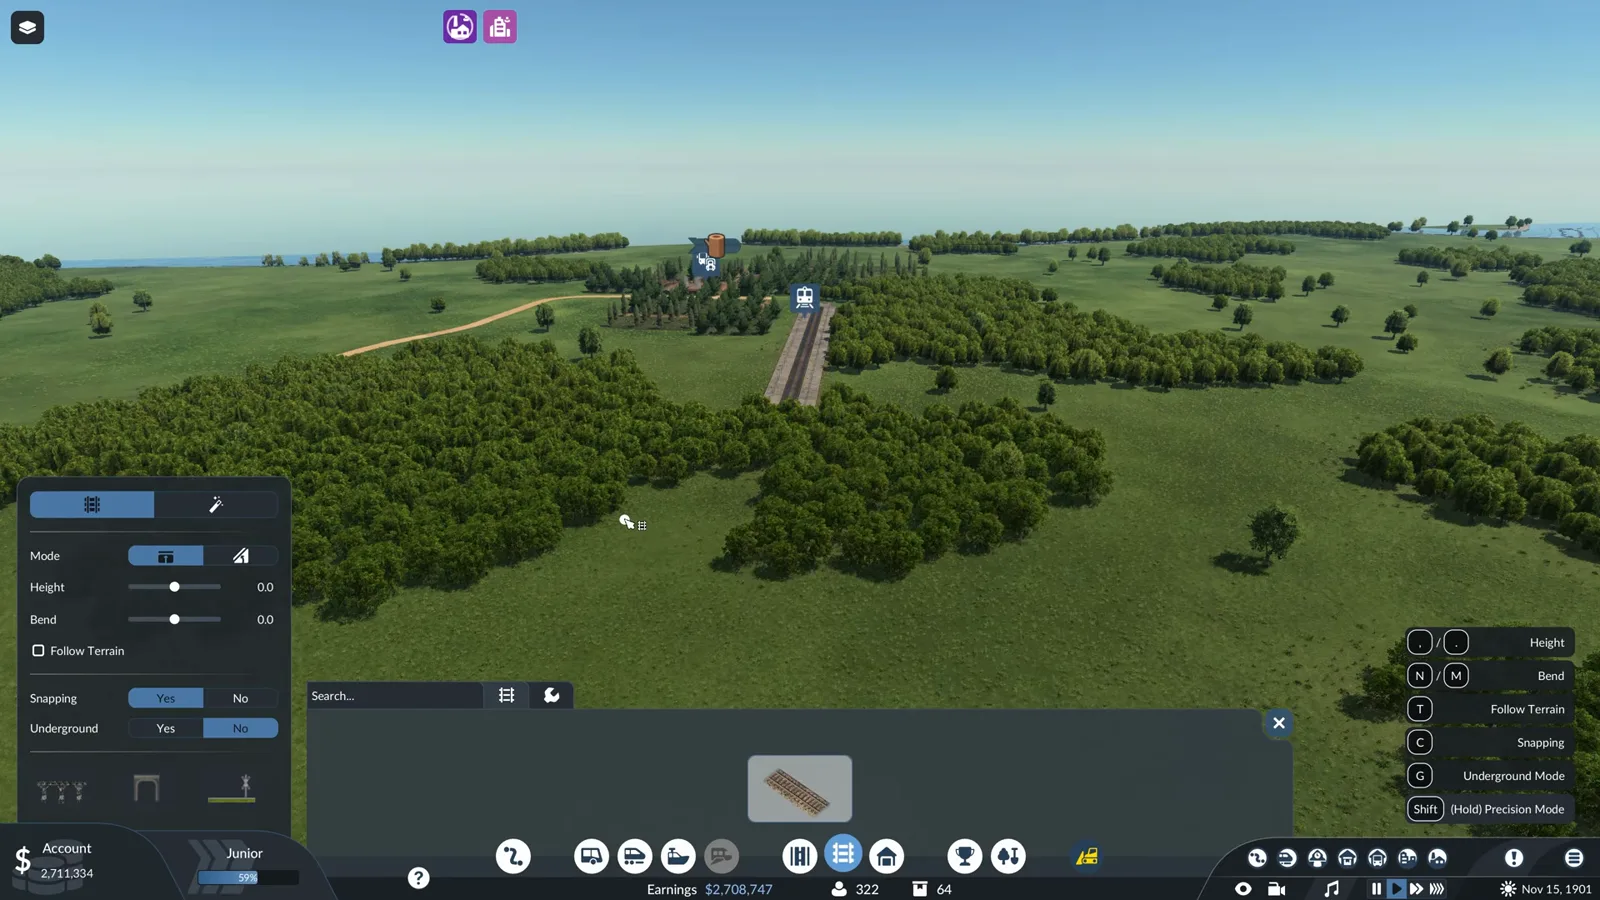
The tool panel never closes while you draw. Watch this step at 2:54 -
Survey the route before you commit
The walkthrough prospected first: a long straight segment quotes its cost, length and rotation in a floating readout as you aim it. Getting the straights down before the curves keeps both the price and the grade down.
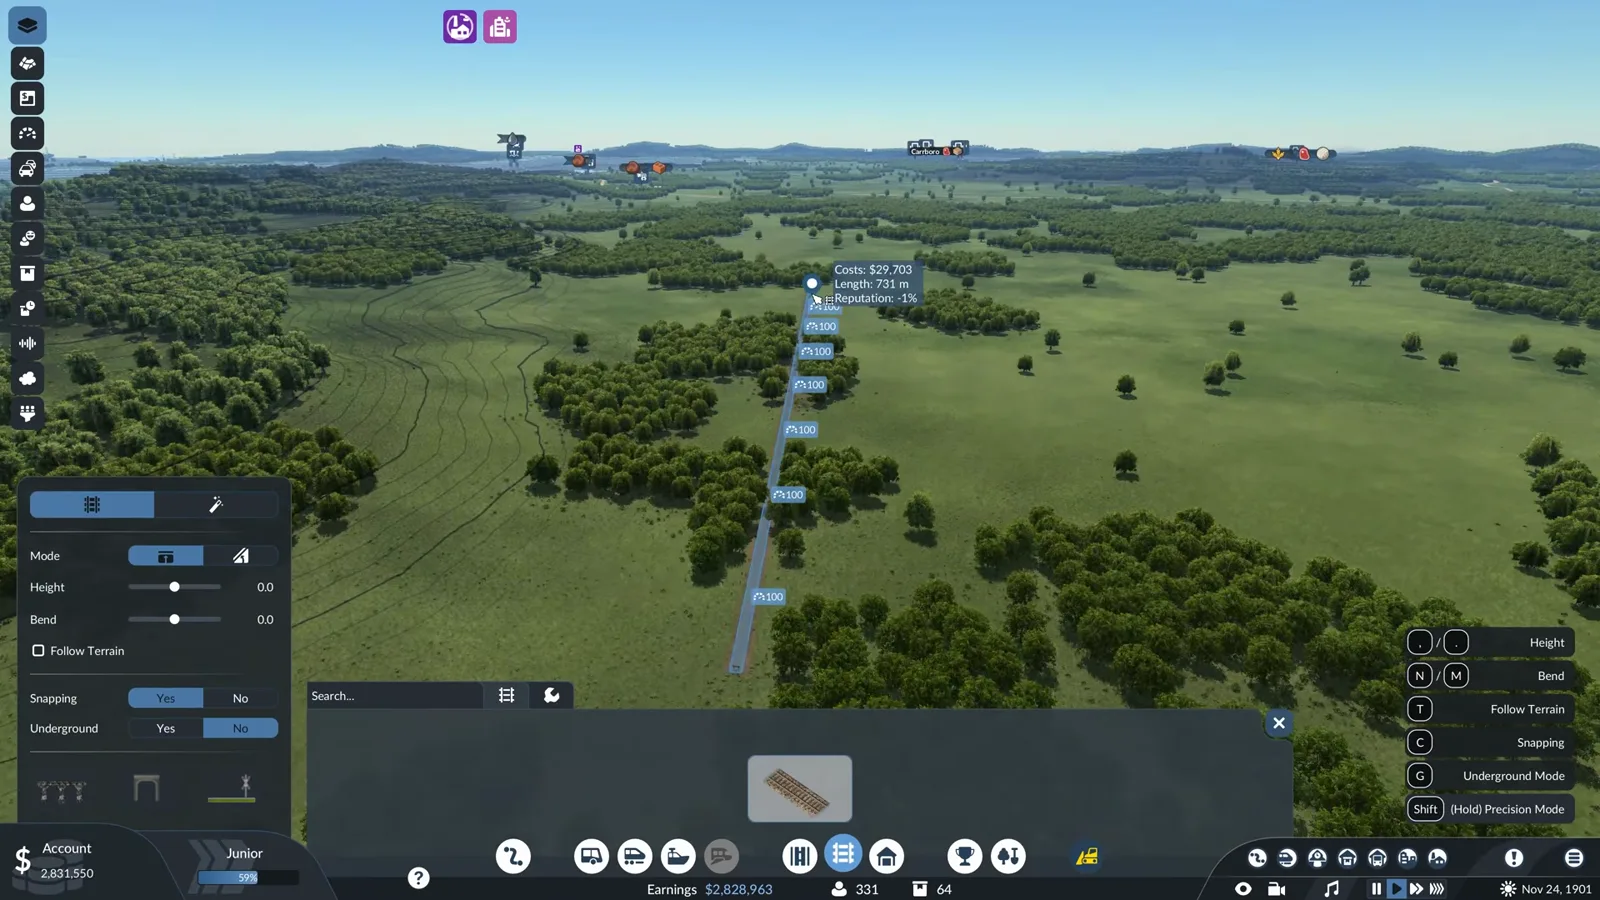
Cost, length and rotation are quoted before you click. Watch this step at 3:32 -
Snap a second track beside the first
Double track is built by clicking next to the existing rail and letting each new segment snap parallel, piece by piece. The tooltip quotes the extra length and the angle of every piece as it follows the finished track.
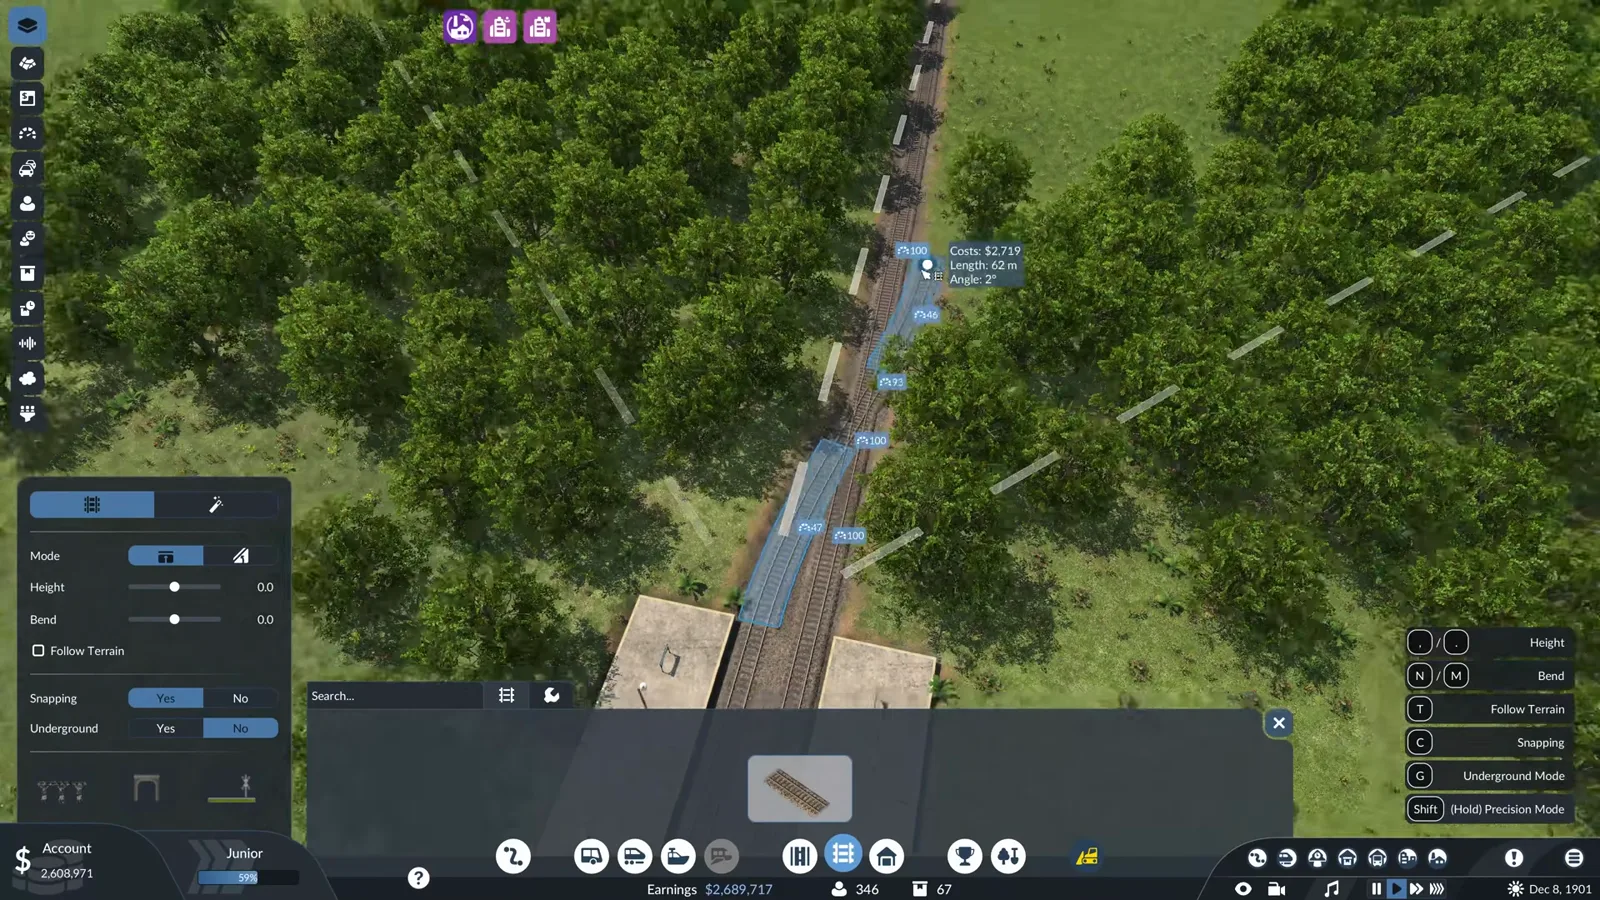
Every section snaps parallel and quotes its own price. Watch this step at 4:14 -
Flatten terrain only where you must
Where the line has no way around a hill, the landscaping tool flattens it, but terraforming is expensive and damages town reputation. The video spends it grudgingly and prefers curving along the shore where the ground is already level.
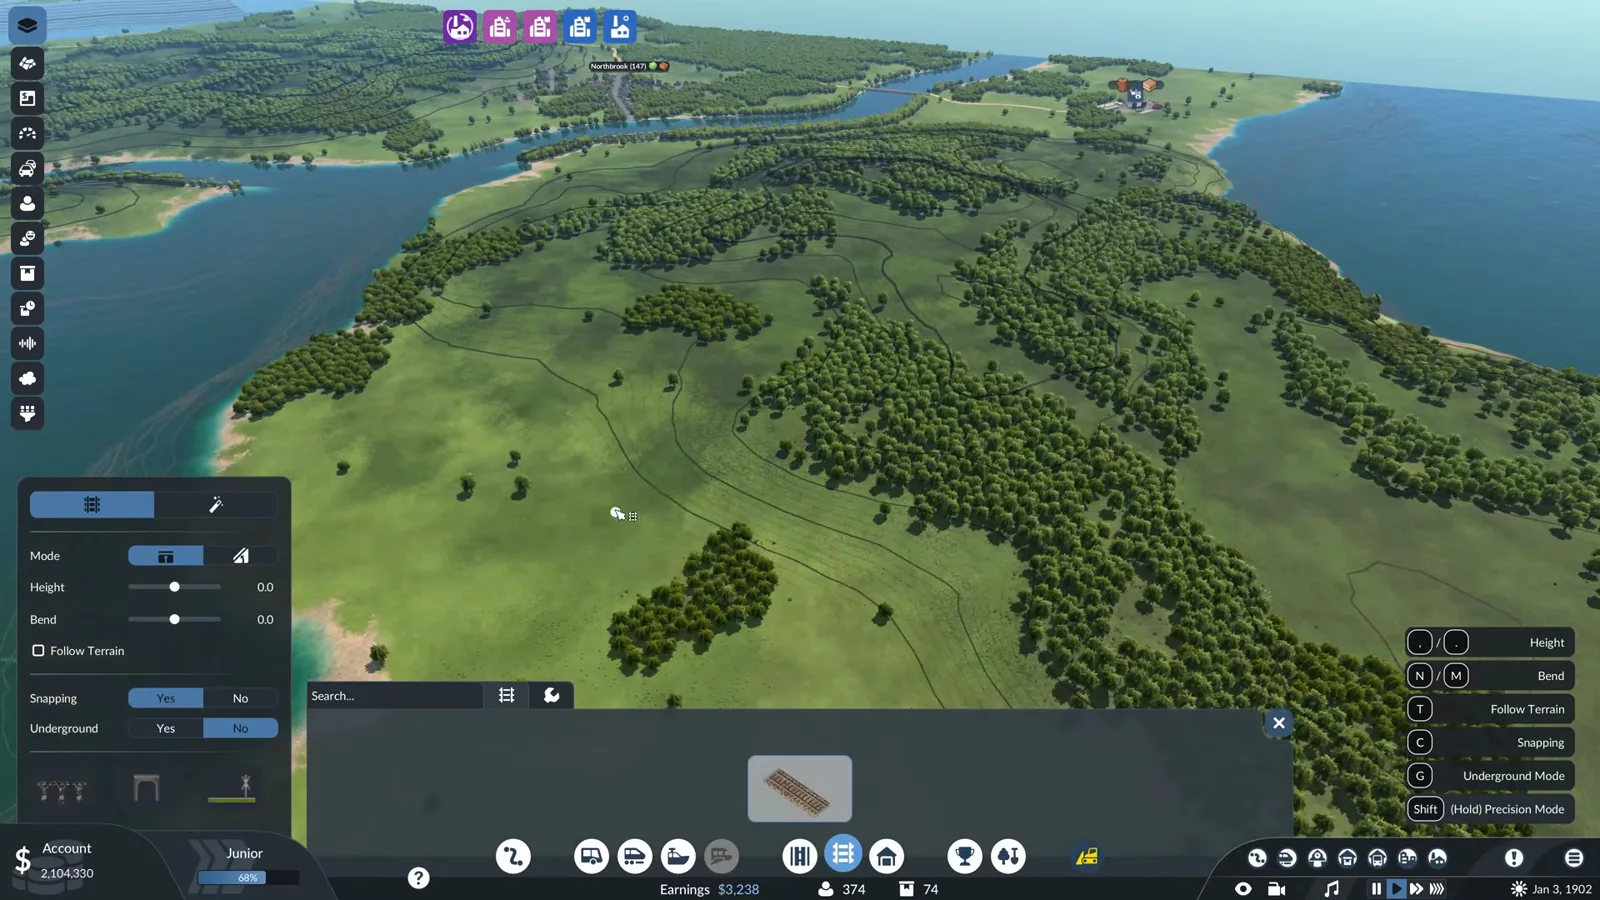
Contour lines show exactly where the ground fights back. Watch this step at 6:00
Everything before the first train is placement math: a station whose circle swallows the industry, a route that reads the contours instead of fighting them, and a second track snapped beside the first so the line is born double. The same catchment logic that drove the first road delivery in the beginner guide applies here — only the circle is bigger and the bill is too. If the city itself blocks the route, the underground subway guide shows how to dive the line beneath it, and the starting position guide explains why some maps make this chapter easy and others brutal.
Switches, signals and the first train
-
Build the crossover at the station throat
A curve drawn from one track across the other creates a switch, and two switches make a crossover so trains can reach either platform. The ghost quotes the connecting piece at 42 metres and 11 degrees before you confirm.
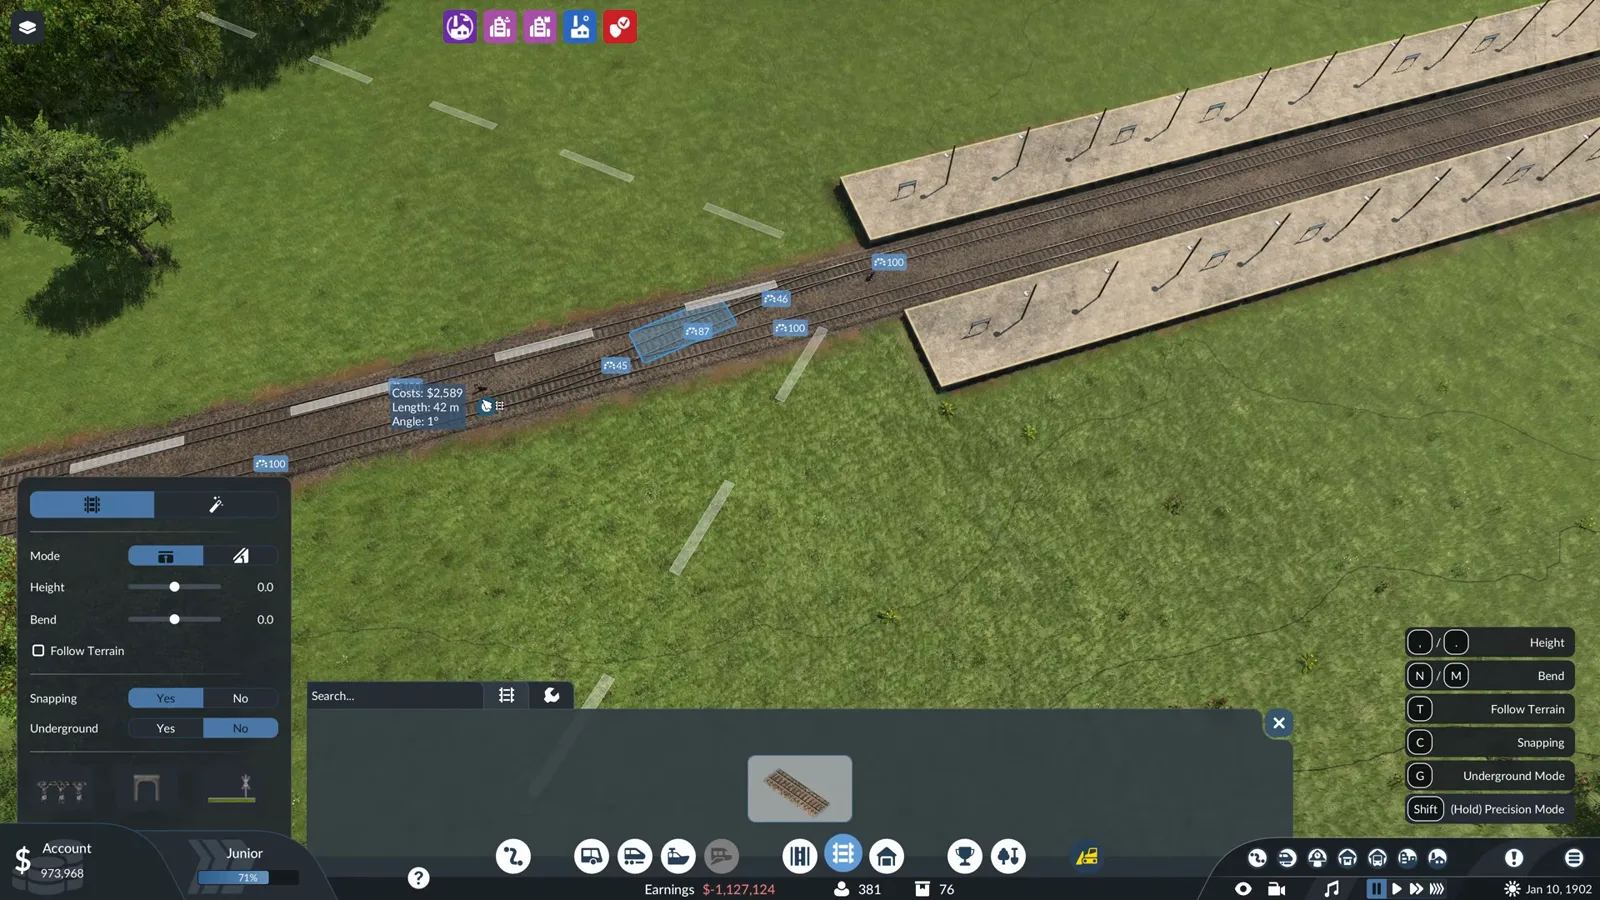
One curve across the rails is all a switch is. Watch this step at 6:56 -
Set path signals to one-way
The tools menu sells a path signal that regulates traffic or acts as a one-way signal for $4,500 plus $750 a year. The video sets One-Way to yes and works down the line, enforcing right-hand running as it goes.
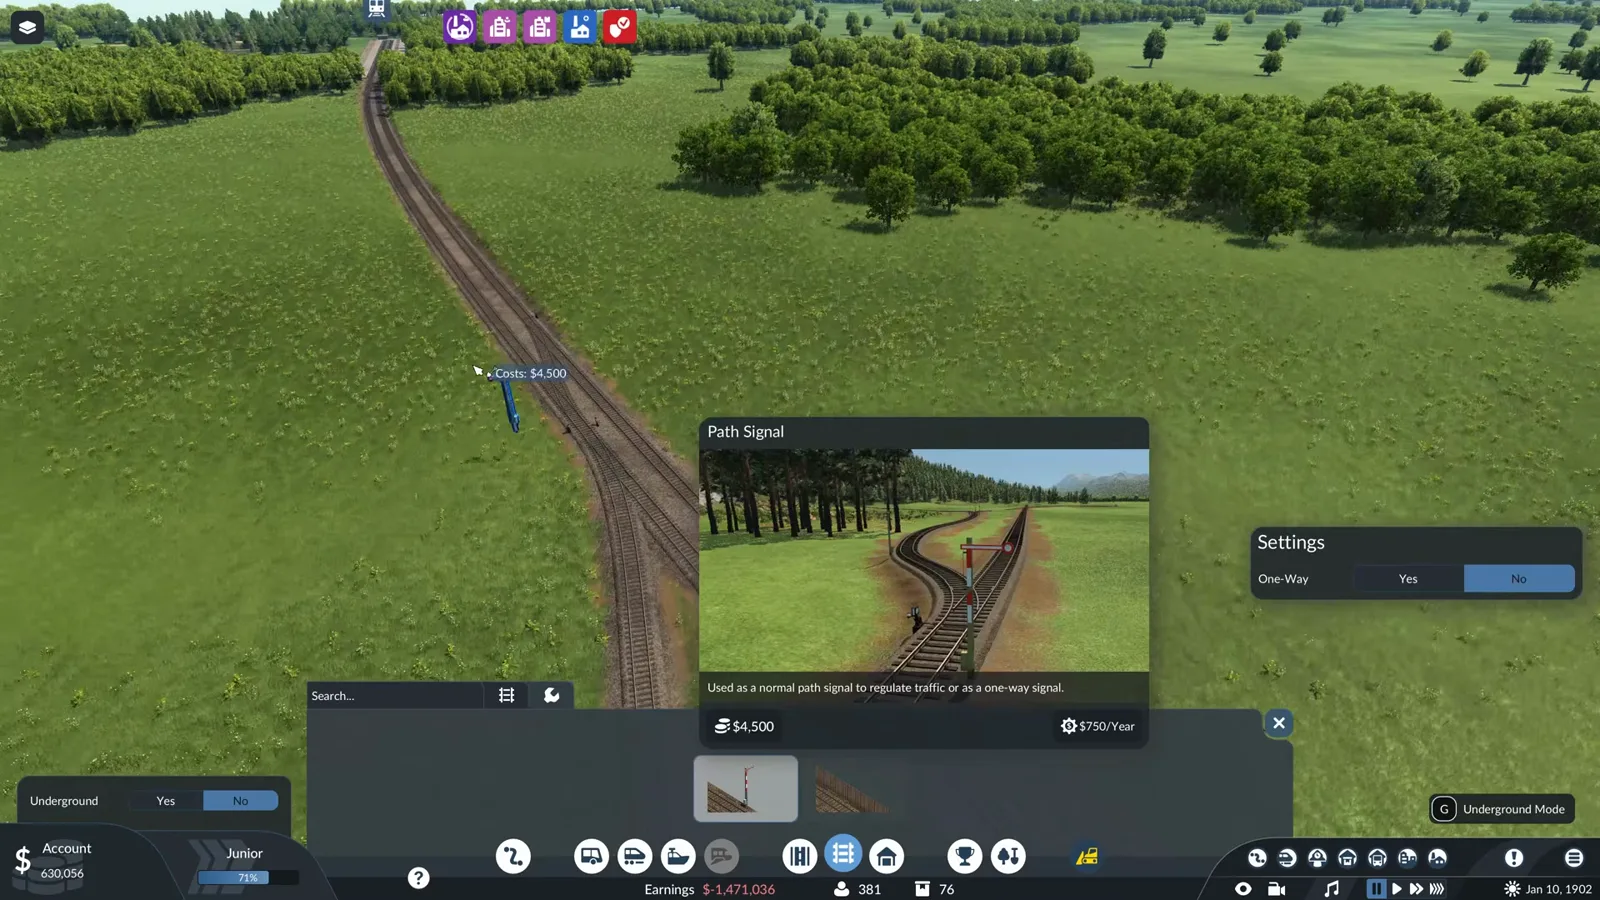
One card, two jobs: block signal or one-way valve. Watch this step at 8:04 -
Create the line and pin its two stops
New Line waits for you to click stations in the world. The freight route gets exactly two: the loading terminus and the unloading station, with the prompt walking you through the stops one by one.
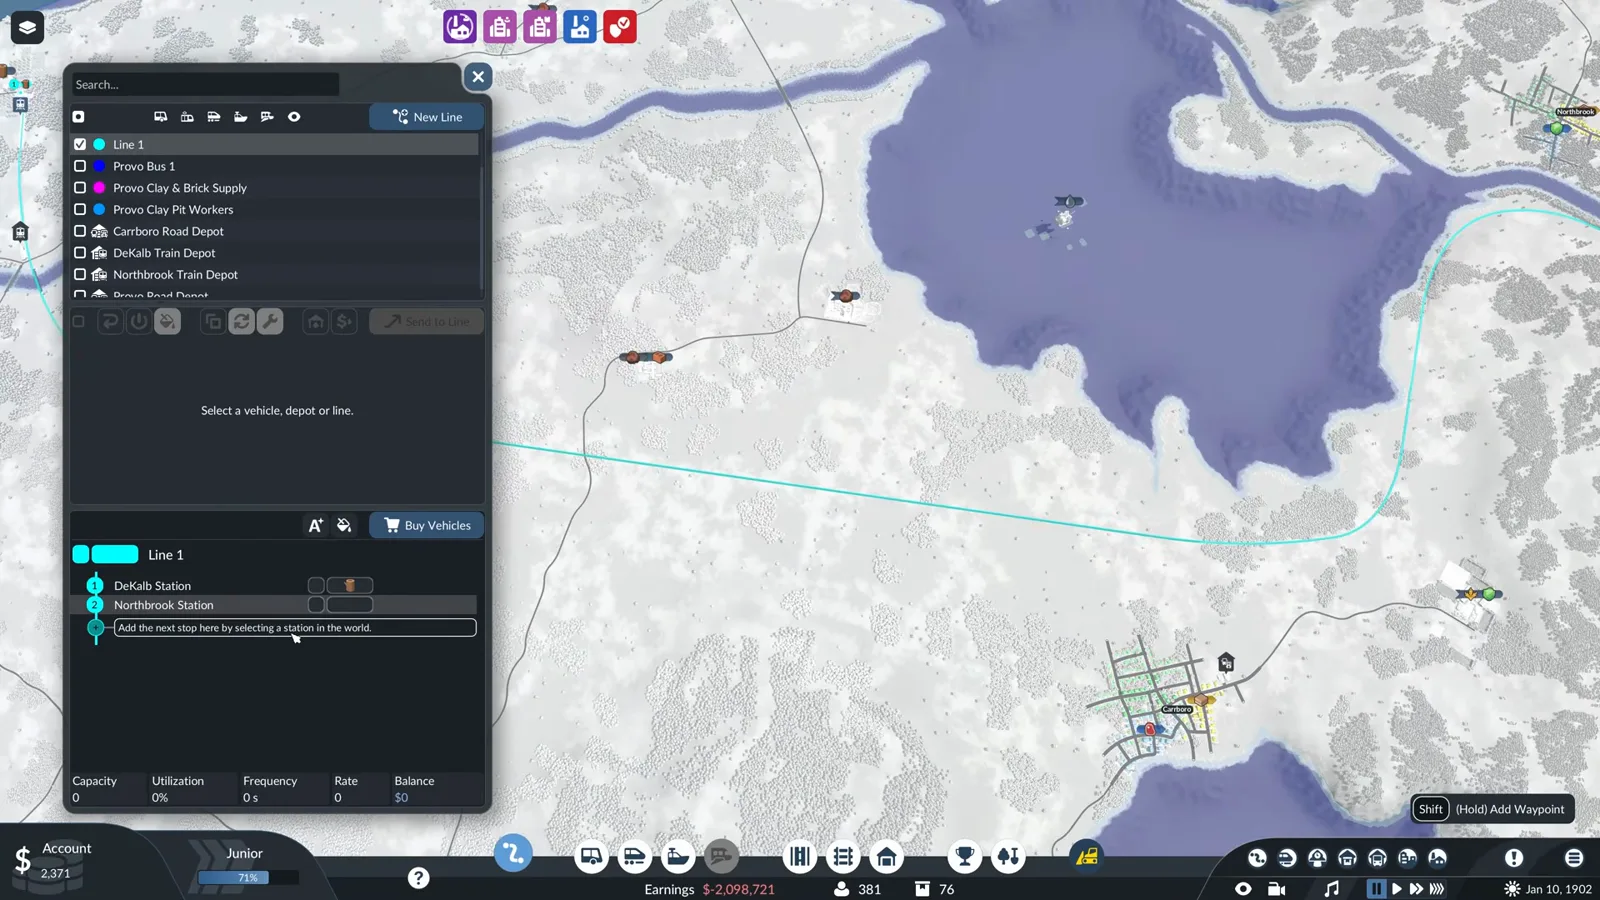
Two clicks, two stops — the line exists. Watch this step at 10:20 -
Fund the purchase with the cheapest loan
Trains are not cheap, so open the company Loans tab and compare offers: four million at 5 percent over 24 months, up to 22 million at 11 percent over 204. The walkthrough takes the lowest interest rate it can service.
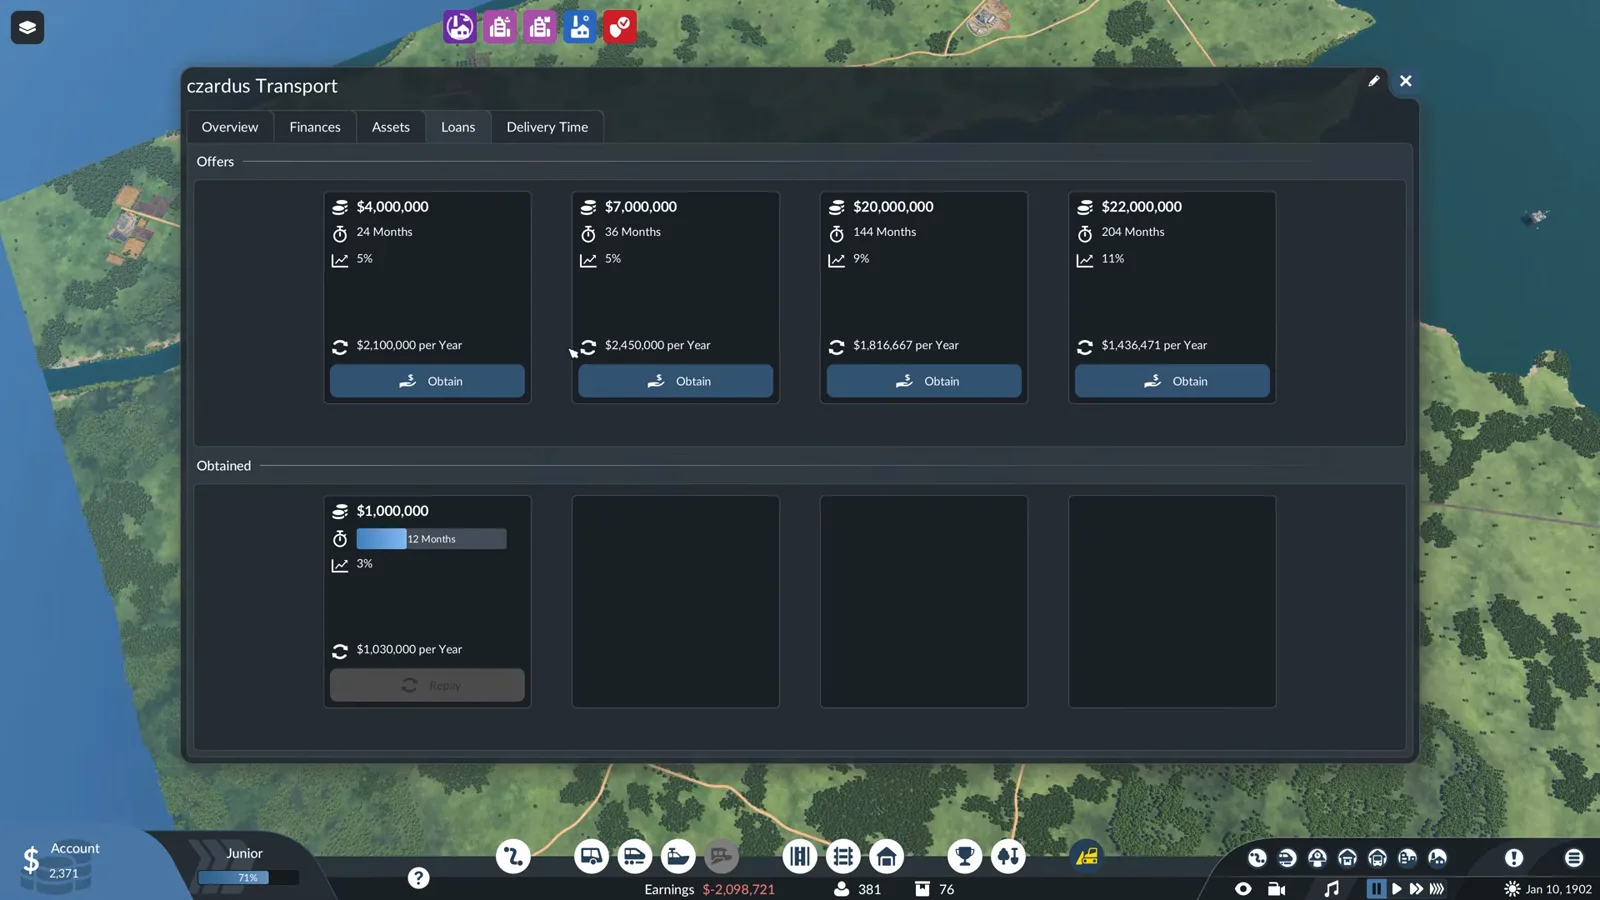
Read the yearly instalment, not just the headline rate. Watch this step at 10:36 -
Compare engine cards before you commit
The depot buy window lines the candidates up: the Prussian Class T 3 and the Russian Class OB differ in power, top speed, noise, pollution and tractive effort. The video weighs them and takes the Russian for about 1.1 million.
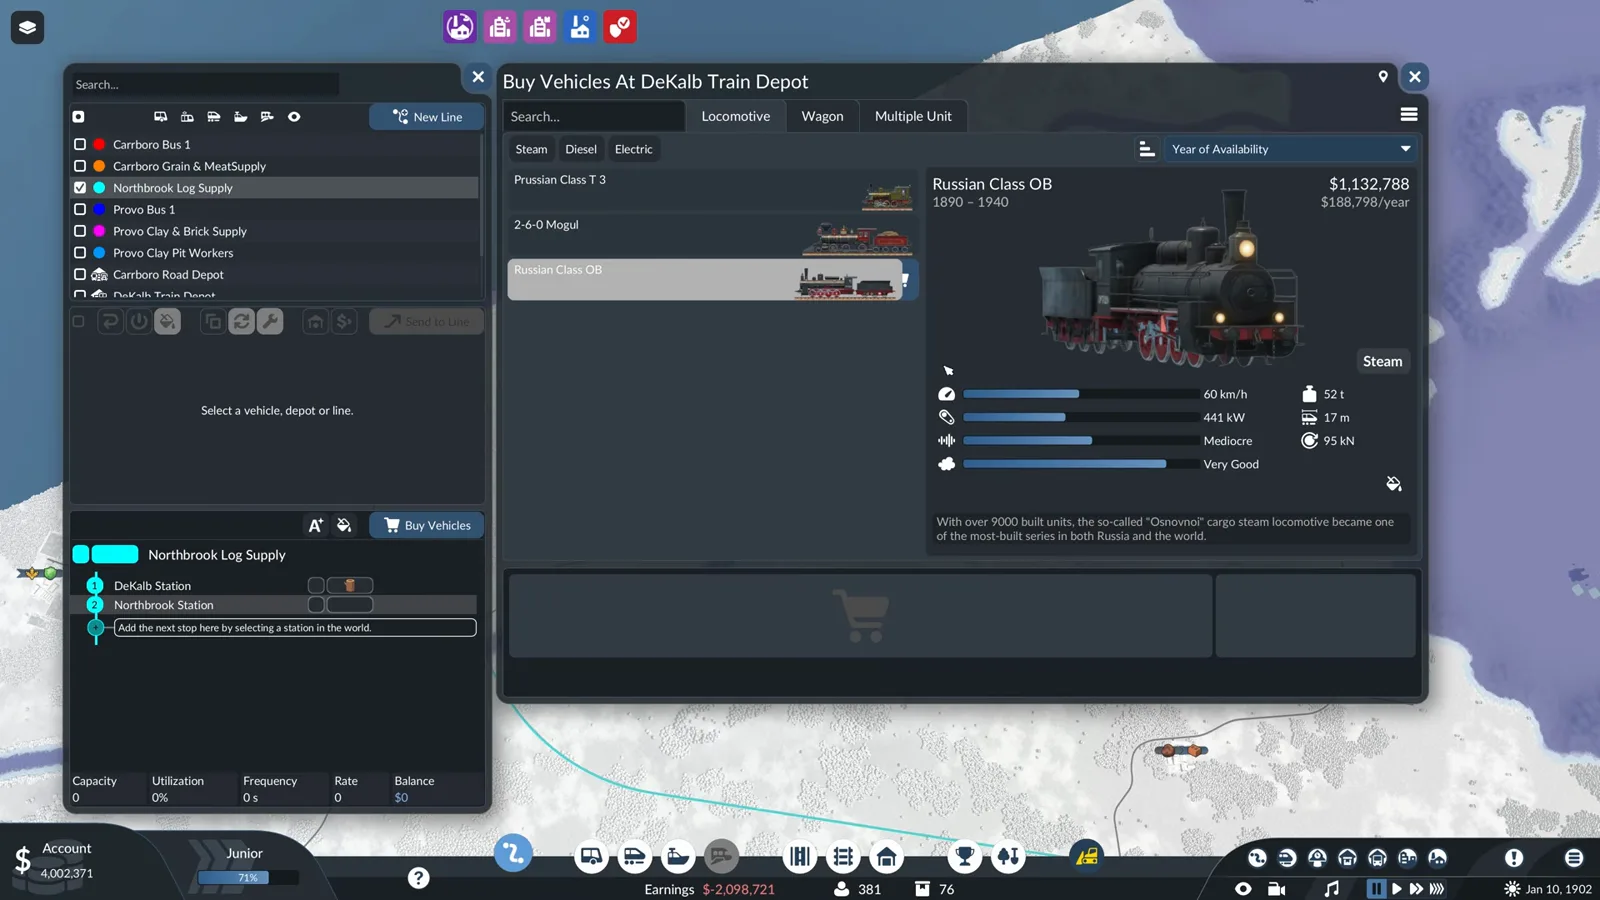
Power, speed, noise, pollution and tractive effort on one card. Watch this step at 11:00
The crossover, the path signals and the depot turn a pair of rails into a railway. Notice the order in the video: double track first, one-way signals second, trains last — the infrastructure exists before anything needs it. When the fleet outgrows two trains and the lights start arguing, our train signals guide takes over exactly where this page stops.
Run it and read the numbers
-
Add stake cars for logs and planks
Wagons follow the engine. The Stake Car 1895 gets the job because it hauls both logs and planks, and the cart at the bottom shows the whole consist updating its running costs, capacity and length with every car added.
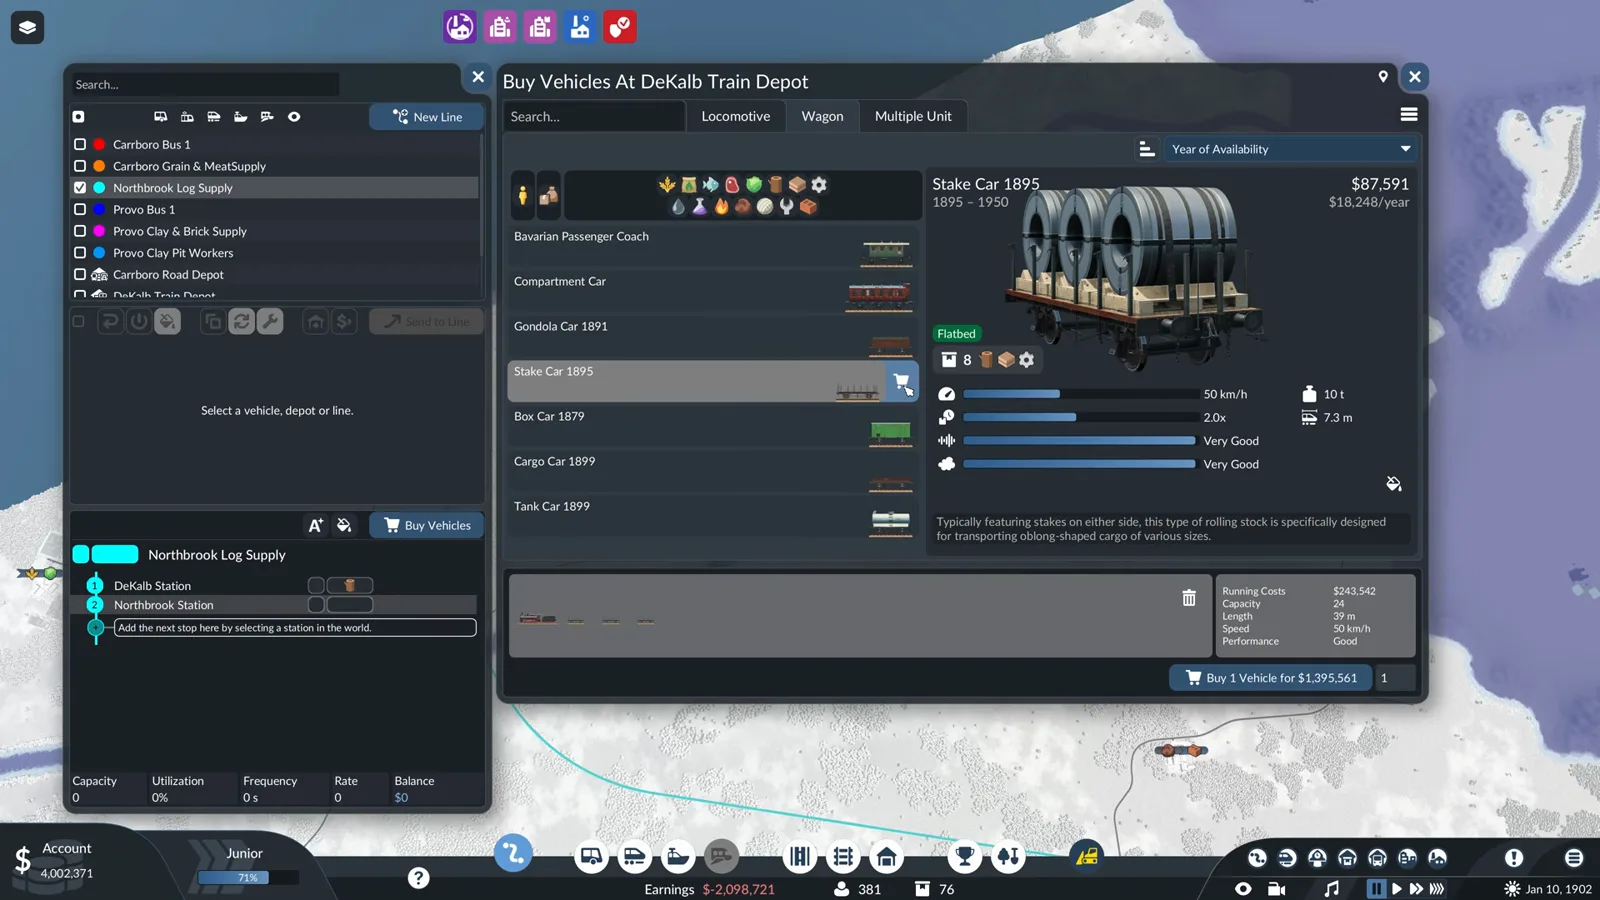
One wagon type that covers both cargoes keeps the platform simple. Watch this step at 11:40 -
Extend the line into town with a stop
Adding the town as a third stop turns a point-to-point service into a distribution run. The new Carboro entry is set to force unload on arrival, so logs and planks are dropped whatever the town currently orders.
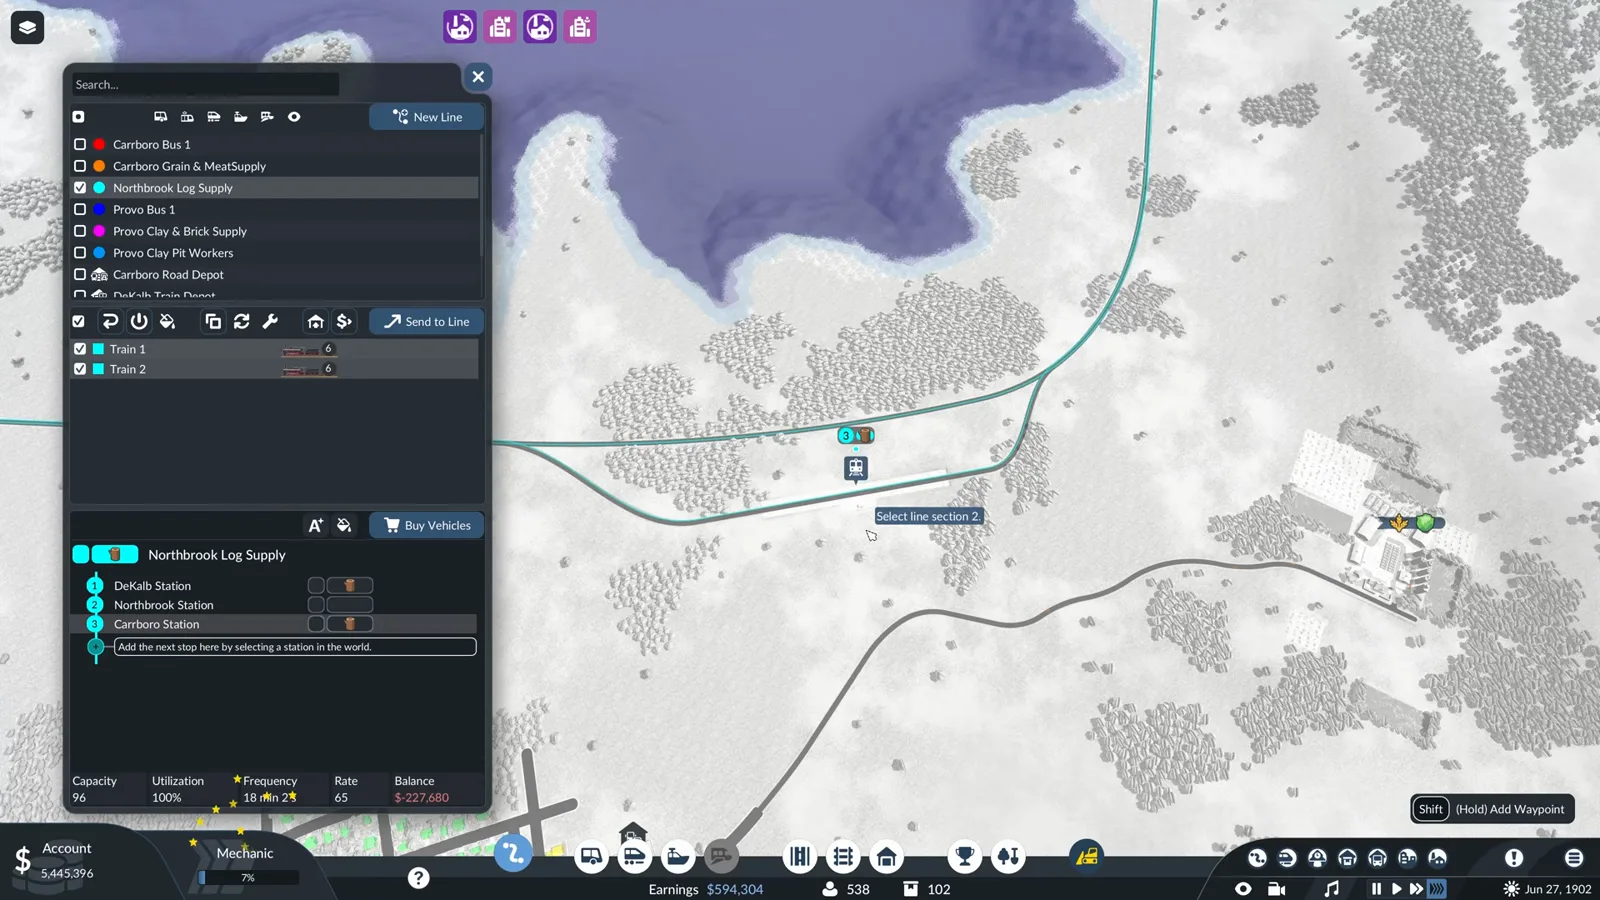
The stop list grows; the trains pay for it. Watch this step at 15:24 -
Read the vehicle window before you scale up
Train 1 stacks the whole business on one card: 25 of 48 load, current noise and pollution, condition, and a balance chart that ended last year 1.6 million dollars up. Copy what works before you duplicate the train.
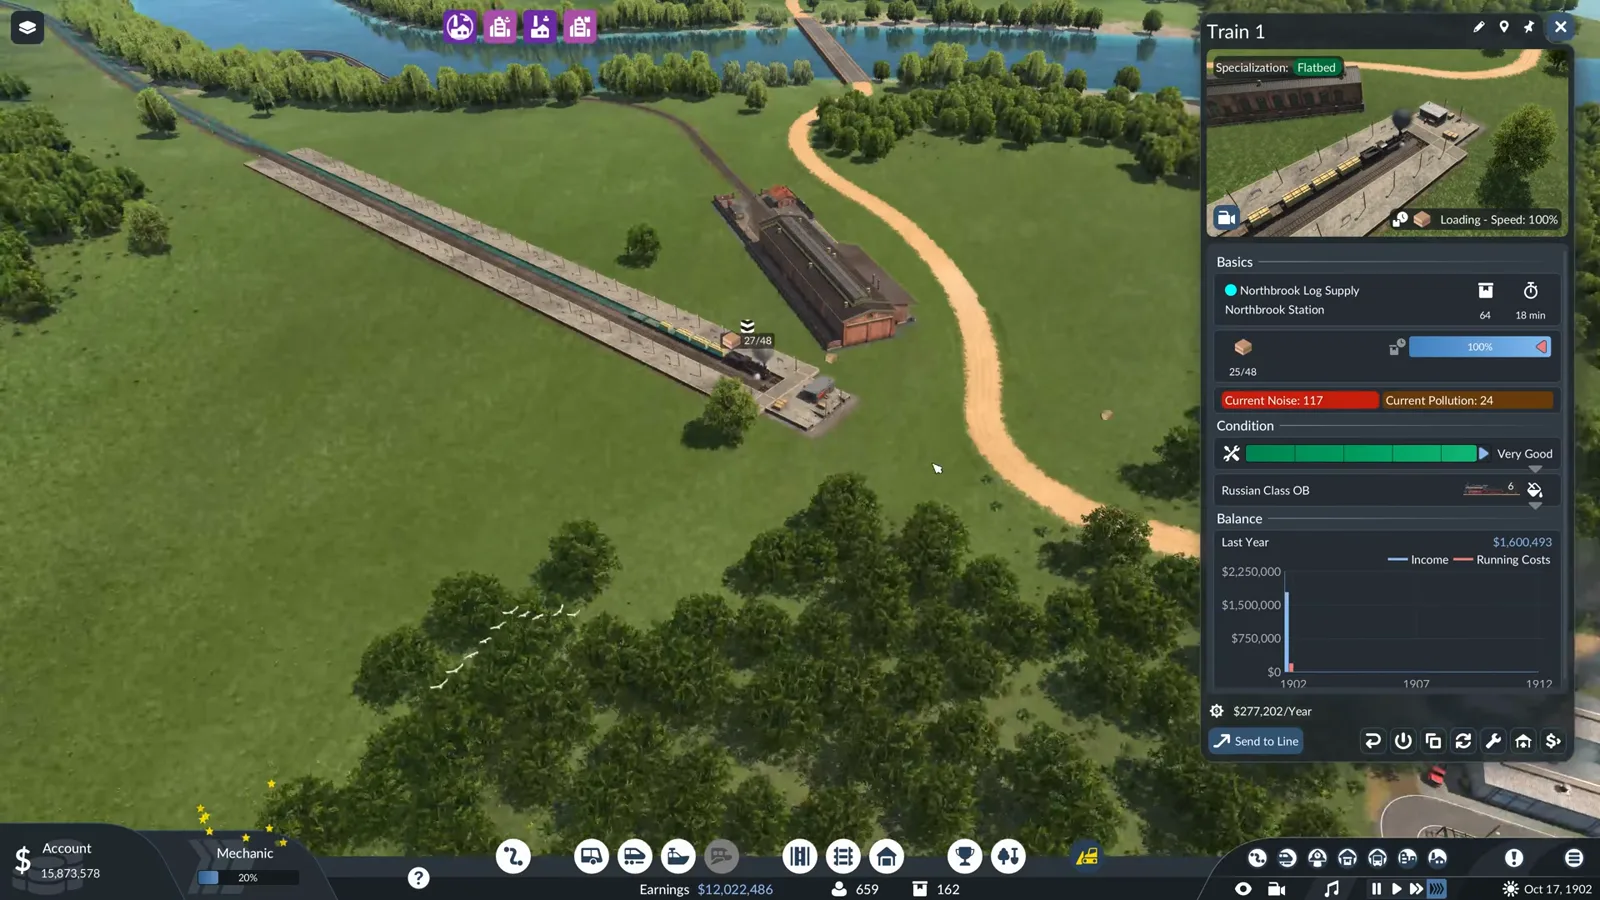
Load, condition and earnings on one card. Watch this step at 17:35
The ending is deliberately unglamorous: a third stop, a forced unload, and a long look at the vehicle window before any money is reinvested. That habit — read the ledger, then scale — is the same one the legit money strategies page builds into a system, and the cargo and warehouse guide explains why the sawmill leg of this line exists at all. For the vehicle side of future purchases, the vehicles guide compares the roster across the years.
Source
The walkthrough above is built from Czardus’s video How to Build Your First Profitable Train Line in Transport Fever 3 (18:38), which extends the map from his beginner guide with a complete logging-camp-to-town rail service: station, double track, switches, signals, depot, loan, train and a town stop. Each step links to the exact second it is demonstrated. Screenshots are the creator’s footage and are used only to illustrate the written steps.
Related reading
- Transport Fever 3 beginner guide — the first hour this rail build grows out of.
- Train signals guide — what to do when the line outgrows one train per direction.
- Bus and tram guide — the passenger version of the same build.
- Legit money strategies — loans and subsidies in more depth.
- Cargo and warehouse guide — why the sawmill leg pays.
- Vehicles guide — the roster behind the depot window.
- Transport Fever 3 tips — twelve habits that keep young companies solvent.
Related Articles
guides
Transport Fever 3 Bus and Tram Guide: City Passenger Networks
Set up bus and tram networks in Transport Fever 3: read passenger demand, wire the district cycle, add bus lanes, connect towns intercity and upgrade to trams.
guides
Transport Fever 3 vs 2: What Changed and Should You Upgrade?
Transport Fever 2 to 3 changes compared: biomes, day-night cycle, warehouses, helicopters, mods and price — plus an honest verdict on whether to upgrade.
guides
Transport Fever 3 Signals Guide: Block Logic, Loops and Junctions
How train signals work in Transport Fever 3: blocks, one-way vs two-way signals, passing loops, main-line spacing and a checklist for trains stuck at red.
Was this helpful?
Thanks for the feedback!