Transport Fever 3 Signals Guide: Block Logic, Loops and Junctions
How train signals work in Transport Fever 3: blocks, one-way vs two-way signals, passing loops, main-line spacing and a checklist for trains stuck at red.
FAQ
How do signals work in Transport Fever 3?
What is the golden rule of signal spacing?
Can single track work with signals in Transport Fever 3?
What is the difference between one-way and two-way signals?
Do stations count as blocks in Transport Fever 3?
Why is my train stuck at a red signal in Transport Fever 3?
Should I place a signal right before a junction?
Signals are the cheapest thing on a rail network and the most expensive thing to get wrong — the creator of the video behind this page opens by admitting he nearly bankrupted a let’s play staring angrily at tracks before the system clicked. The good news: Transport Fever 3 signaling really is one idea. The game chops track into blocks between signals, and a block containing so much as one axle shows red to anyone trying to enter. Every rule below is that idea wearing different clothes.
The block rules
-
See the map the way signals do
Two signals on a line fence off a block, and one axle inside turns the entry signal red until the block empties. The video opens on exactly this pair, with the signal catalogue open below.
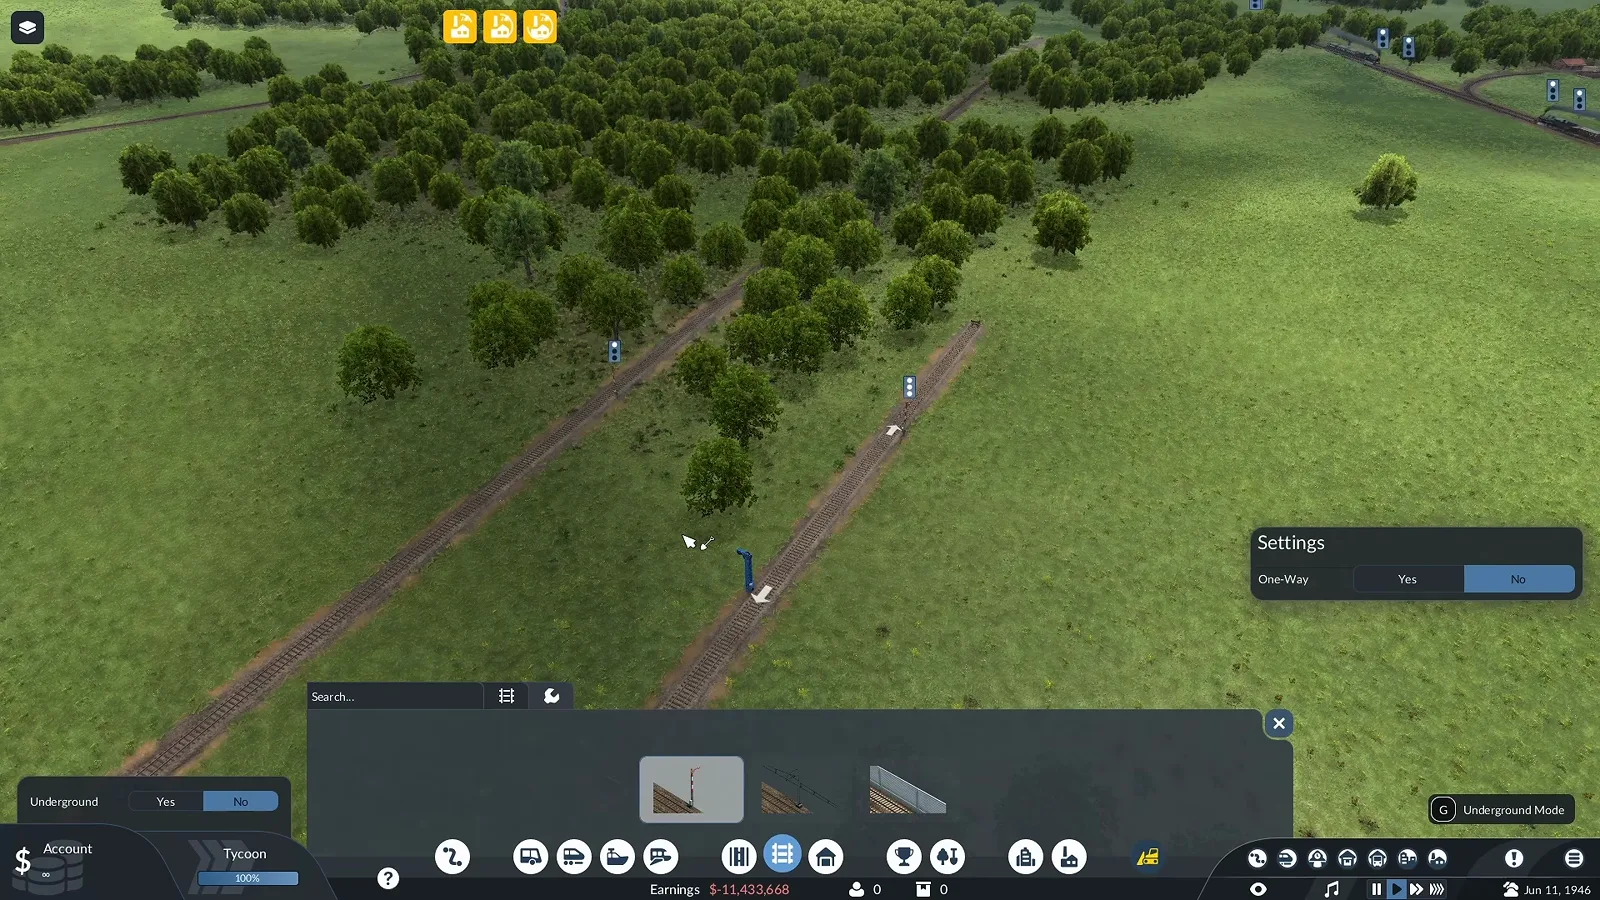
Two posts, one block — that is the whole system. Watch this step at 0:45 -
Read the white direction arrow
When the signal tool points at a line, a small white arrow shows which way traffic may flow. A two-way signal passes trains both ways; a one-way signal makes the section directional — the tool you graduate to once the line has a dedicated main run.
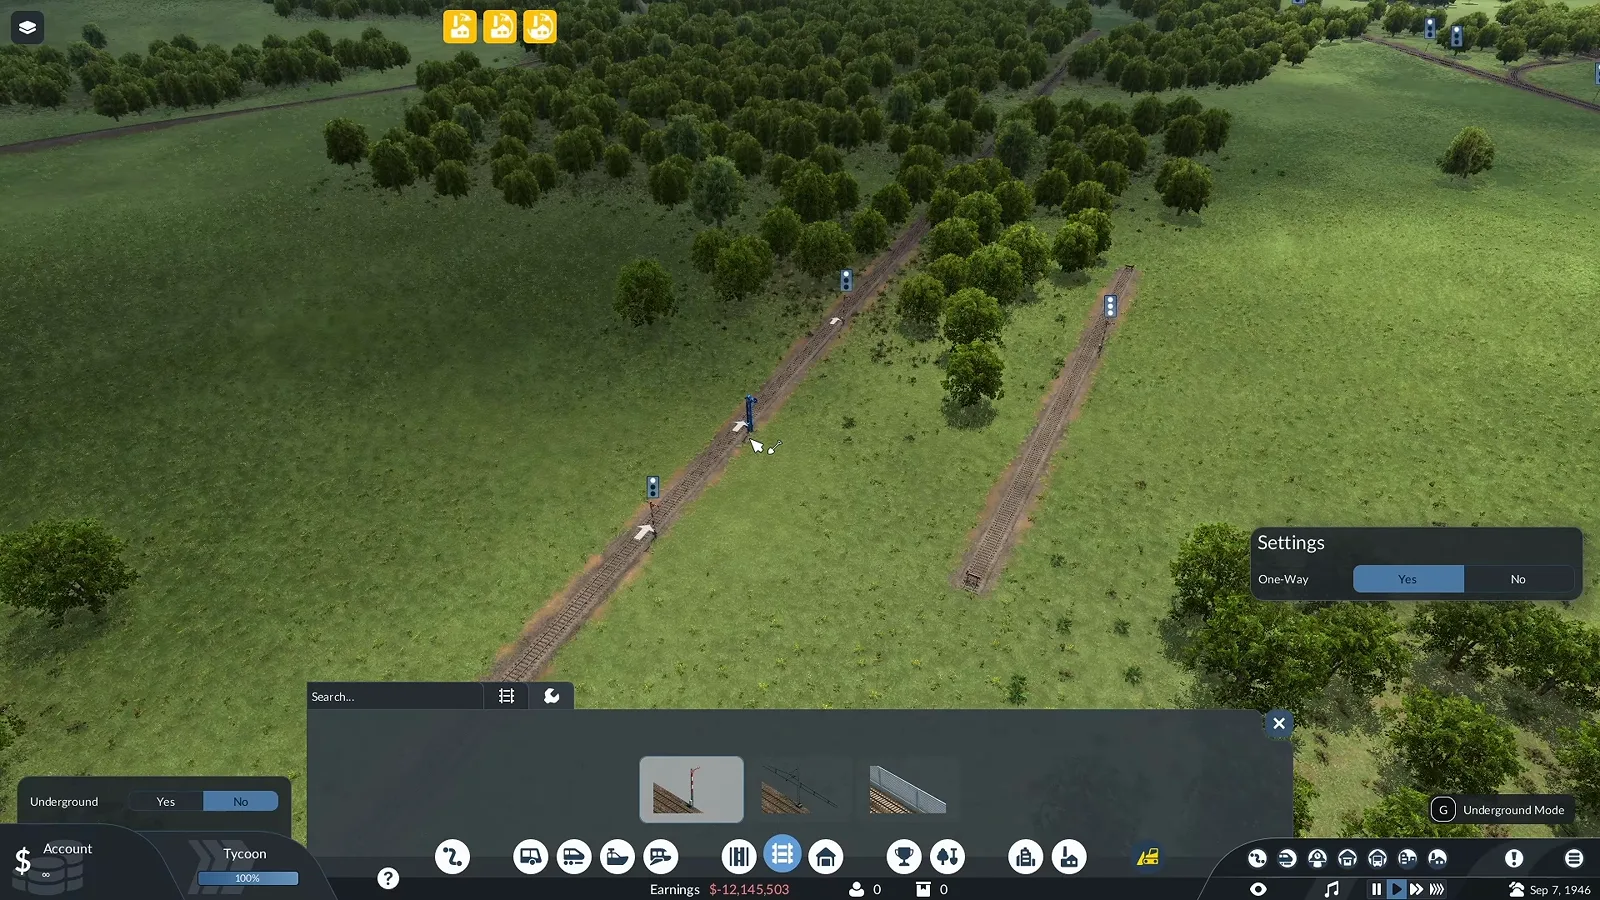
The arrow, not the post, decides who may pass. Watch this step at 1:45 -
Mind the golden rule of spacing
Never place signals closer together than your longest train. Signals 50 metres apart with a 150-metre freight train leave the tail protruding into the previous block, causing false red lights — and remember that stations count as blocks sized by platform length.
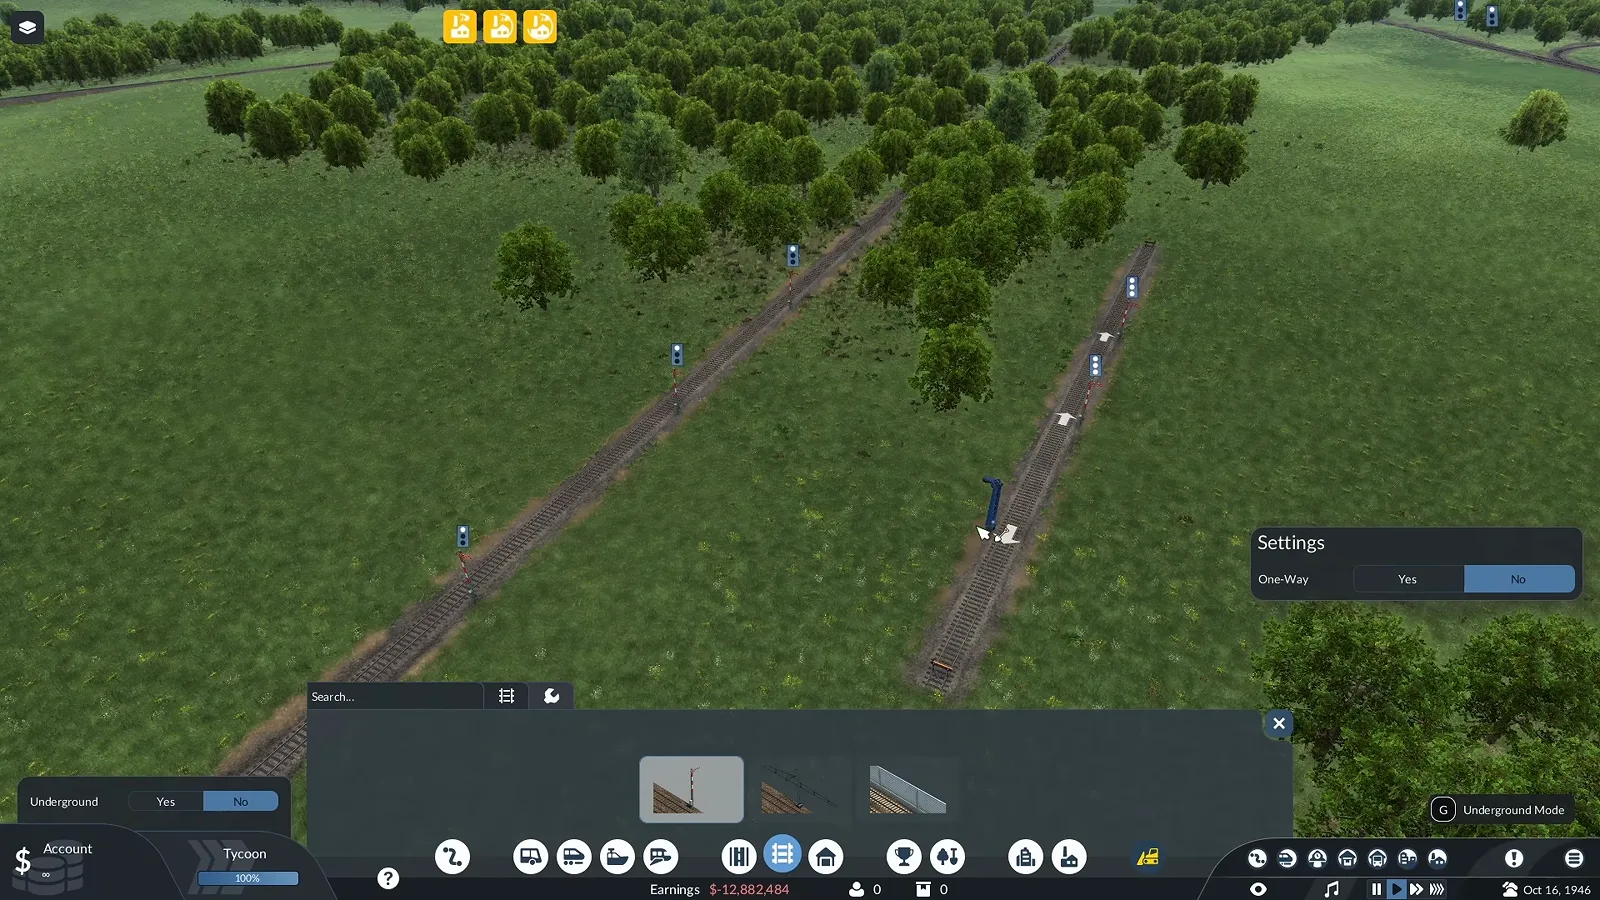
Space for the longest train, not the shortest one. Watch this step at 2:15 -
Keep the shared stretch one continuous block
The critical error: signalling inside a shared single-track section. If both trains get green onto the same stretch they meet in the middle and neither can move, so the entire single-track run between turnouts stays signal-free.
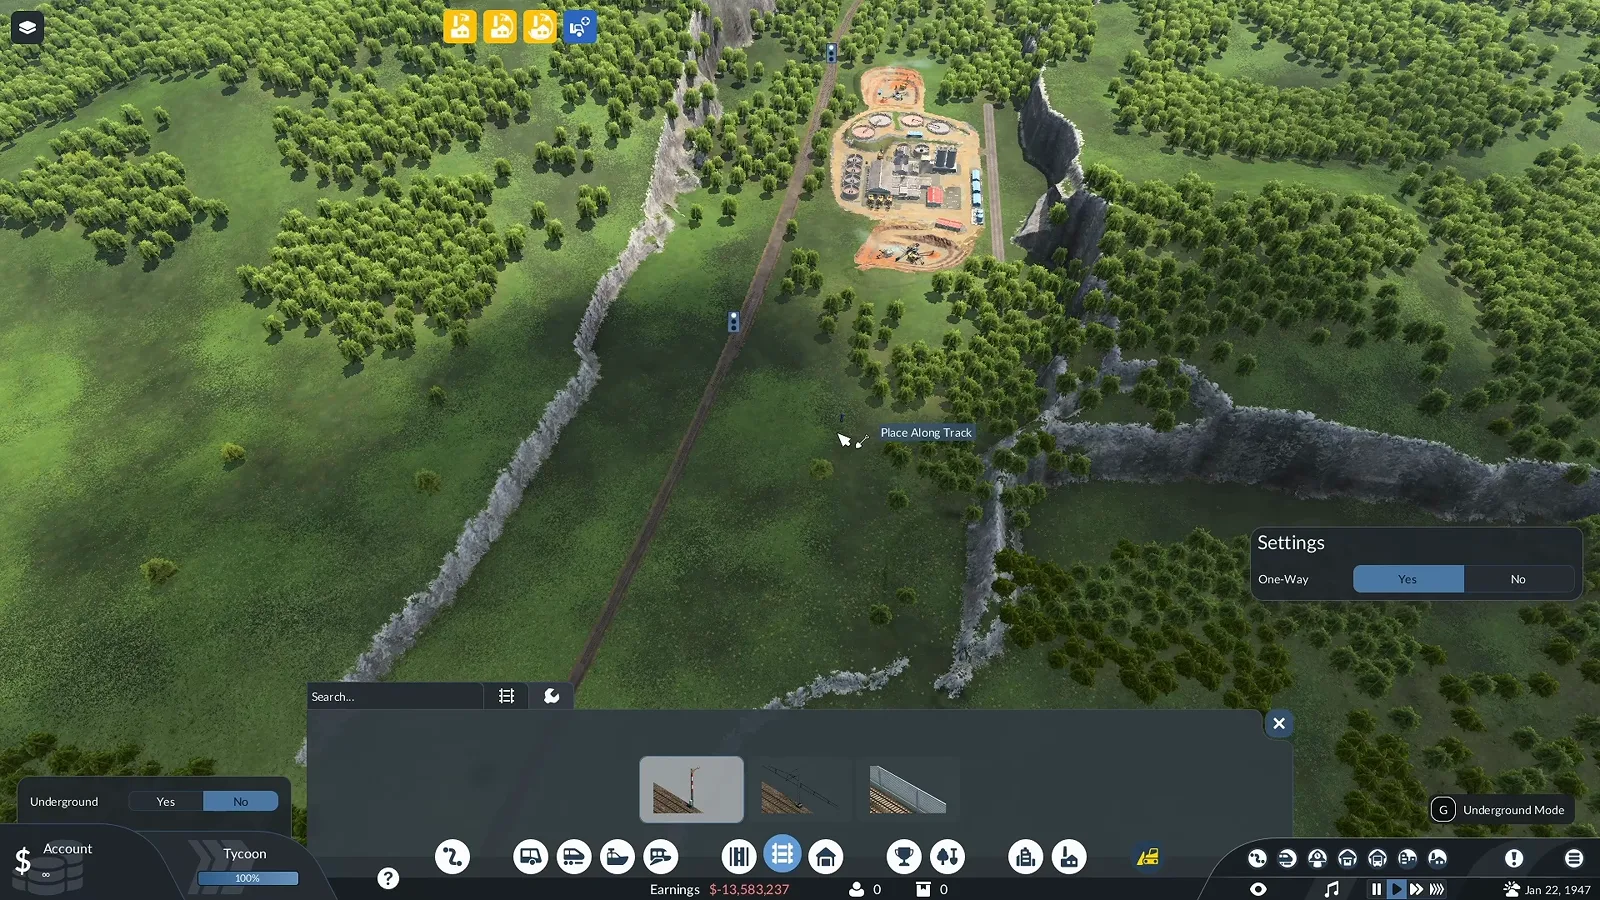
No signals between the turnouts — ever. Watch this step at 3:18 -
Repeat passing loops down a long route
Trains meet only at short parallel loops, each end guarded by a signal: a train waits at the turnout until the oncoming train has fully entered the opposite loop. The same element repeats at intervals so a long single-track route keeps moving.
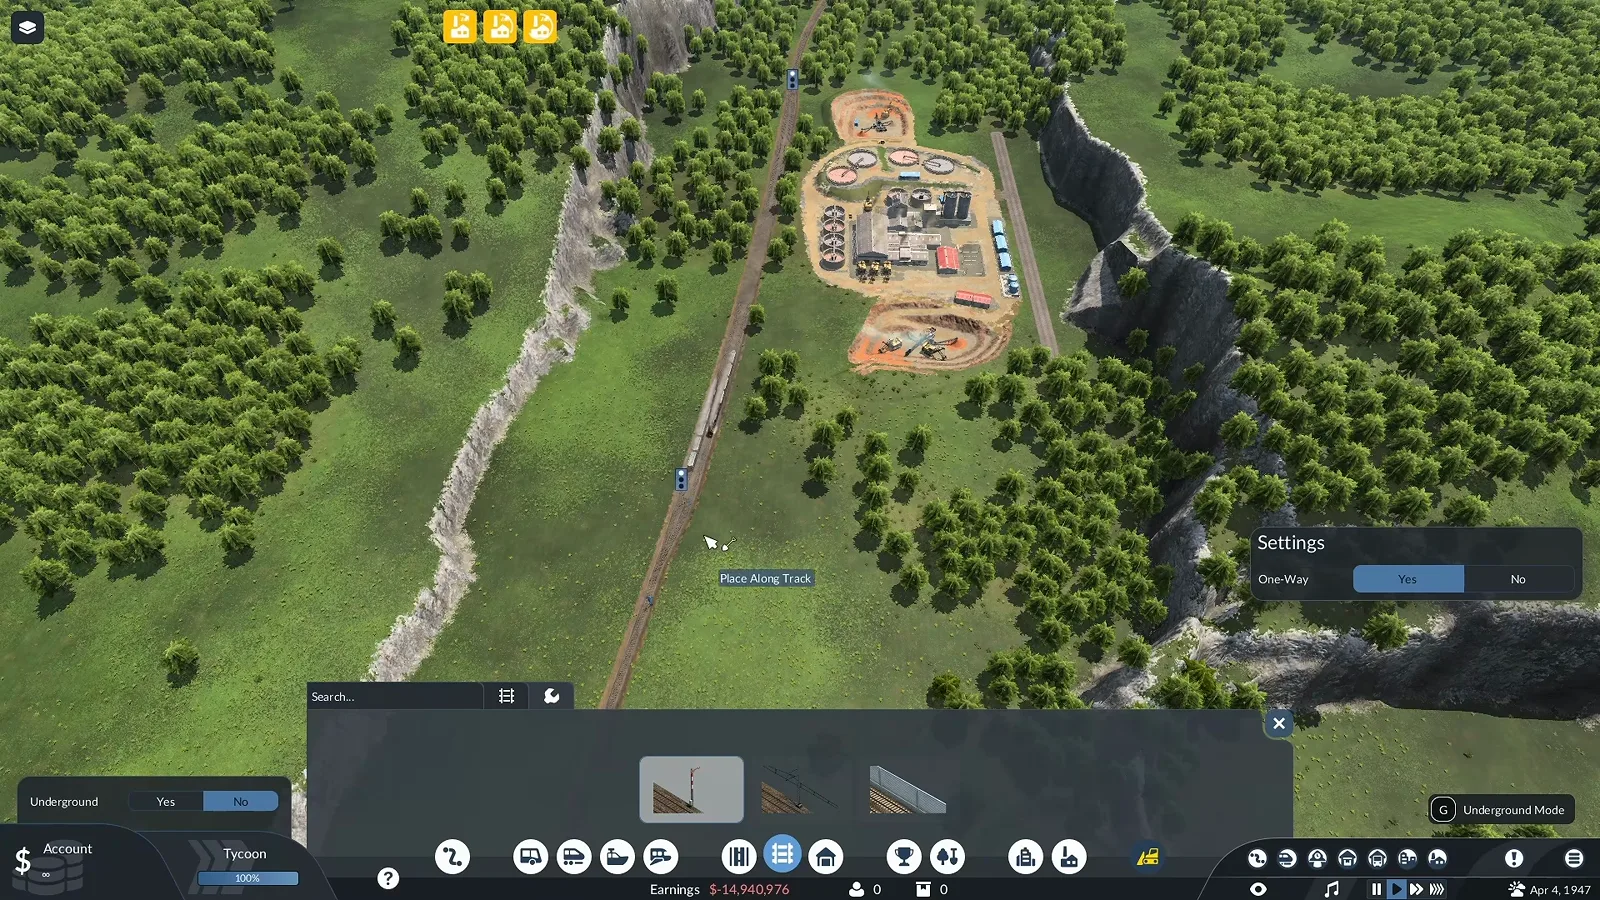
Between loops, the single track stays one block. Watch this step at 3:55
Blocks, arrows, spacing, and the single-track survival kit: keep the shared stretch one continuous block and let trains meet only at signaled passing loops. These five rules run every network in the game, from the two-station shuttle in the beginner guide to the multi-line empires in the Mission 3 walkthrough. If you are still choosing between road and rail for a route, the first train line guide shows the build these signals will eventually live on.
Main lines, stations and junctions
-
Convert the main line to one-way double track
When budget allows, double the main line, pick left- or right-hand running and stick to it map-wide, then set every main-line signal one-way and space them about one and a half to two train lengths apart so trains follow nose-to-tail at full speed.
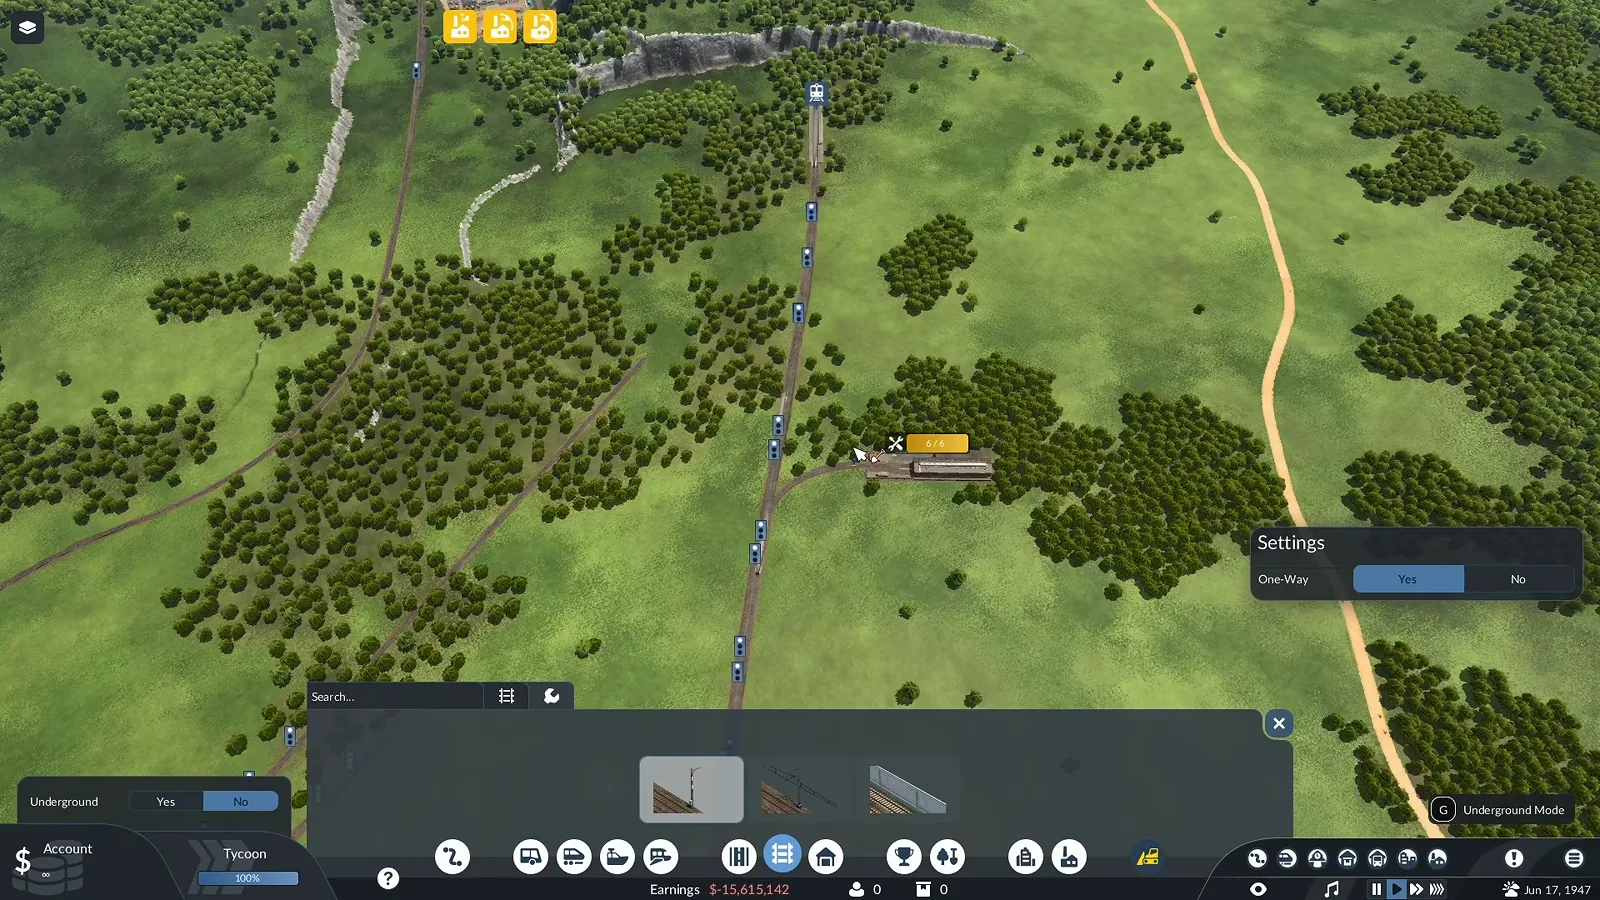
One direction per track, spaced by train lengths. Watch this step at 4:45 -
Know what a queue looks like
When spacing or directions are wrong, the line announces it: trains bunched nose-to-tail at a steady red. This convoy is the symptom to memorize — the fix is almost always an arrow set backwards or a block too short for the train inside it.
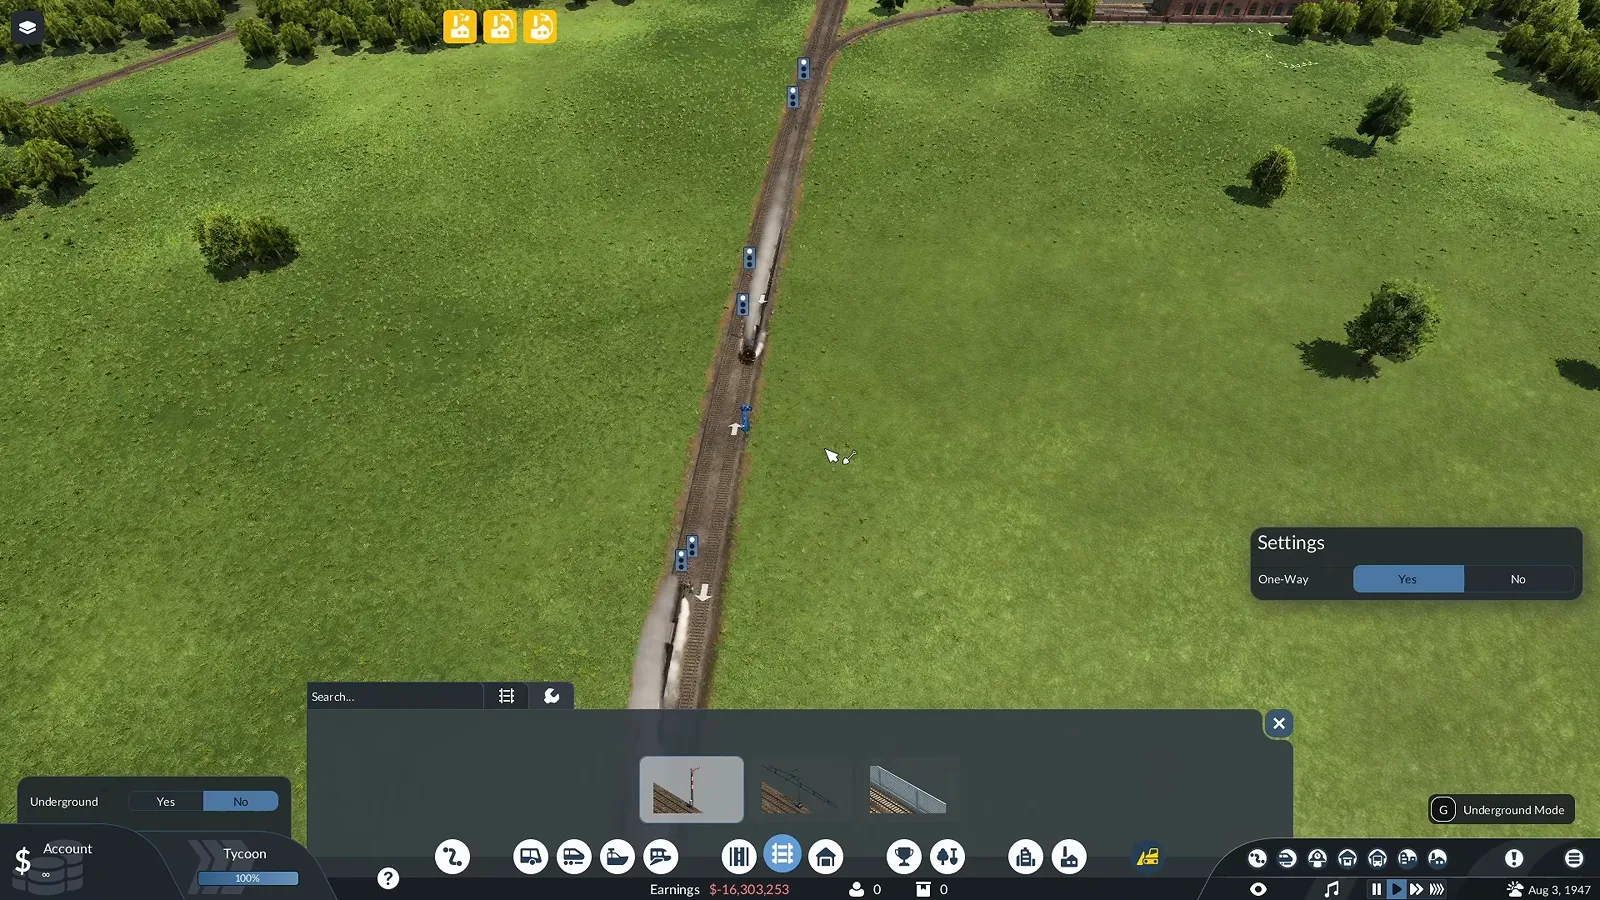
A nose-to-tail convoy is a symptom, not a cause. Watch this step at 5:20 -
Give each station a primary and a backup platform
The station block is sized by the platform, and the Terminals popup sets one platform as preferred and the other as alternate. Arriving trains take whichever is free, so two services can call without queueing behind each other.
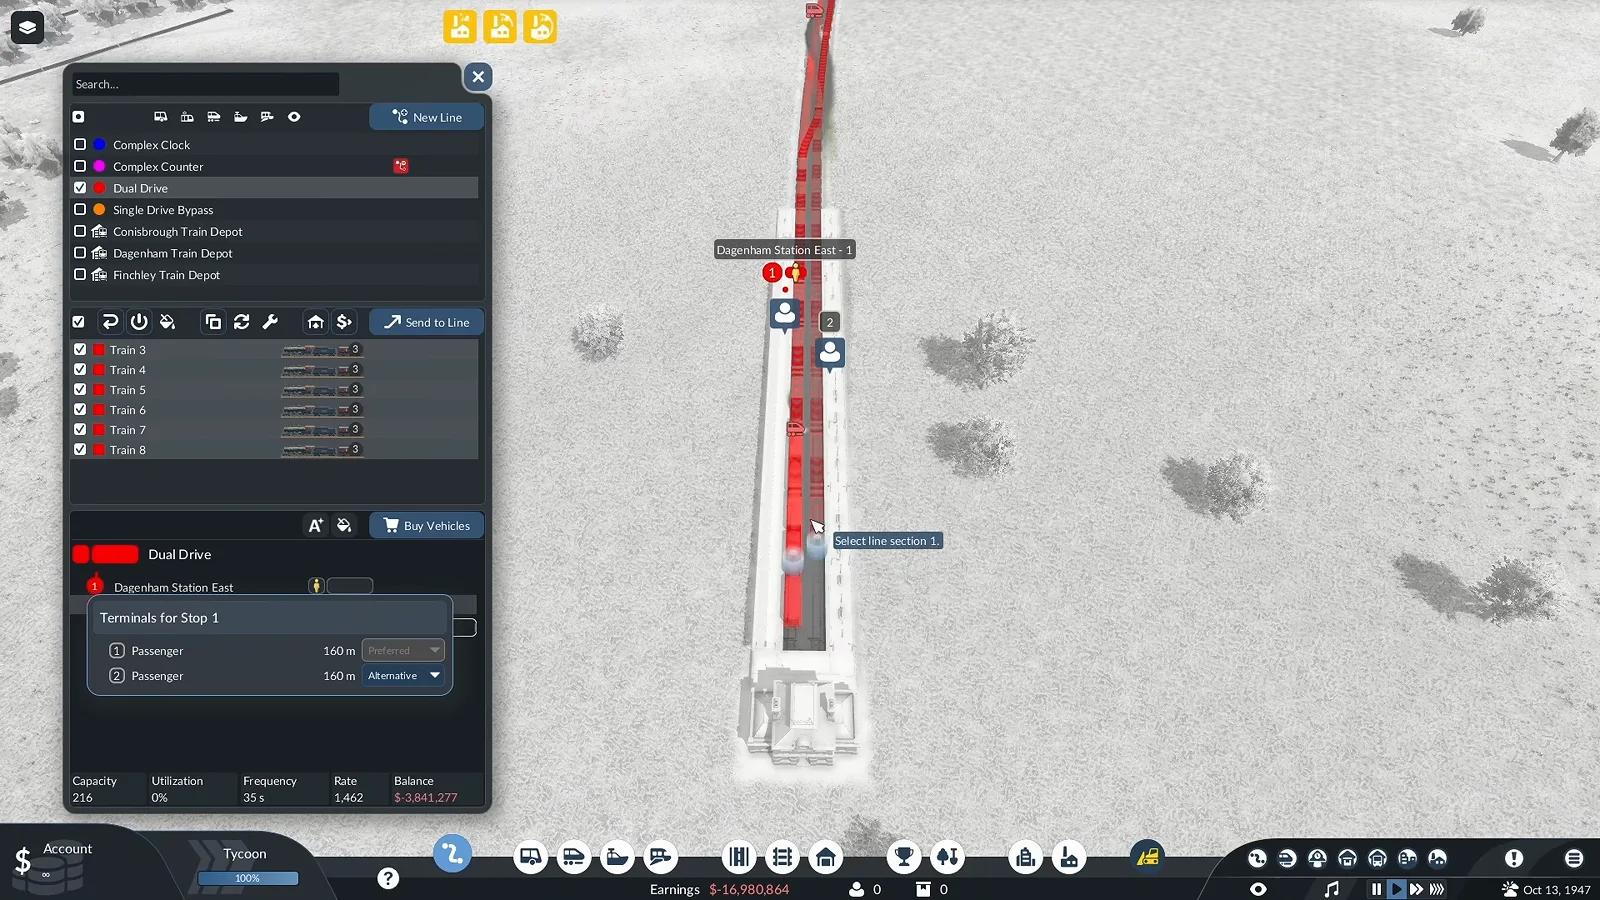
Preferred platform, plus one alternate for the queue. Watch this step at 6:15 -
Signal the approach, not the platform
Signals sit in front of the station throat, not inside it — the platform is already a block of its own. The curve into this station carries its signals on the approach side, where a waiting train cannot block the platform.
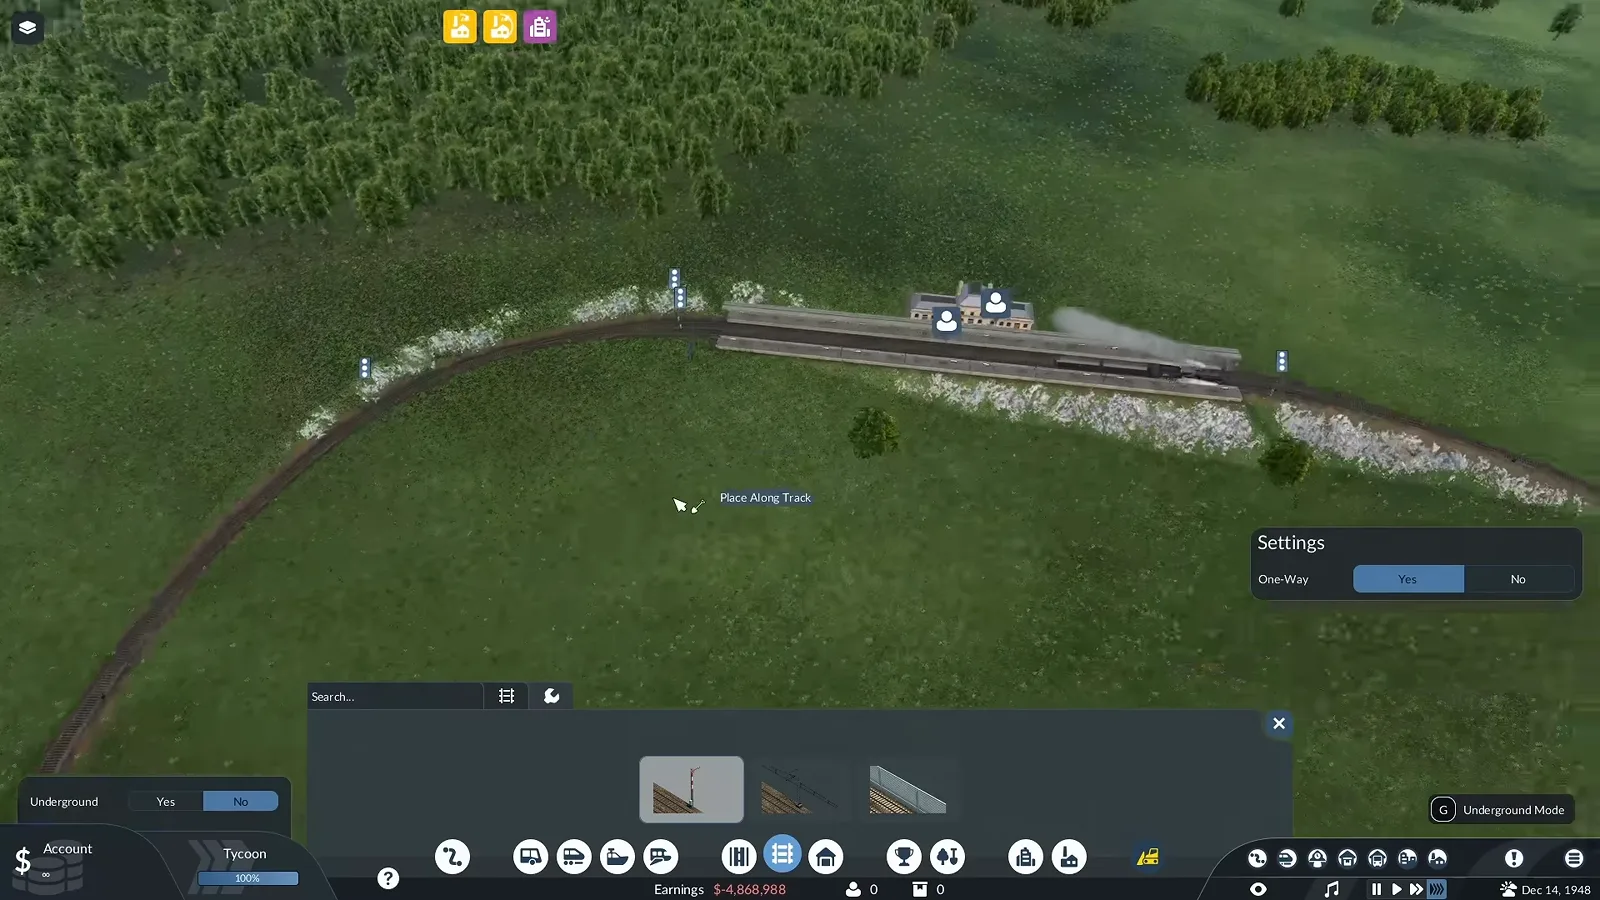
The platform is a block; the approach is where signals go. Watch this step at 7:15 -
Design junctions with room to wait
Never signal directly before a crossing or dead-end junction unless a whole train can stop behind it — a freight car covering the switch blocks every cross movement. Set the signal far enough back that the waiting train clears the intersection.
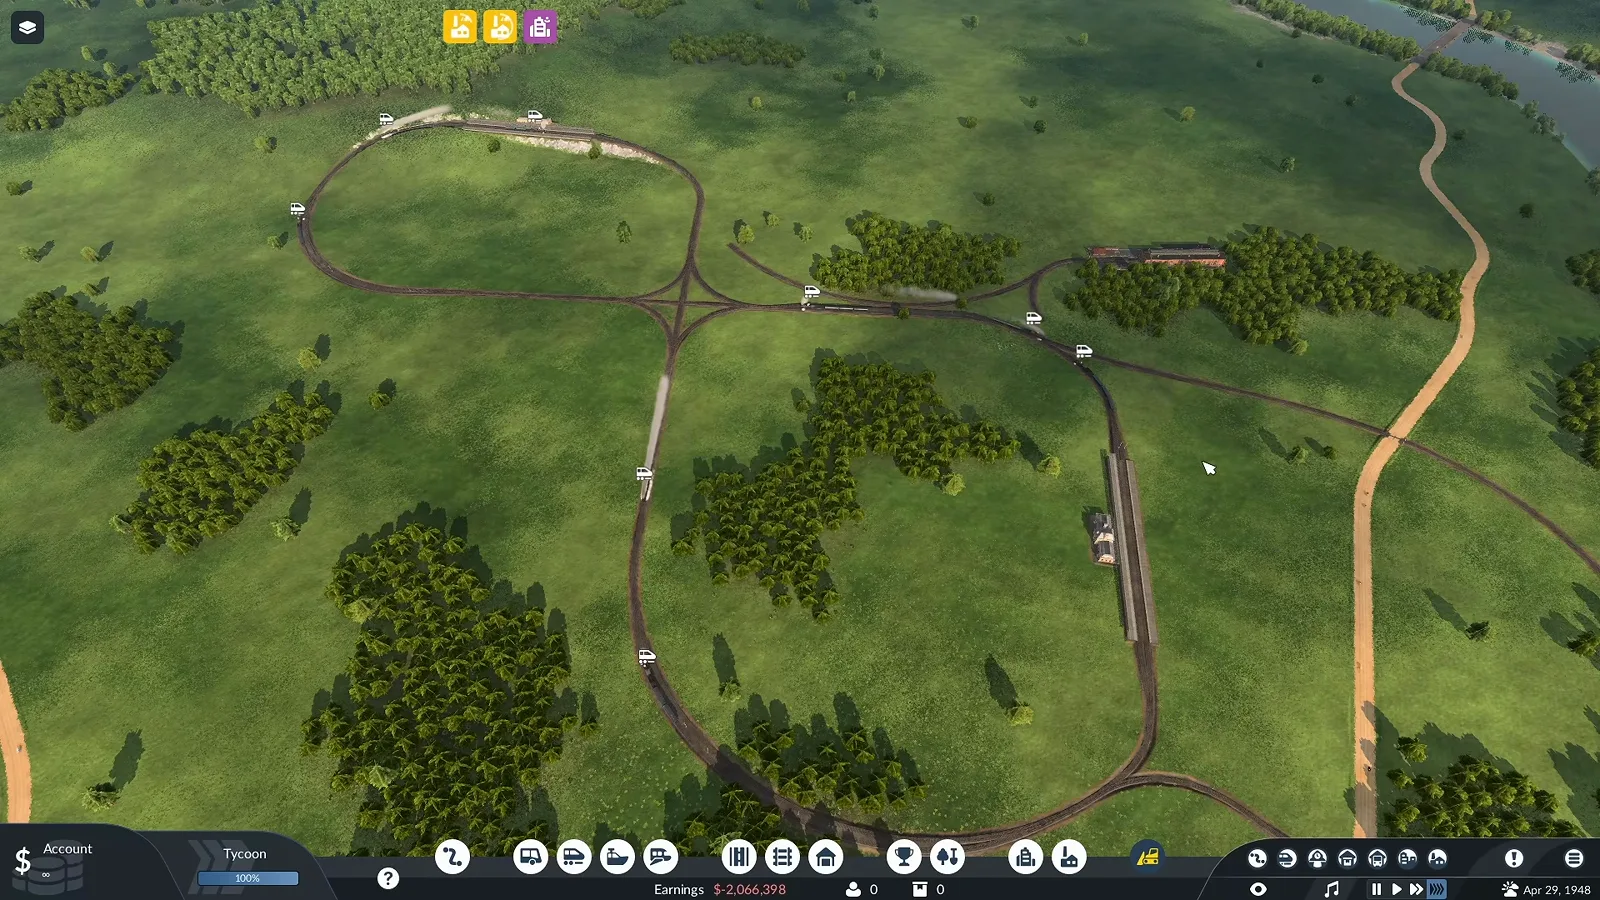
The signal goes where the queue will fit, not where the junction is. Watch this step at 7:45
Doubled track with one-way signals spaced by train lengths is the backbone; alternating platforms keep stations from queueing; and junctions stay clear because the signal was placed where the queue fits, not where the switch is. The platform alternates work exactly like the bus stop alternates in the bus and tram guide — one preferred side, one fallback.
When it goes wrong anyway
-
Trace the blocks when a train sticks
A steady red or a no-path error gets a five-second check: first the direction arrows, because one reversed one-way signal stops a line, then whether the stopped train tail protrudes into the previous block. Beyond that, walk the blocks back one by one.
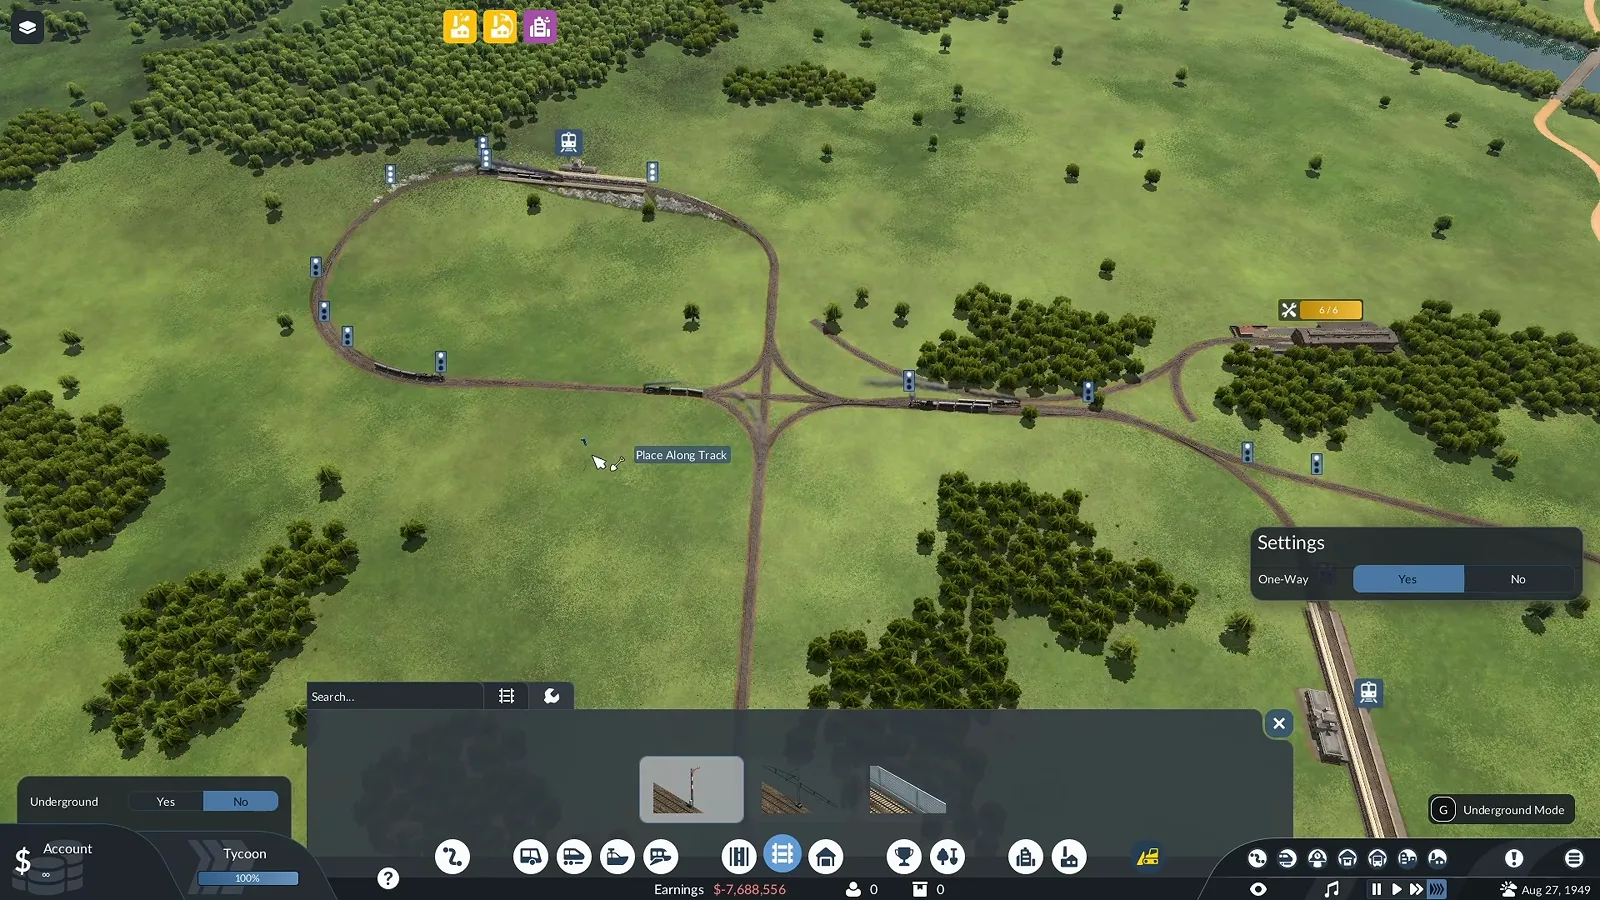
Arrows first, tail ends second, then walk the blocks. Watch this step at 8:40
The five-second diagnostic: arrows, then tail ends, then a slow walk block by block. That is genuinely all of it — and it is the same read-the-ledger-first discipline the Transport Fever 3 tips page preaches for finances. For deeper chain design once the signals are behaving, the cargo and warehouse guide covers what those trains should actually be carrying, and the vehicles guide helps you match the locomotive to the blocks you have just built.
Source
The walkthrough above is built from Northwoods Gaming’s video Complete Signal Guide: Block Logic, Passing Loops & Junction Fixes | Transport Fever 3 (9:26), a demo-map breakdown of block logic, single-track passing loops, one-way main lines, station platforms and junction clearance. Each step links to the exact second it is demonstrated. Screenshots are the creator’s footage and are used only to illustrate the written steps.
Related reading
- First train line guide — the line these signals will run on.
- Bus and tram guide — the street-level cousin of every rule here.
- Transport Fever 3 beginner guide — the fundamentals behind the first signals.
- Cargo and warehouse guide — what the freight on those blocks should carry.
- Vehicles guide — matching locomotives to your block lengths.
- Transport Fever 3 tips — the diagnose-before-you-spend habit, applied everywhere.
Related Articles
guides
Transport Fever 3 Bus and Tram Guide: City Passenger Networks
Set up bus and tram networks in Transport Fever 3: read passenger demand, wire the district cycle, add bus lanes, connect towns intercity and upgrade to trams.
guides
Transport Fever 3 First Train Line: A Step-by-Step Rail Guide
Build your first train line in Transport Fever 3 step by step: cargo station, catchment, double track, switches, path signals, loans and the right wagons.
guides
Transport Fever 3 vs 2: What Changed and Should You Upgrade?
Transport Fever 2 to 3 changes compared: biomes, day-night cycle, warehouses, helicopters, mods and price — plus an honest verdict on whether to upgrade.
Was this helpful?
Thanks for the feedback!