How to Build an Underground Subway in Transport Fever 3
Transport Fever 3 has no real metro, but underground tram stops, tram-only track and light rail trams make a convincing subway. Eleven steps, station to city loop.
FAQ
Is there a real subway in Transport Fever 3?
Can underground stations handle cargo in Transport Fever 3?
How deep should the tunnel be in Transport Fever 3?
Can the tram depot go underground?
Do underground lines make money in Transport Fever 3?
Do subways reduce noise and pollution in Transport Fever 3?
Transport Fever 3 will happily bury tram lines, and that is as close to a metro as the base game gets. The trick is a chain of four pieces the game never explains together: the underground passenger stop tucked into the road-stop menu, tram-only track that can be dropped below street level, a surface depot fed by a short branch, and light rail trams to give it the right look. This page follows one video experiment from a single loop around Maidenhead to a four-city network, and closes with the honest results — traffic and pollution improved, profitability mixed.
Building the first underground line
-
Find the underground stop in the stop menu
The underground stop hides in the ordinary road-stop menu rather than the rail catalogue. Select it and the game explains the deal: an underground platform with street access, for passengers only.
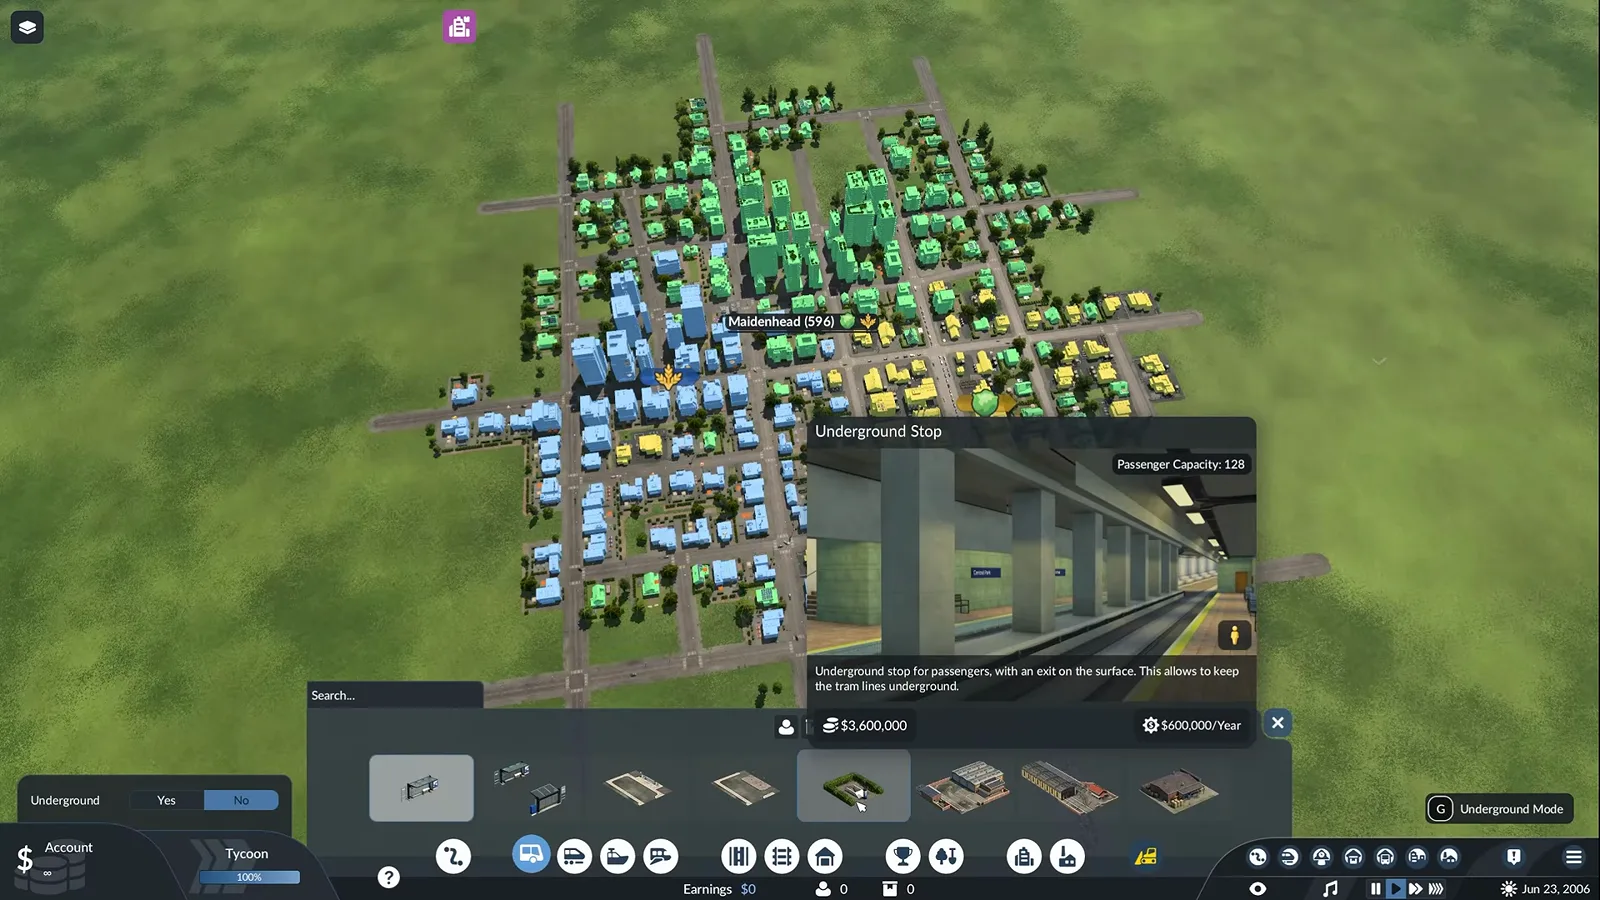
It lives with the bus and tram stops, not with the stations. Watch this step at 1:29 -
Place the underground station
The placement settings let you choose the number of tracks, the platform length and the track type, and a green circle shows the walk-in catchment. The ghost in the video costs a little town reputation, so mind where the entrance lands.
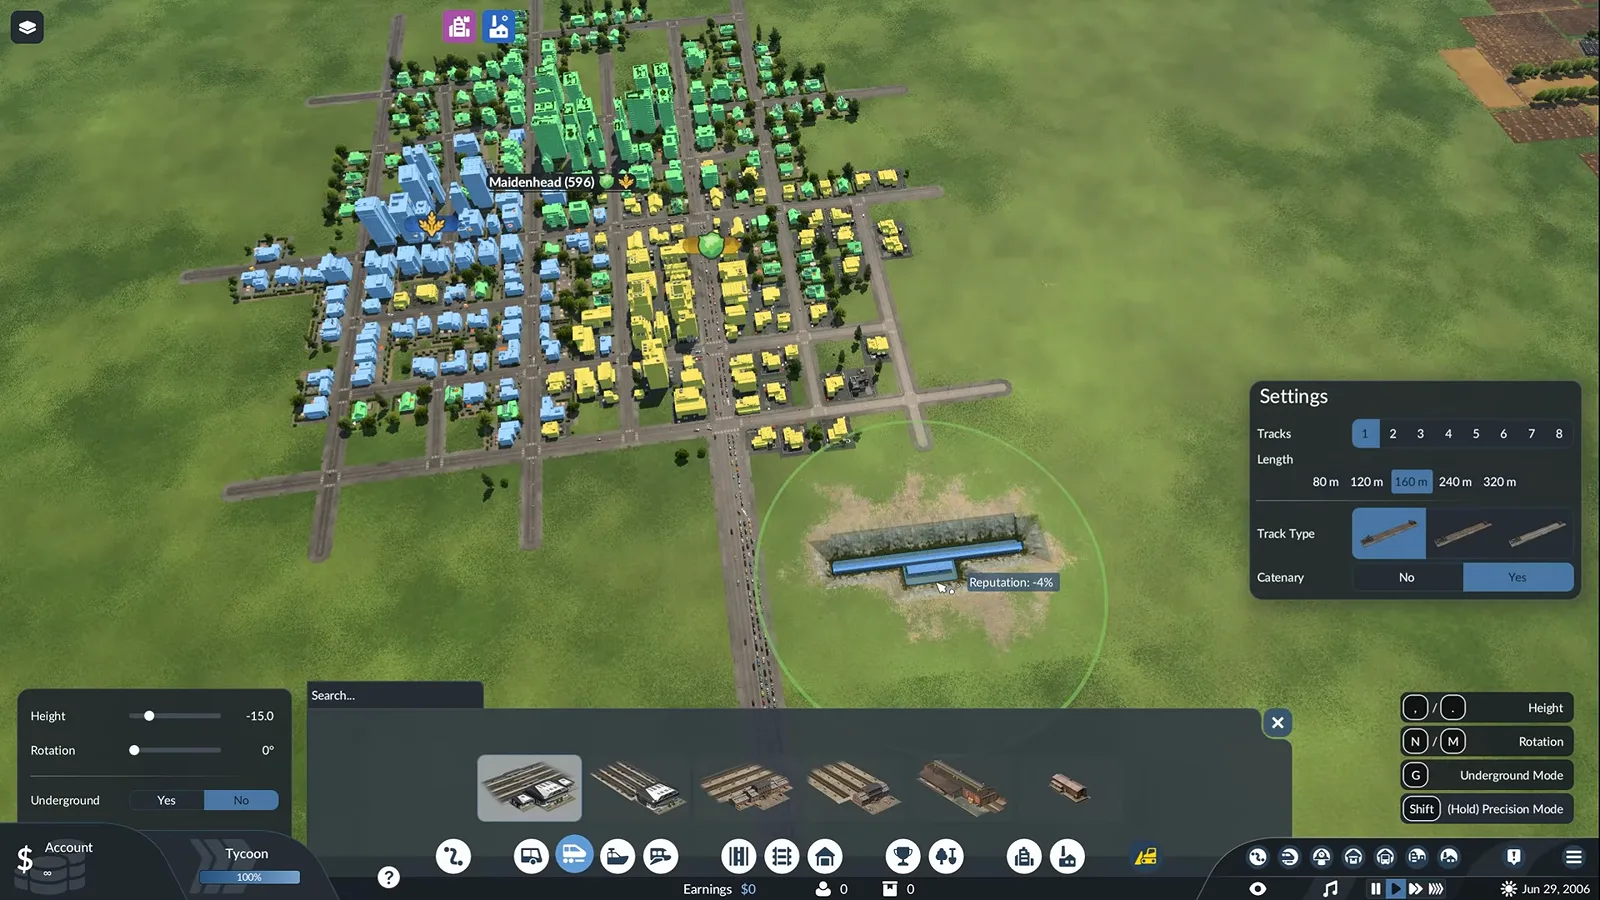
The green circle is the walk-in catchment for passengers. Watch this step at 1:57 -
Pick tram-only track and dig down to minus 18
Tram track on its own sits at the end of the roads menu — a road connection that only trams may use. Press G for underground mode and lower the height; the walkthrough finds minus 18 deep enough for a clean tunnel.
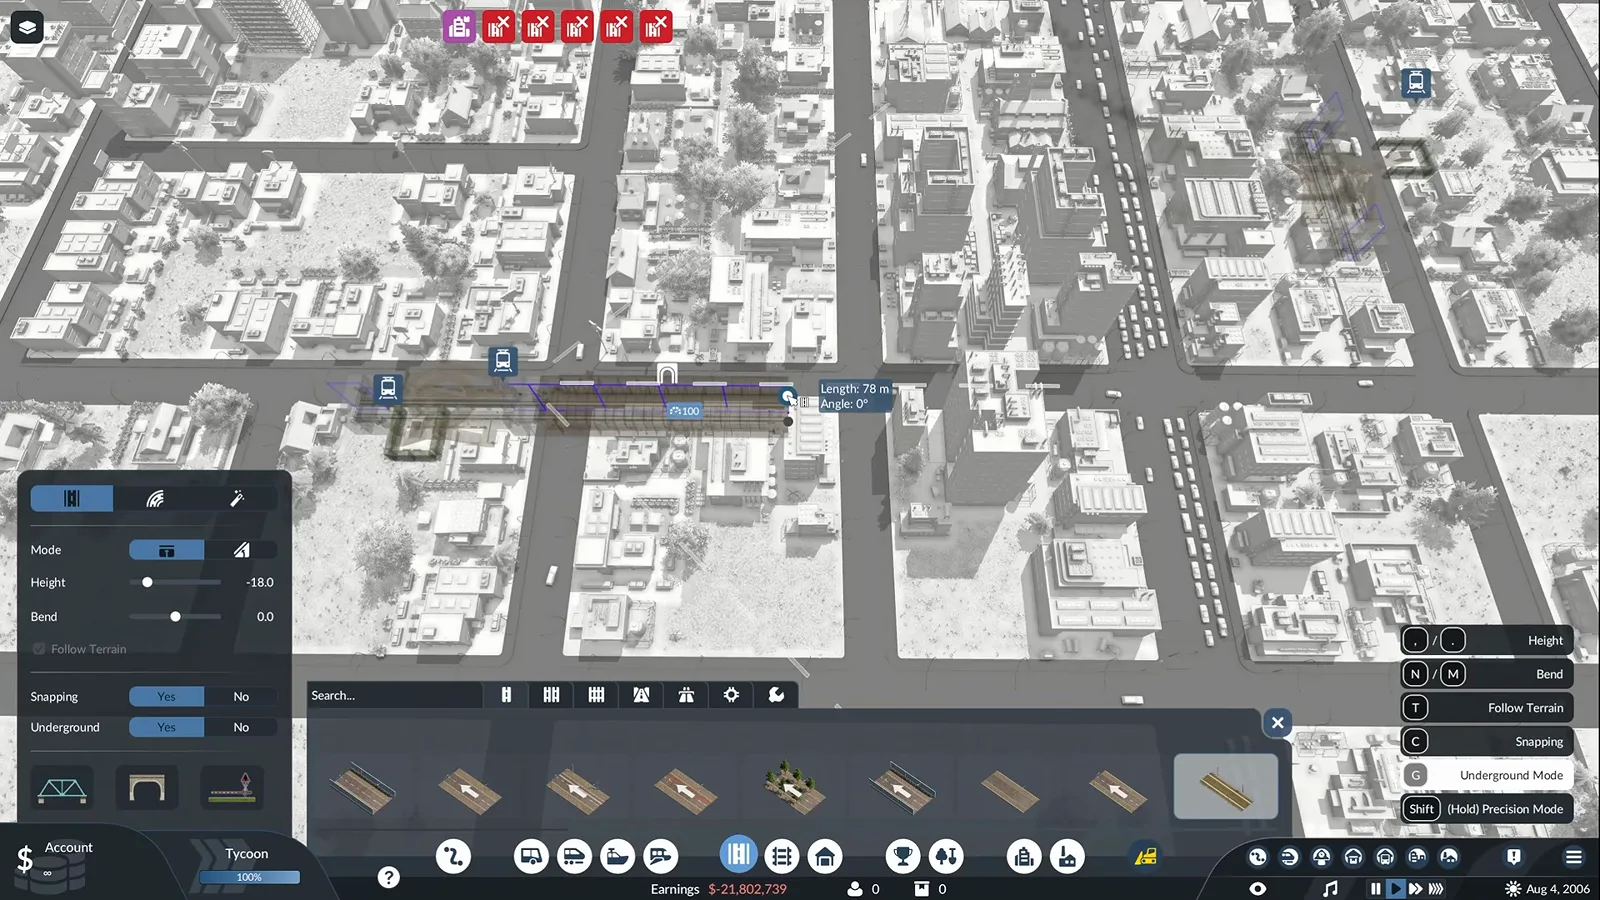
The panel shows the height the tunnel sits at while you draw. Watch this step at 4:21 -
Bend the loop under the street grid
Follow the street grid and bend the tunnel into curves between the stations. Close the loop back at the first stop so trams can circle in both directions without ever surfacing.
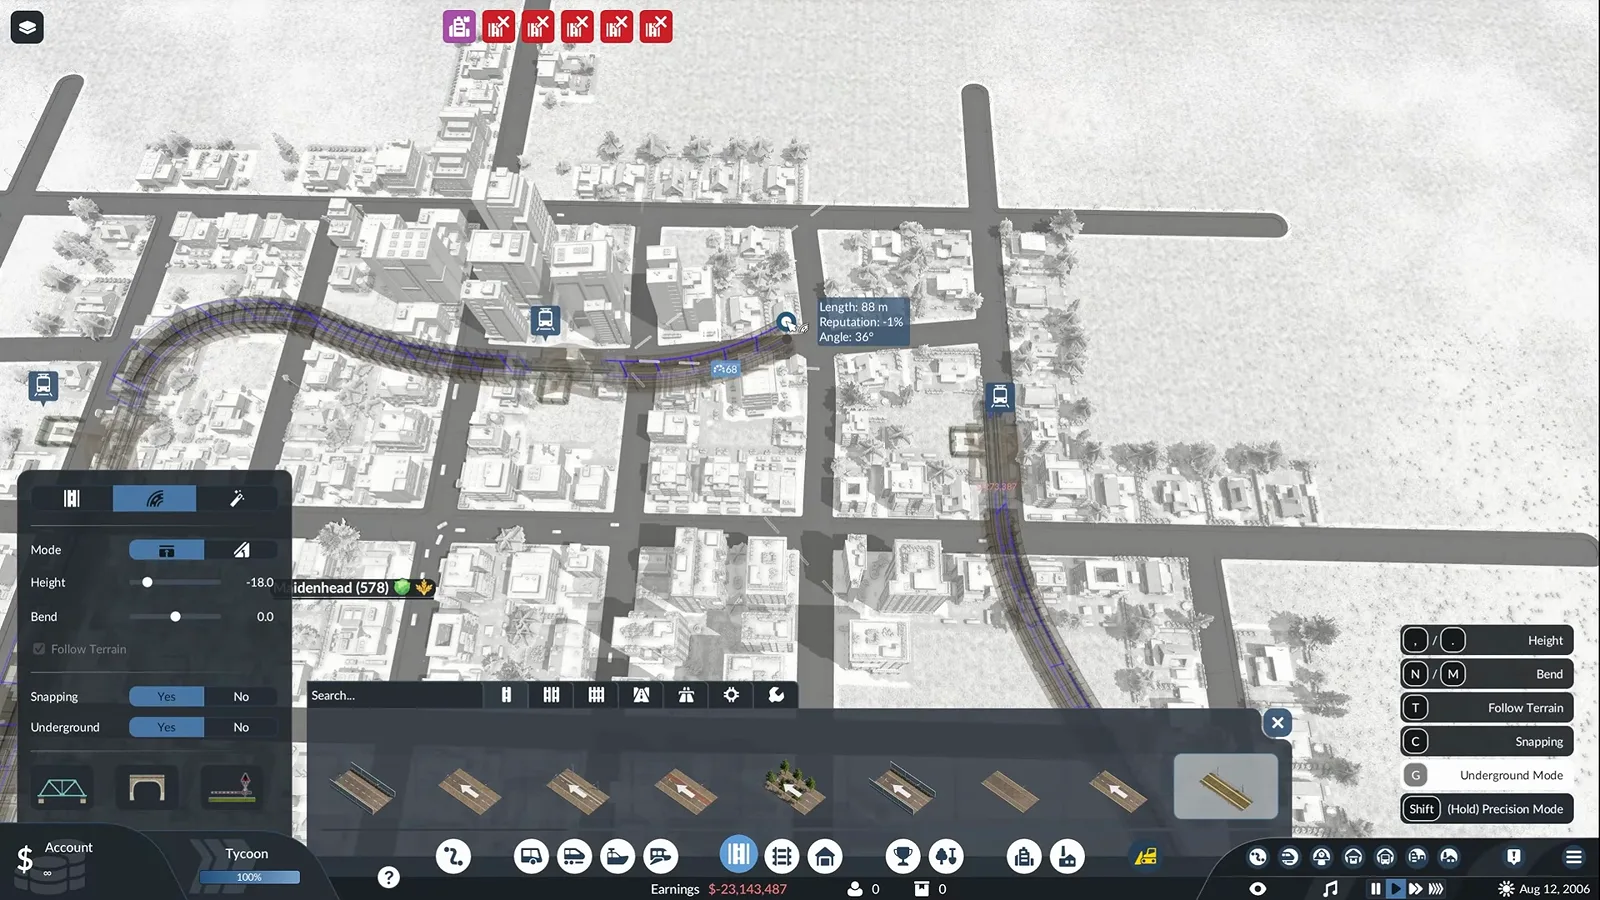
Curves under the streets cost nothing but drawing time. Watch this step at 4:54 -
Build the depot on the surface
There is no underground depot, so branch the tunnel up until it breaks the surface and place a normal tram depot there. The depot also carries the maintenance panel for the whole fleet.
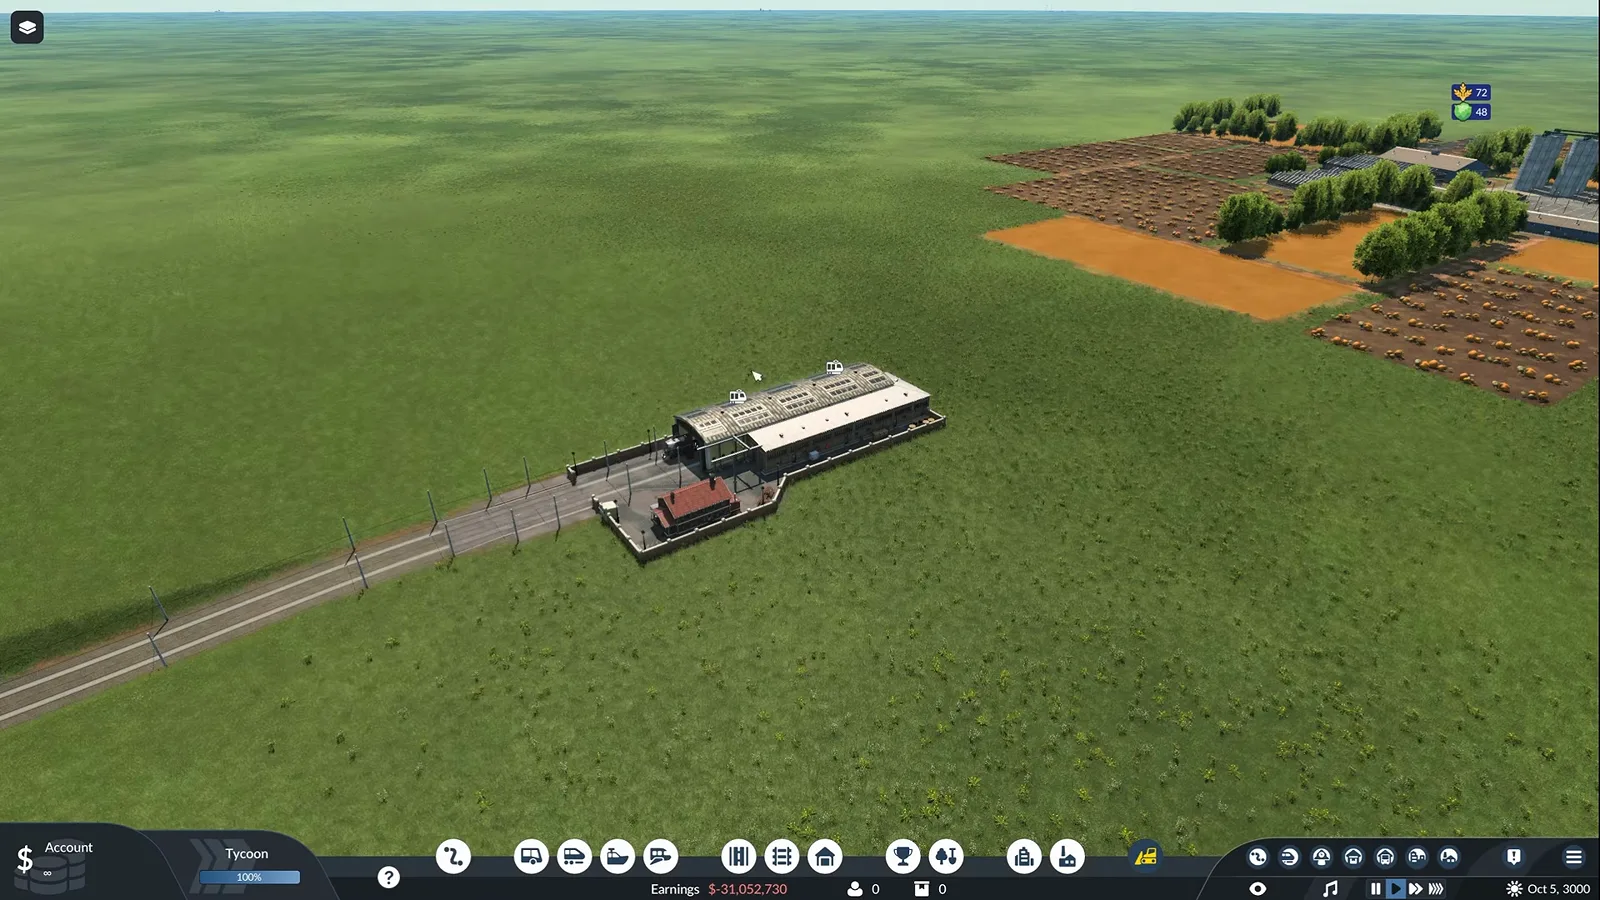
Every subway needs one trip to the surface for servicing. Watch this step at 8:34
The underground stop behaves like any tram stop once placed: catchment circle, platform settings, and trams that walk-in passengers board from street level. The one number worth memorising is depth — minus 12 still poked near the surface in the video, minus 18 stayed buried across the whole grid. If you are still learning the building menus themselves, the beginner guide covers the construction screens first.
Lines, trams and the dive underground
-
Create one line per direction
The loop supports two lines at once: one clockwise, one counterclockwise. Create both in the line manager and give them the same stops so a passenger always has a tram back.
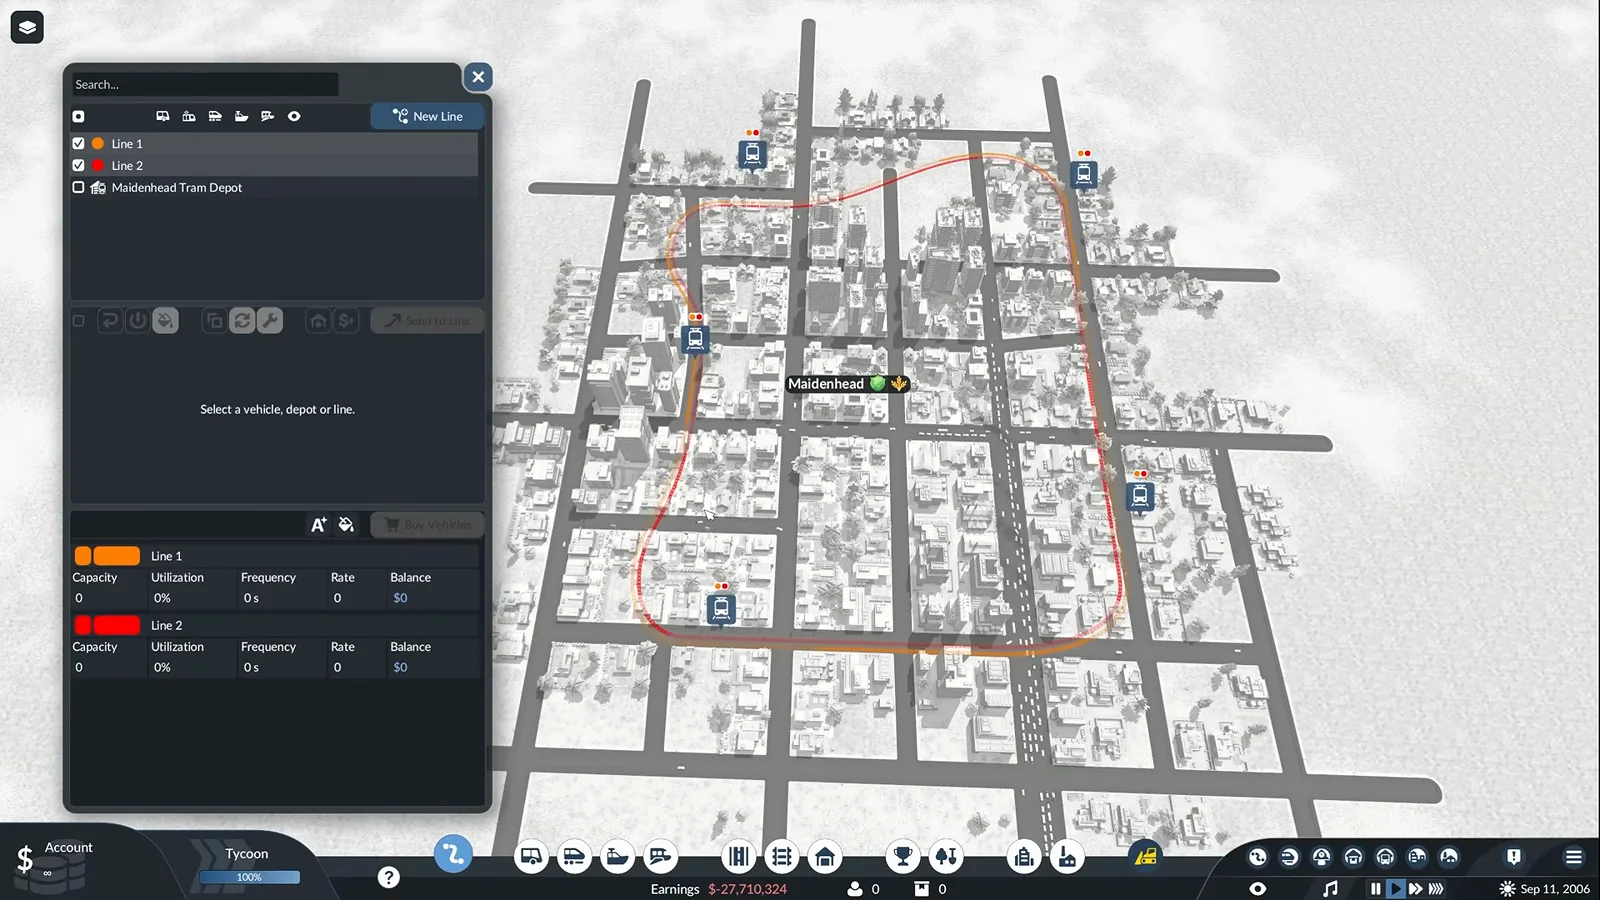
Two lines, one loop, both directions covered. Watch this step at 6:52 -
Buy light rail trams
For the subway feel, shop in the Light Rail tab: the video picks the 2022 Stadler Citylink, an electric tram-train with fifty seats. Newer years unlock longer vehicles, so scroll the whole list before you commit.
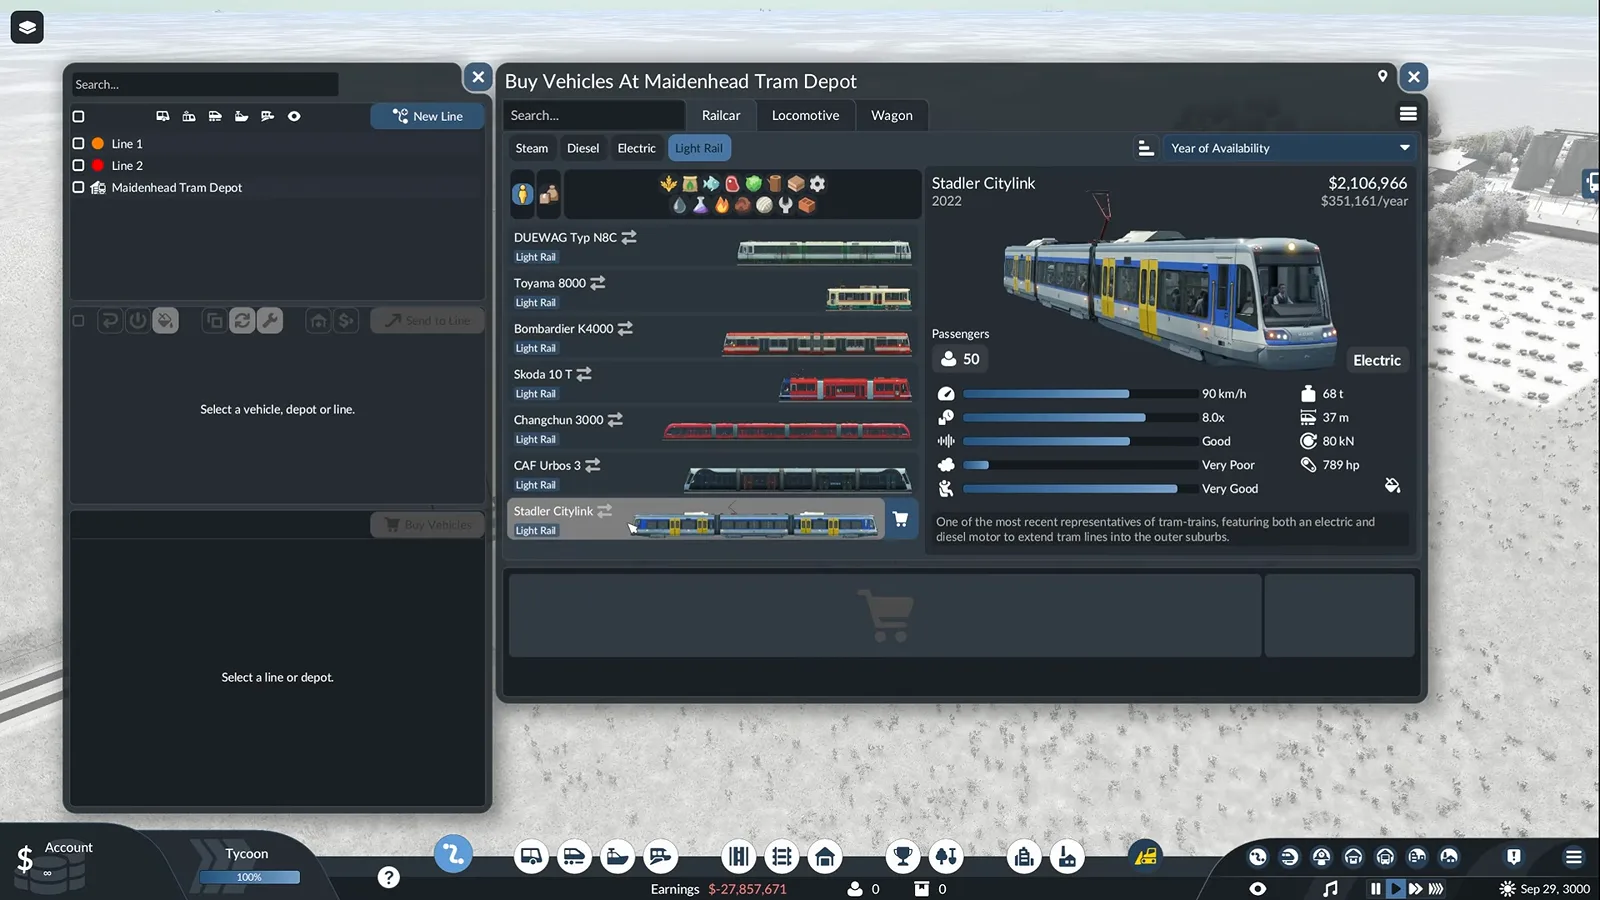
The Light Rail filter does the shopping for you. Watch this step at 8:10 -
Assign one tram to each line
Select the depot, then send a tram to each line with the Send to Line button. Two trams cover a small loop; more vehicles only become necessary once the bigger network below arrives.
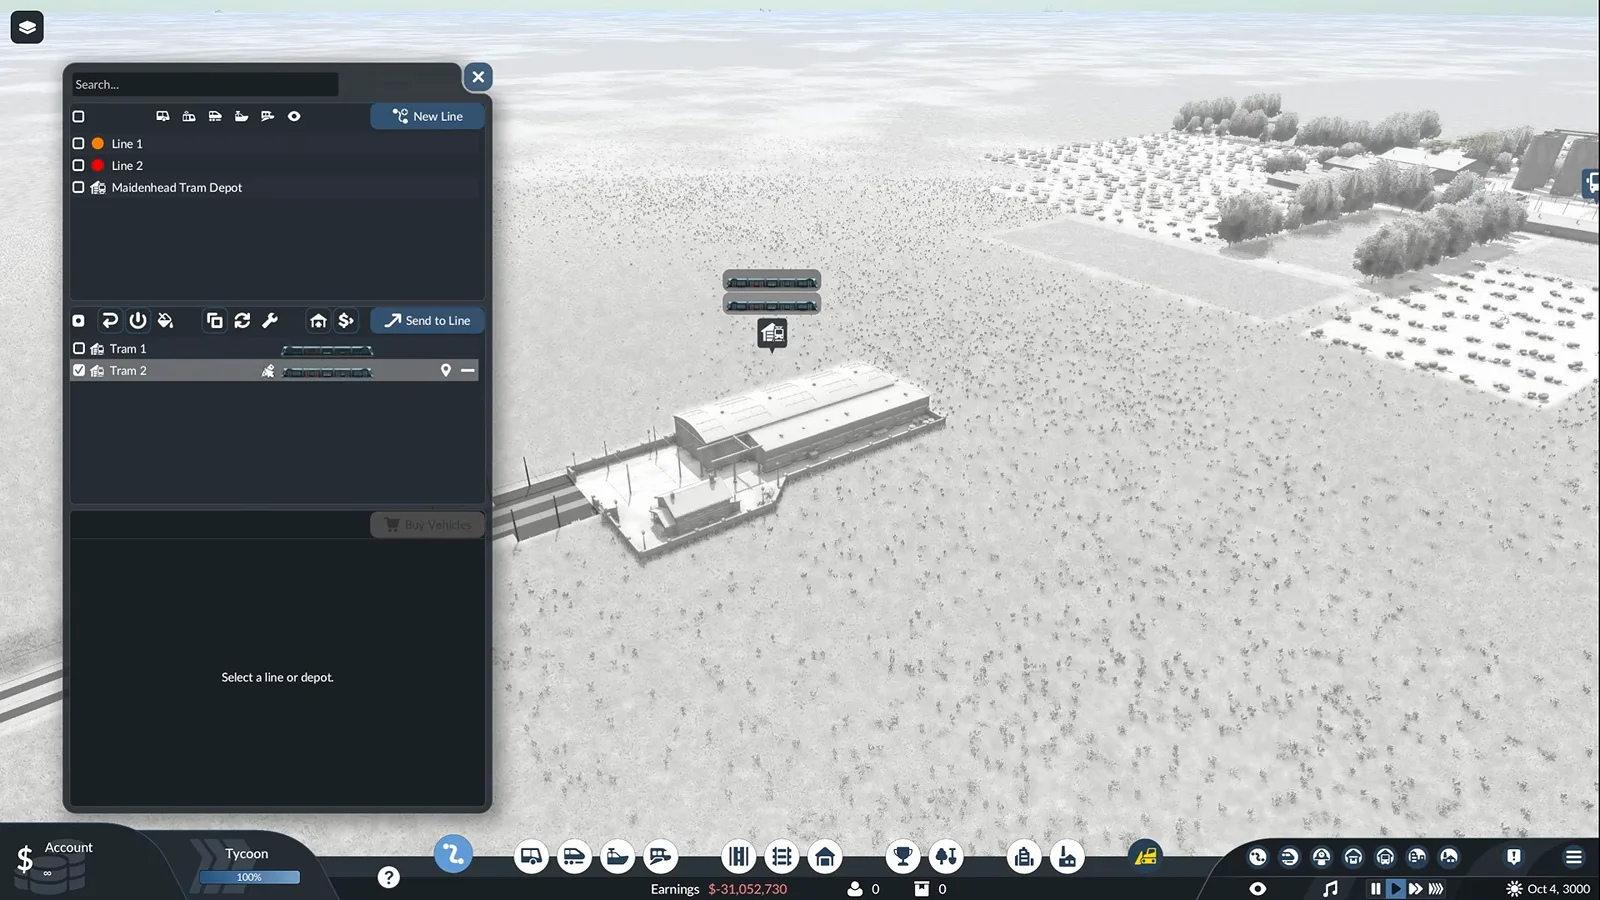
Send to Line is the last click before service starts. Watch this step at 8:30 -
Watch the trams dive underground
Trams leave the surface depot and drop into the tunnel through a portal on the branch. From street level the network is invisible except for its entrances, which is exactly the point.
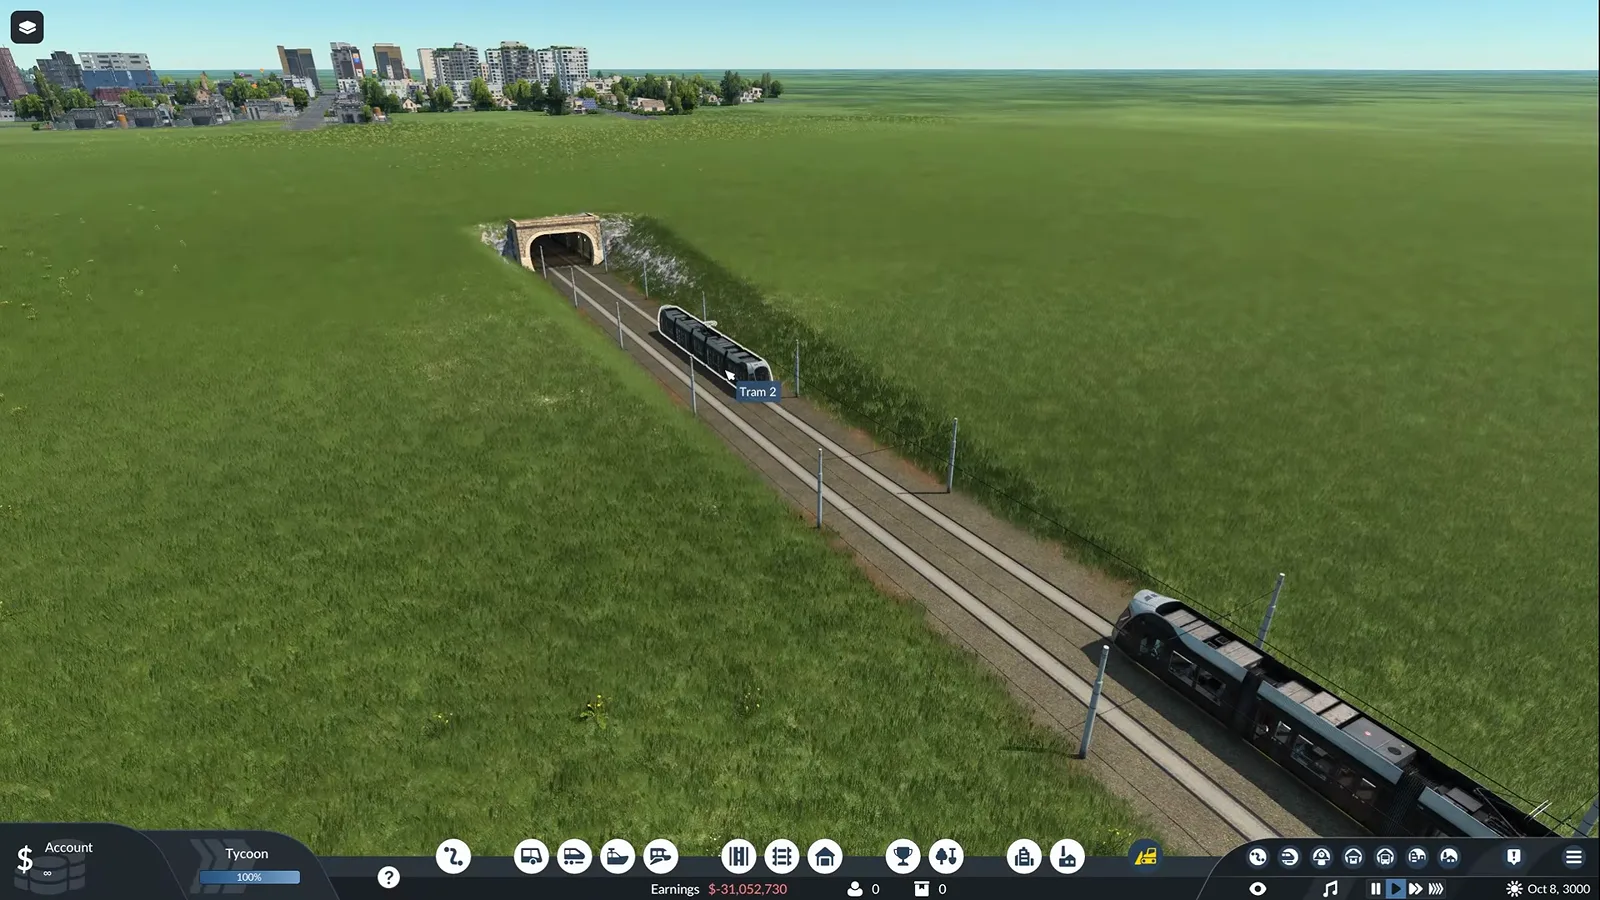
Below the portal, the streets never see the tram again. Watch this step at 8:46
Two directions on one loop is the cheapest service pattern in the game, and light rail trams are what sell the illusion — the video’s Škoda-era list ends at a 2022 Stadler Citylink that would pass for a metro car anywhere. The same Send to Line habit that assigns a wagon in the Mission 1 walkthrough assigns trams here.
A city-wide network and its payoff
-
Connect the cities with a big loop
Repeat the station-tunnel pattern in every city, then draw one large loop between them with two more lines. In the video the big intercity loops are the lines that earn by far the most, while tiny inner loops barely pay for themselves.
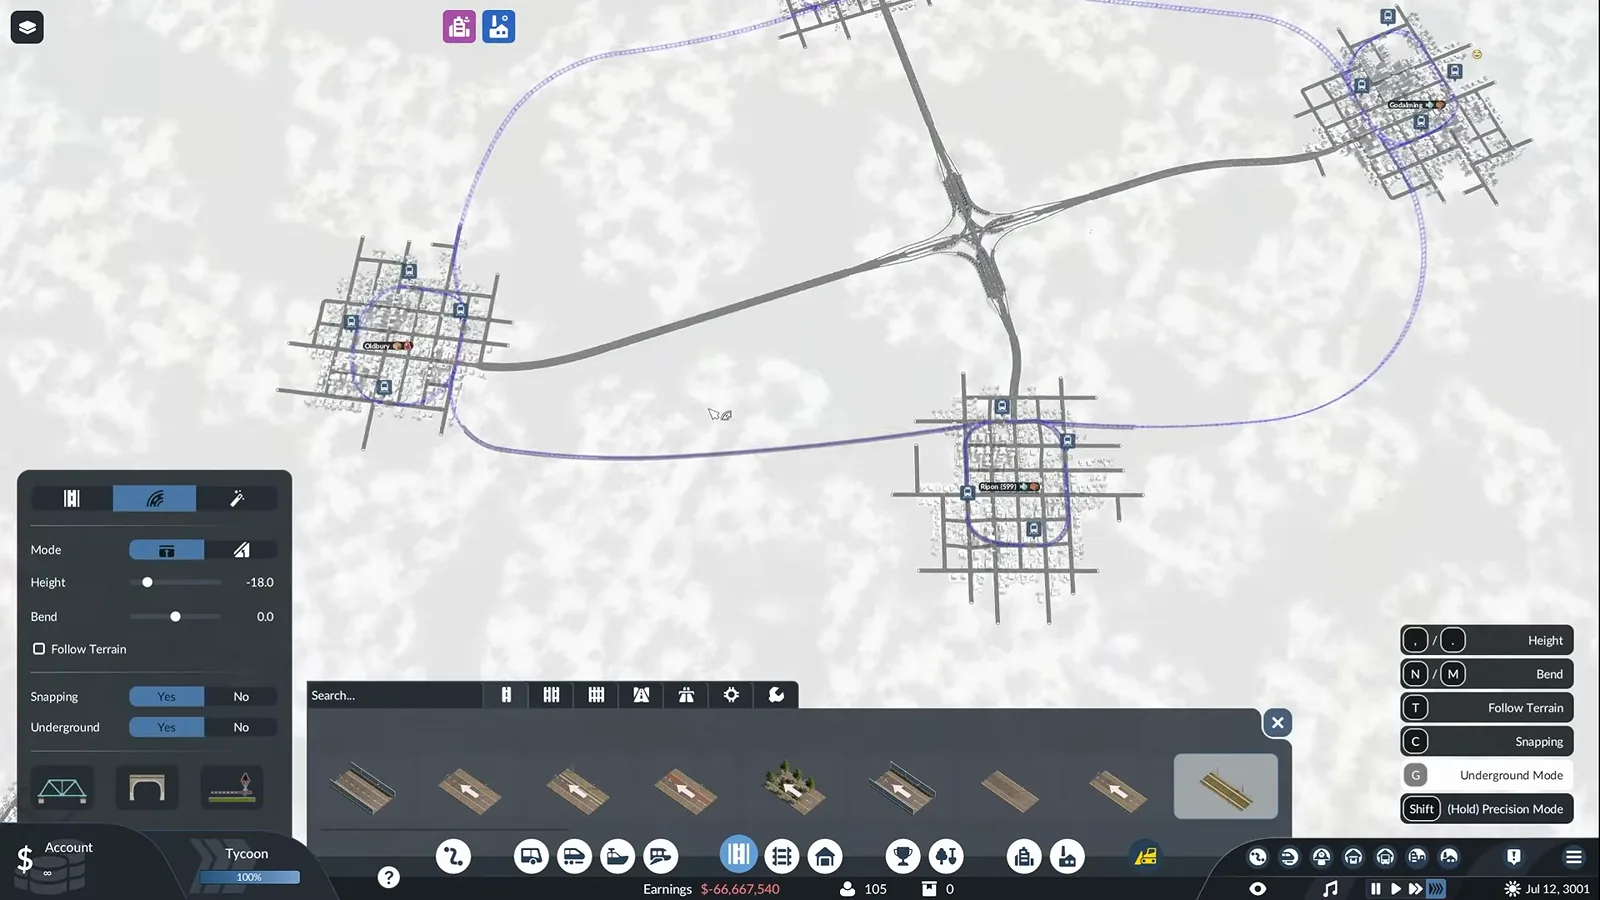
The big loop between cities is where the profit sits. Watch this step at 10:24 -
Check traffic and pollution afterwards
The traffic flow overlay turns green as the queues disappear and the town window grades congestion. Pollution moves underground while surface noise stays about the same, and the city keeps growing.
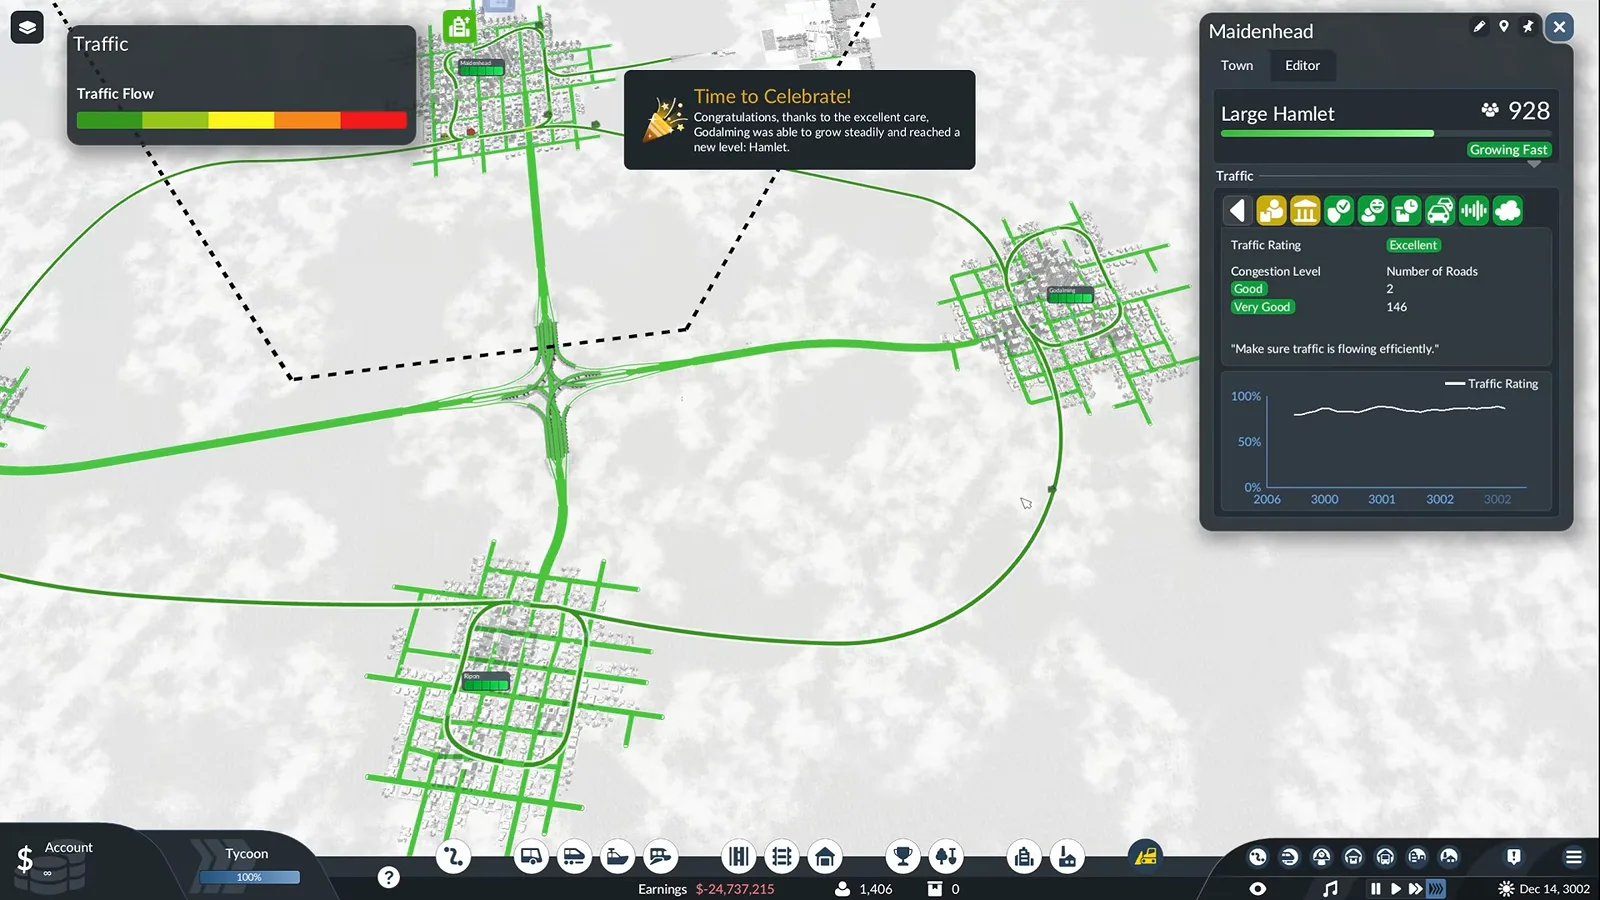
Green roads and an Excellent rating after the subway opens. Watch this step at 14:56
The experiment’s verdict: the subway emptied the roads into town, the pollution map calmed down, and the traffic rating climbed to Excellent — but the small city-centre loops were marginal earners, while the big intercity loops between the four towns earned the most. Bigger loops, fewer stops, and a surface connection for the depot are the three takeaways. For the vehicle side of the ledger — which trams can even run these lines — our vehicles guide compares the roster, and if you want the metro look for real, the mods guide covers installing community trams styled as subway trains. The performance settings guide is worth a look too, since a buried network still renders the whole city above it.
Source
The walkthrough above is built from SeniacTWO’s video How to Build UNDERGROUND SUBWAYS in Transport Fever 3 (19:36), an experiment that builds a single-city loop, expands it to a four-city network and reads the traffic and profit results. Each step links to the exact second it is demonstrated. Screenshots are the creator’s footage and are used only to illustrate the written steps.
Related reading
- Transport Fever 3 beginner guide — the construction menus behind every step here.
- Vehicles guide — choosing the trams that run your tunnels.
- Mods guide — community trams styled as metro trains.
- Performance settings guide — keep the frame rate up under a big city.
- Transport Fever 3 tips — network habits that keep the whole map moving.
Related Articles
guides
Transport Fever 3 Bus and Tram Guide: City Passenger Networks
Set up bus and tram networks in Transport Fever 3: read passenger demand, wire the district cycle, add bus lanes, connect towns intercity and upgrade to trams.
guides
Transport Fever 3 First Train Line: A Step-by-Step Rail Guide
Build your first train line in Transport Fever 3 step by step: cargo station, catchment, double track, switches, path signals, loans and the right wagons.
guides
Transport Fever 3 vs 2: What Changed and Should You Upgrade?
Transport Fever 2 to 3 changes compared: biomes, day-night cycle, warehouses, helicopters, mods and price — plus an honest verdict on whether to upgrade.
Was this helpful?
Thanks for the feedback!